Once you submit a procurement request, Spendflo initiates an automated workflow to manage approvals, security reviews, and integrations. You can track this entire process from your dashboard.
The Post-Submission Workflow
Follow these steps to complete and monitor your procurement request:
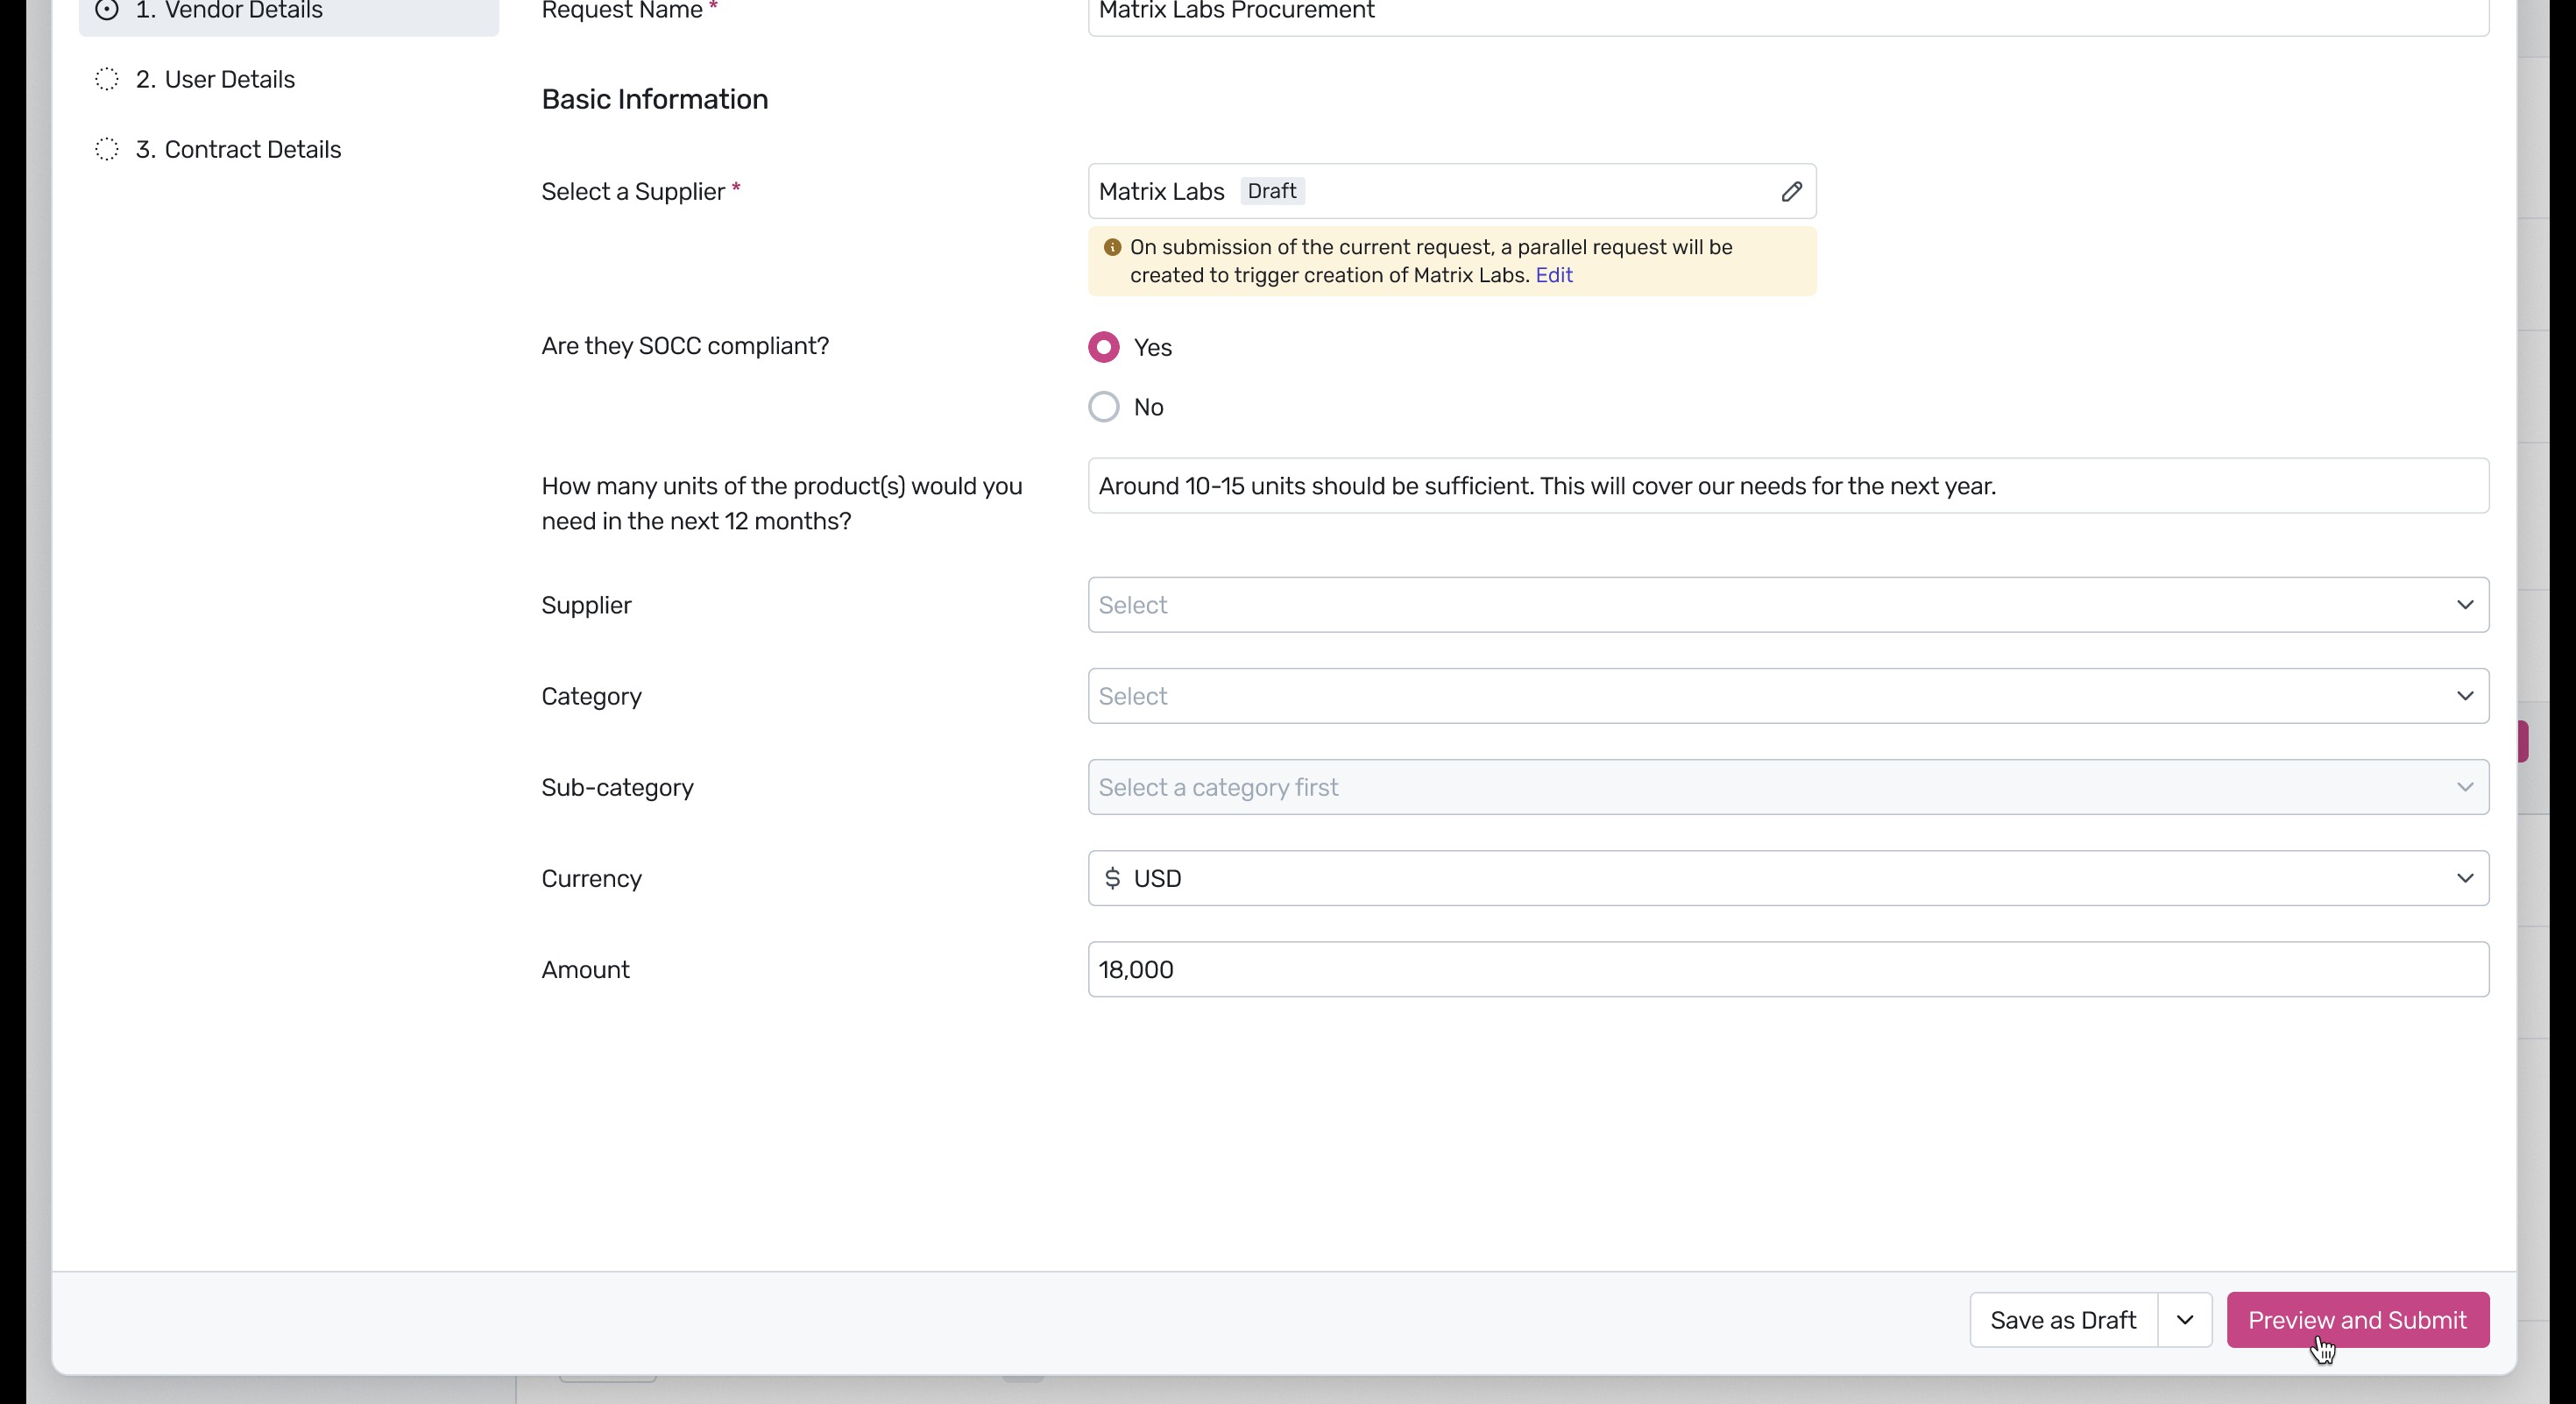
- Submit the Procurement Request: Fill out the request creation form with supplier details, SOCC compliance, estimated units, currency, and total amount. Click Preview and Submit at the bottom right.
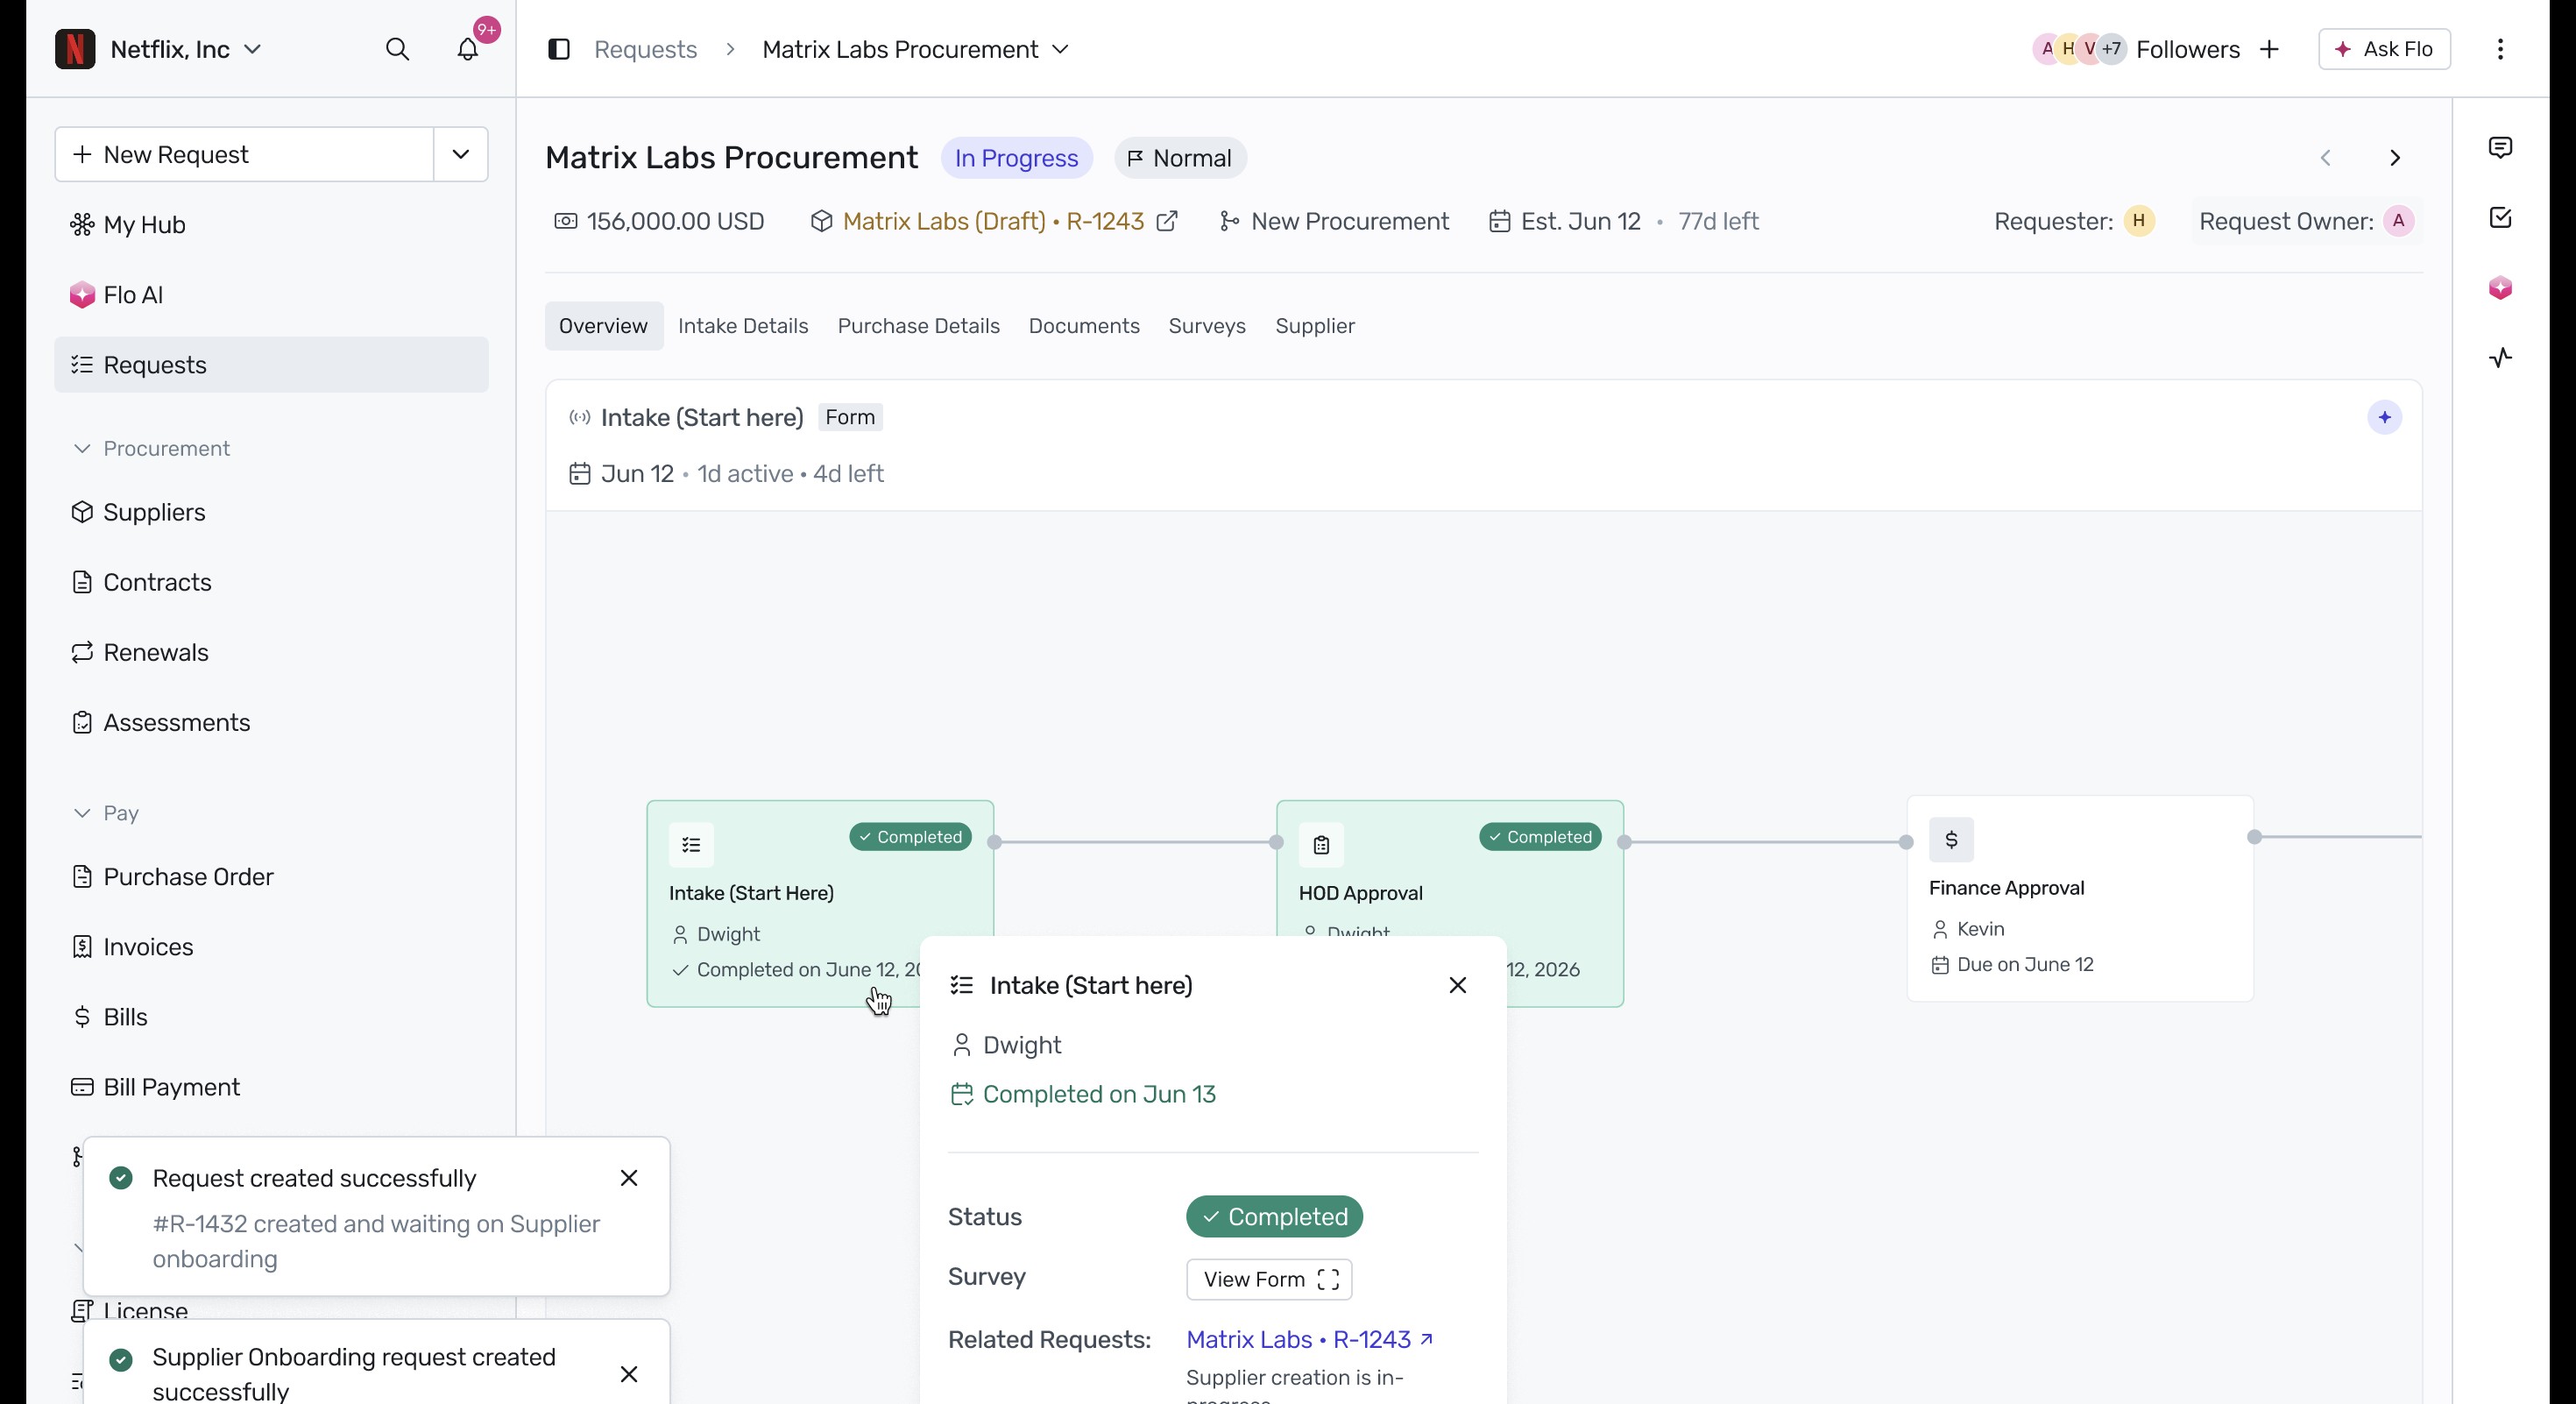
- Track the Initiated Workflow: Upon submission, a success notification confirms request creation (e.g., #R-1432 created). You can track progress on the Request Details page, where the visual workflow diagram shows completed (Intake and HOD Approval) and active (Finance Approval) stages.
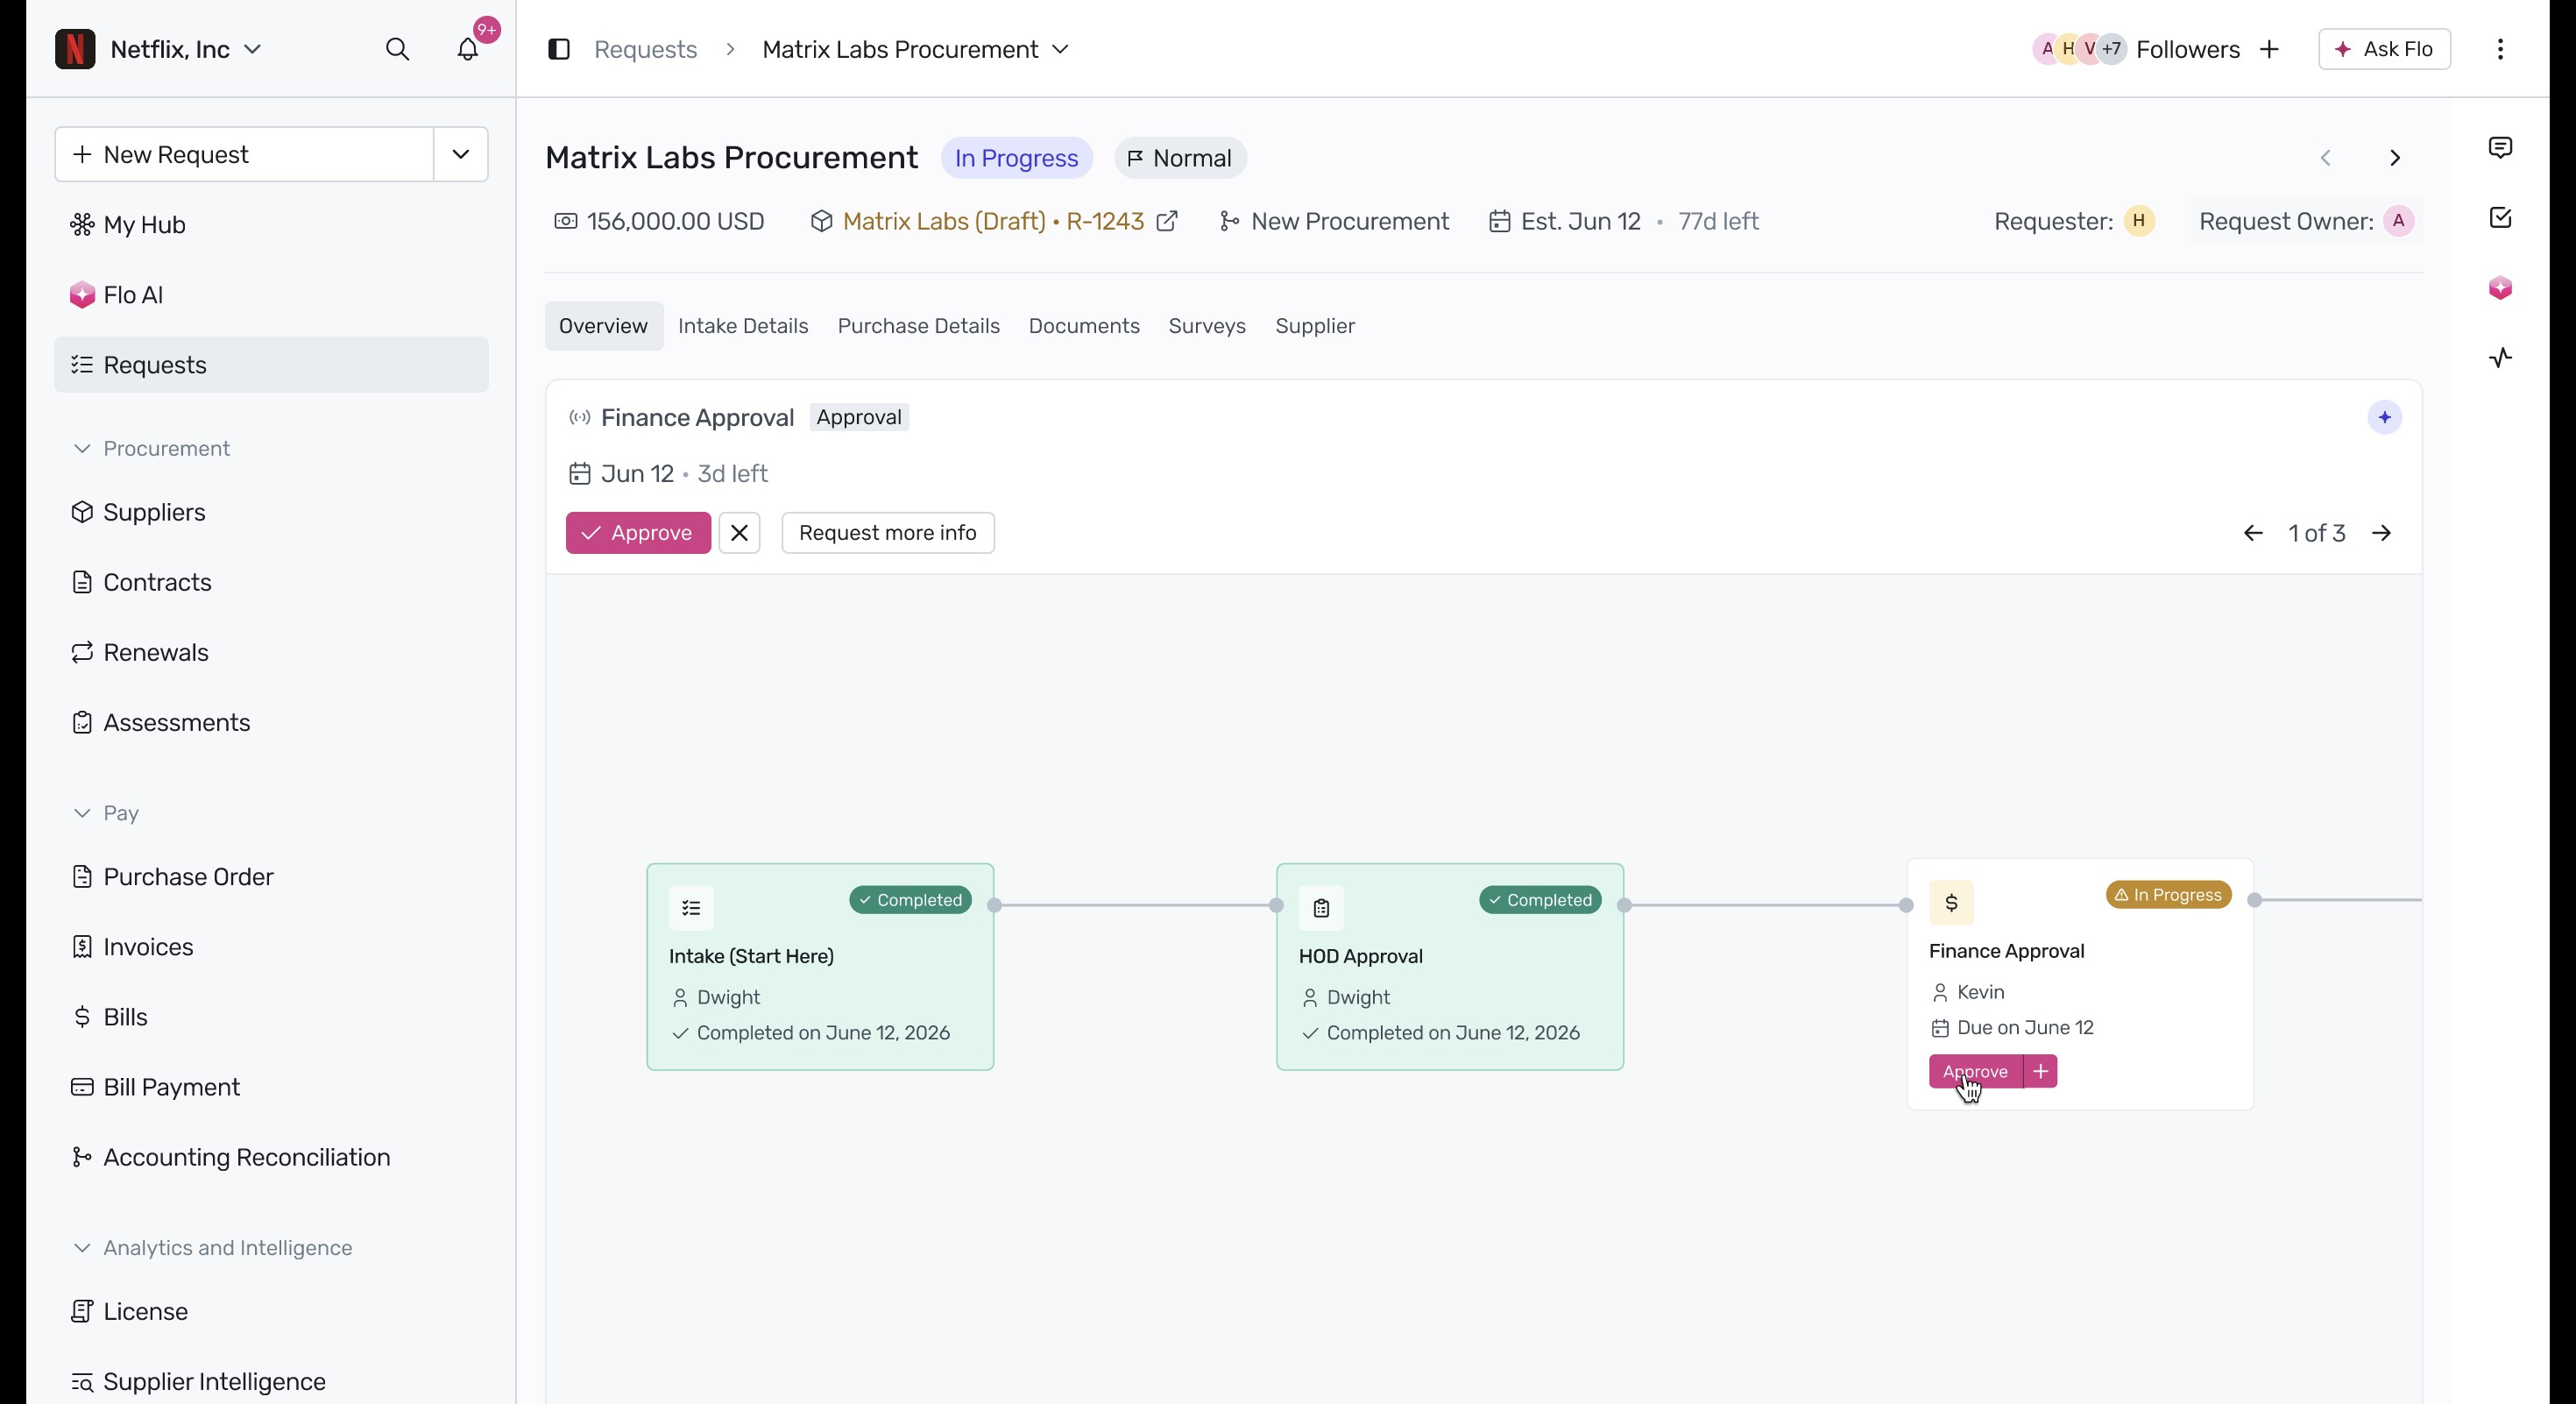
- Complete Finance Approval: As the Finance Approver, click the Finance Approval node in the workflow diagram and click Approve.
 Review the request details in the modal, check the compliance agreement box, and click the approval button to proceed.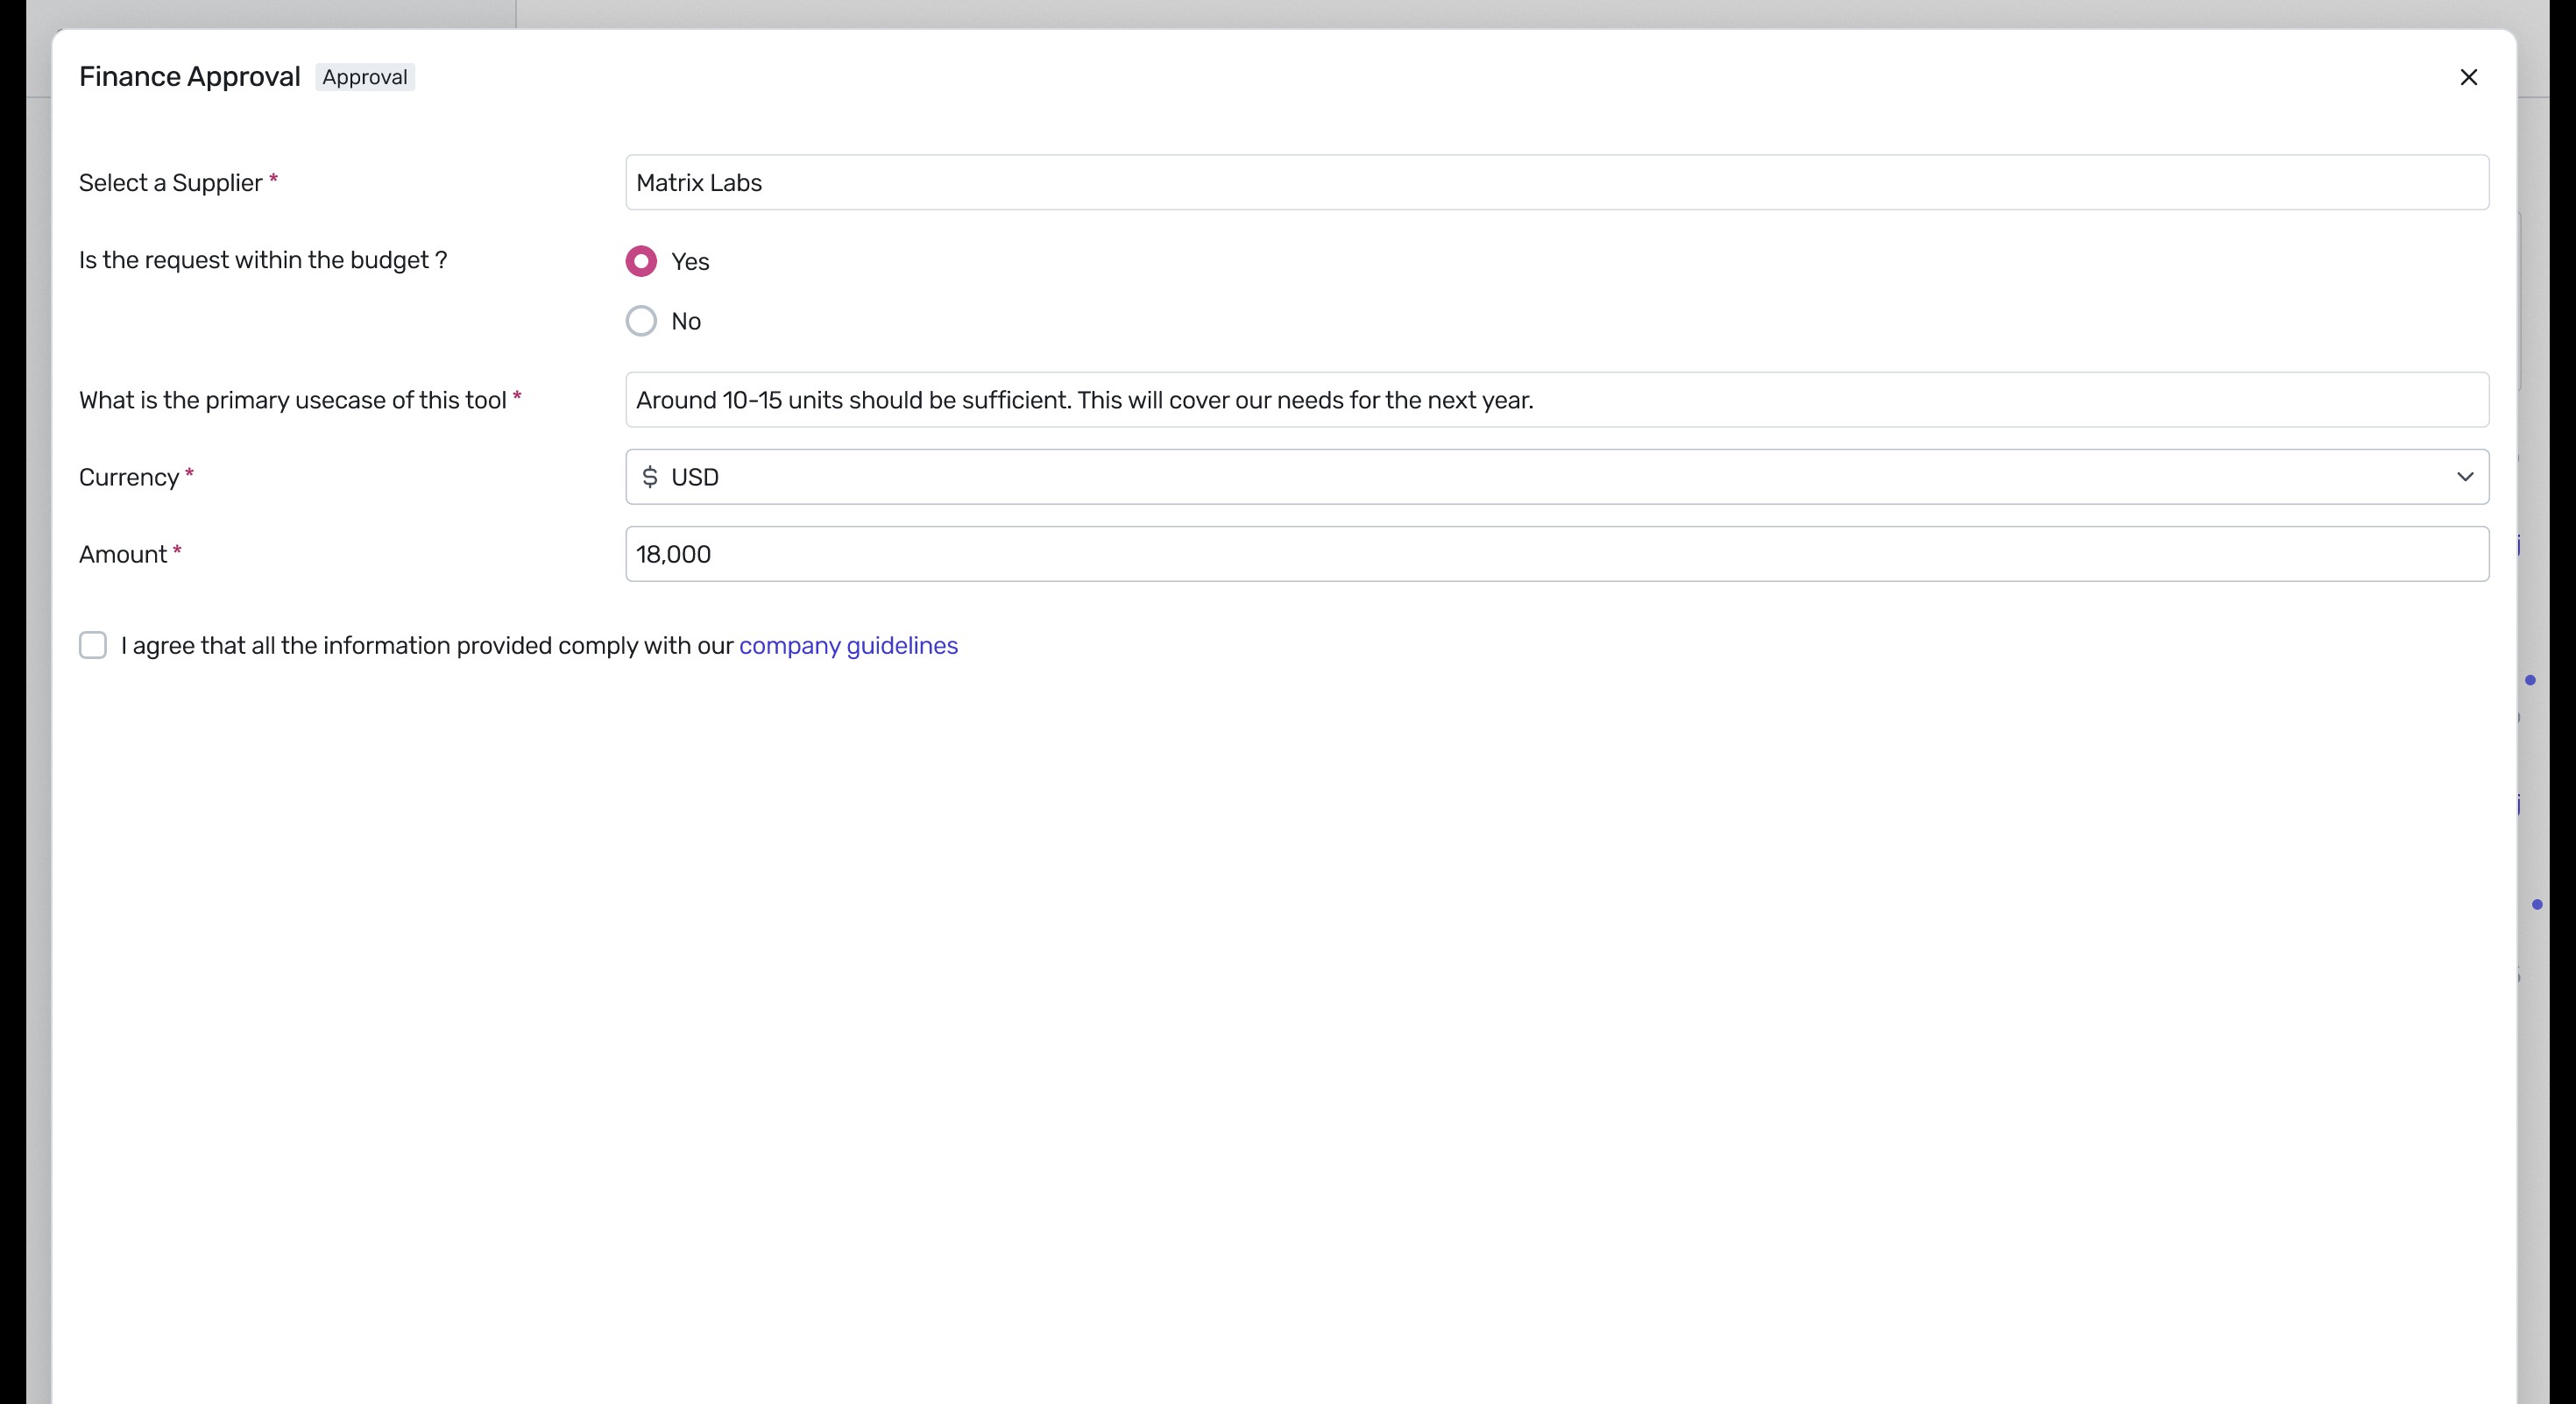
- Manage Parallel Approvals: Once Finance Approval is complete, the workflow automatically triggers three parallel tasks: Legal Approval (Ironclad), Infosec Approval (Jira), and Wait for supplier creation.
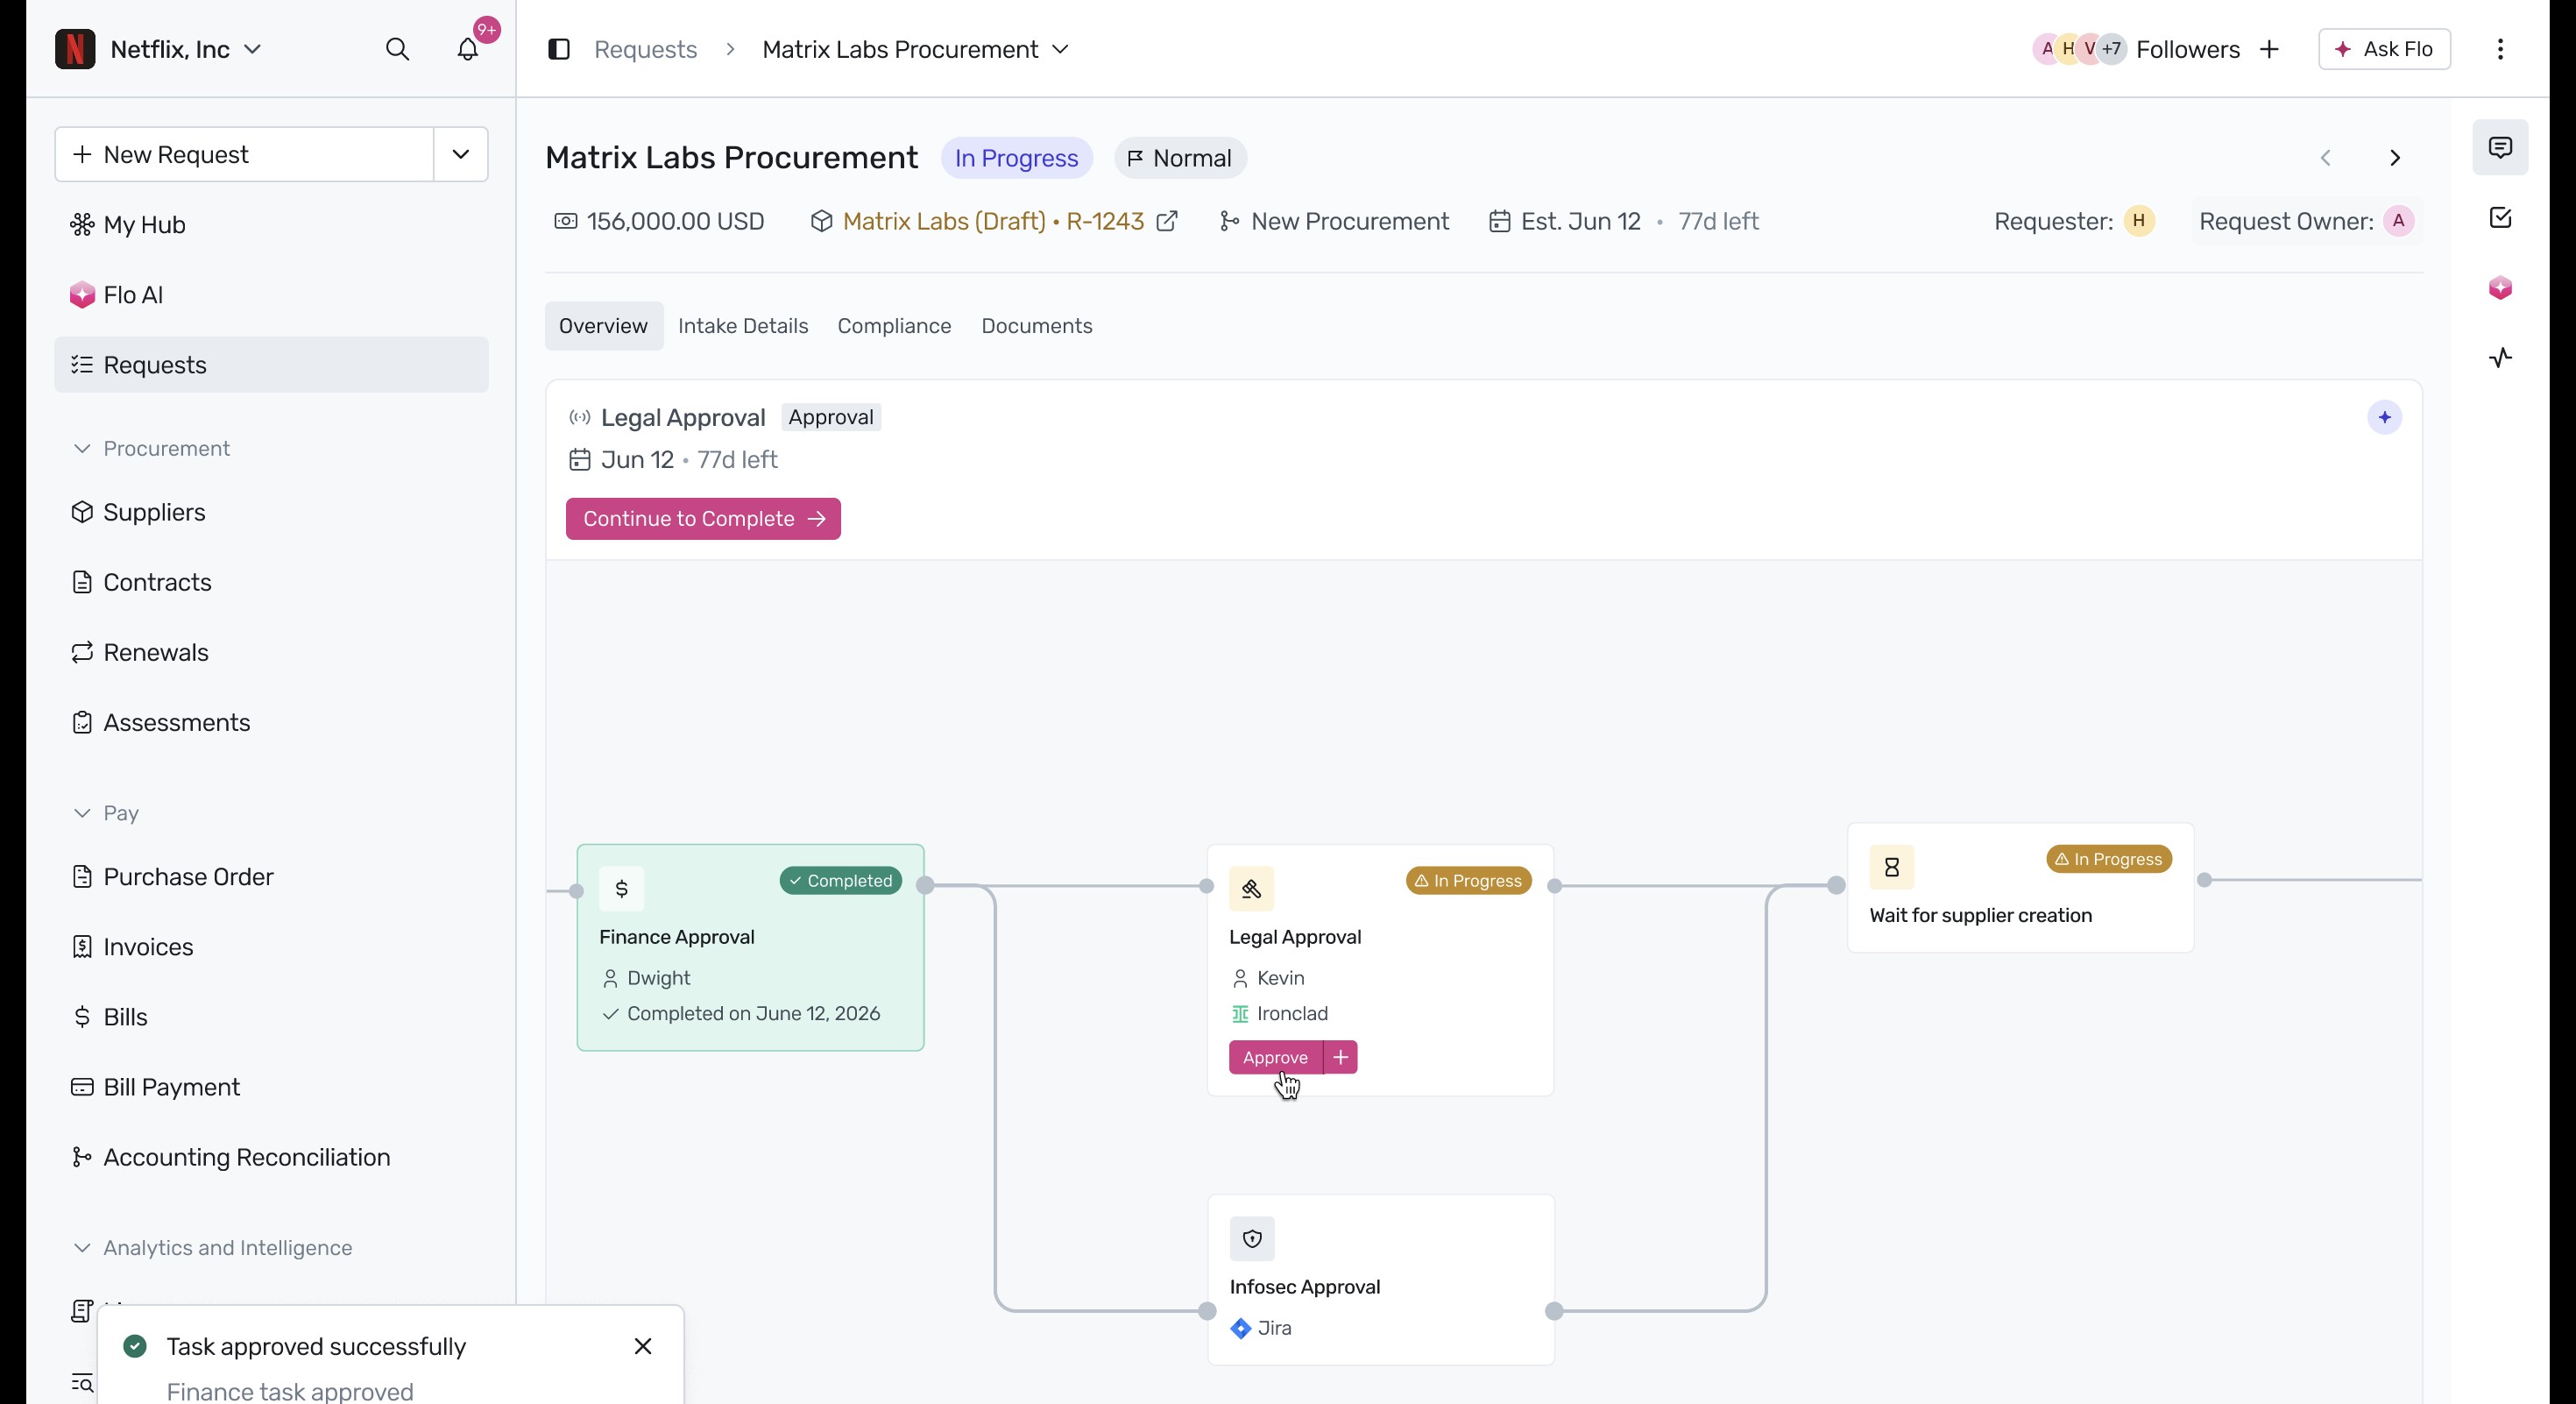
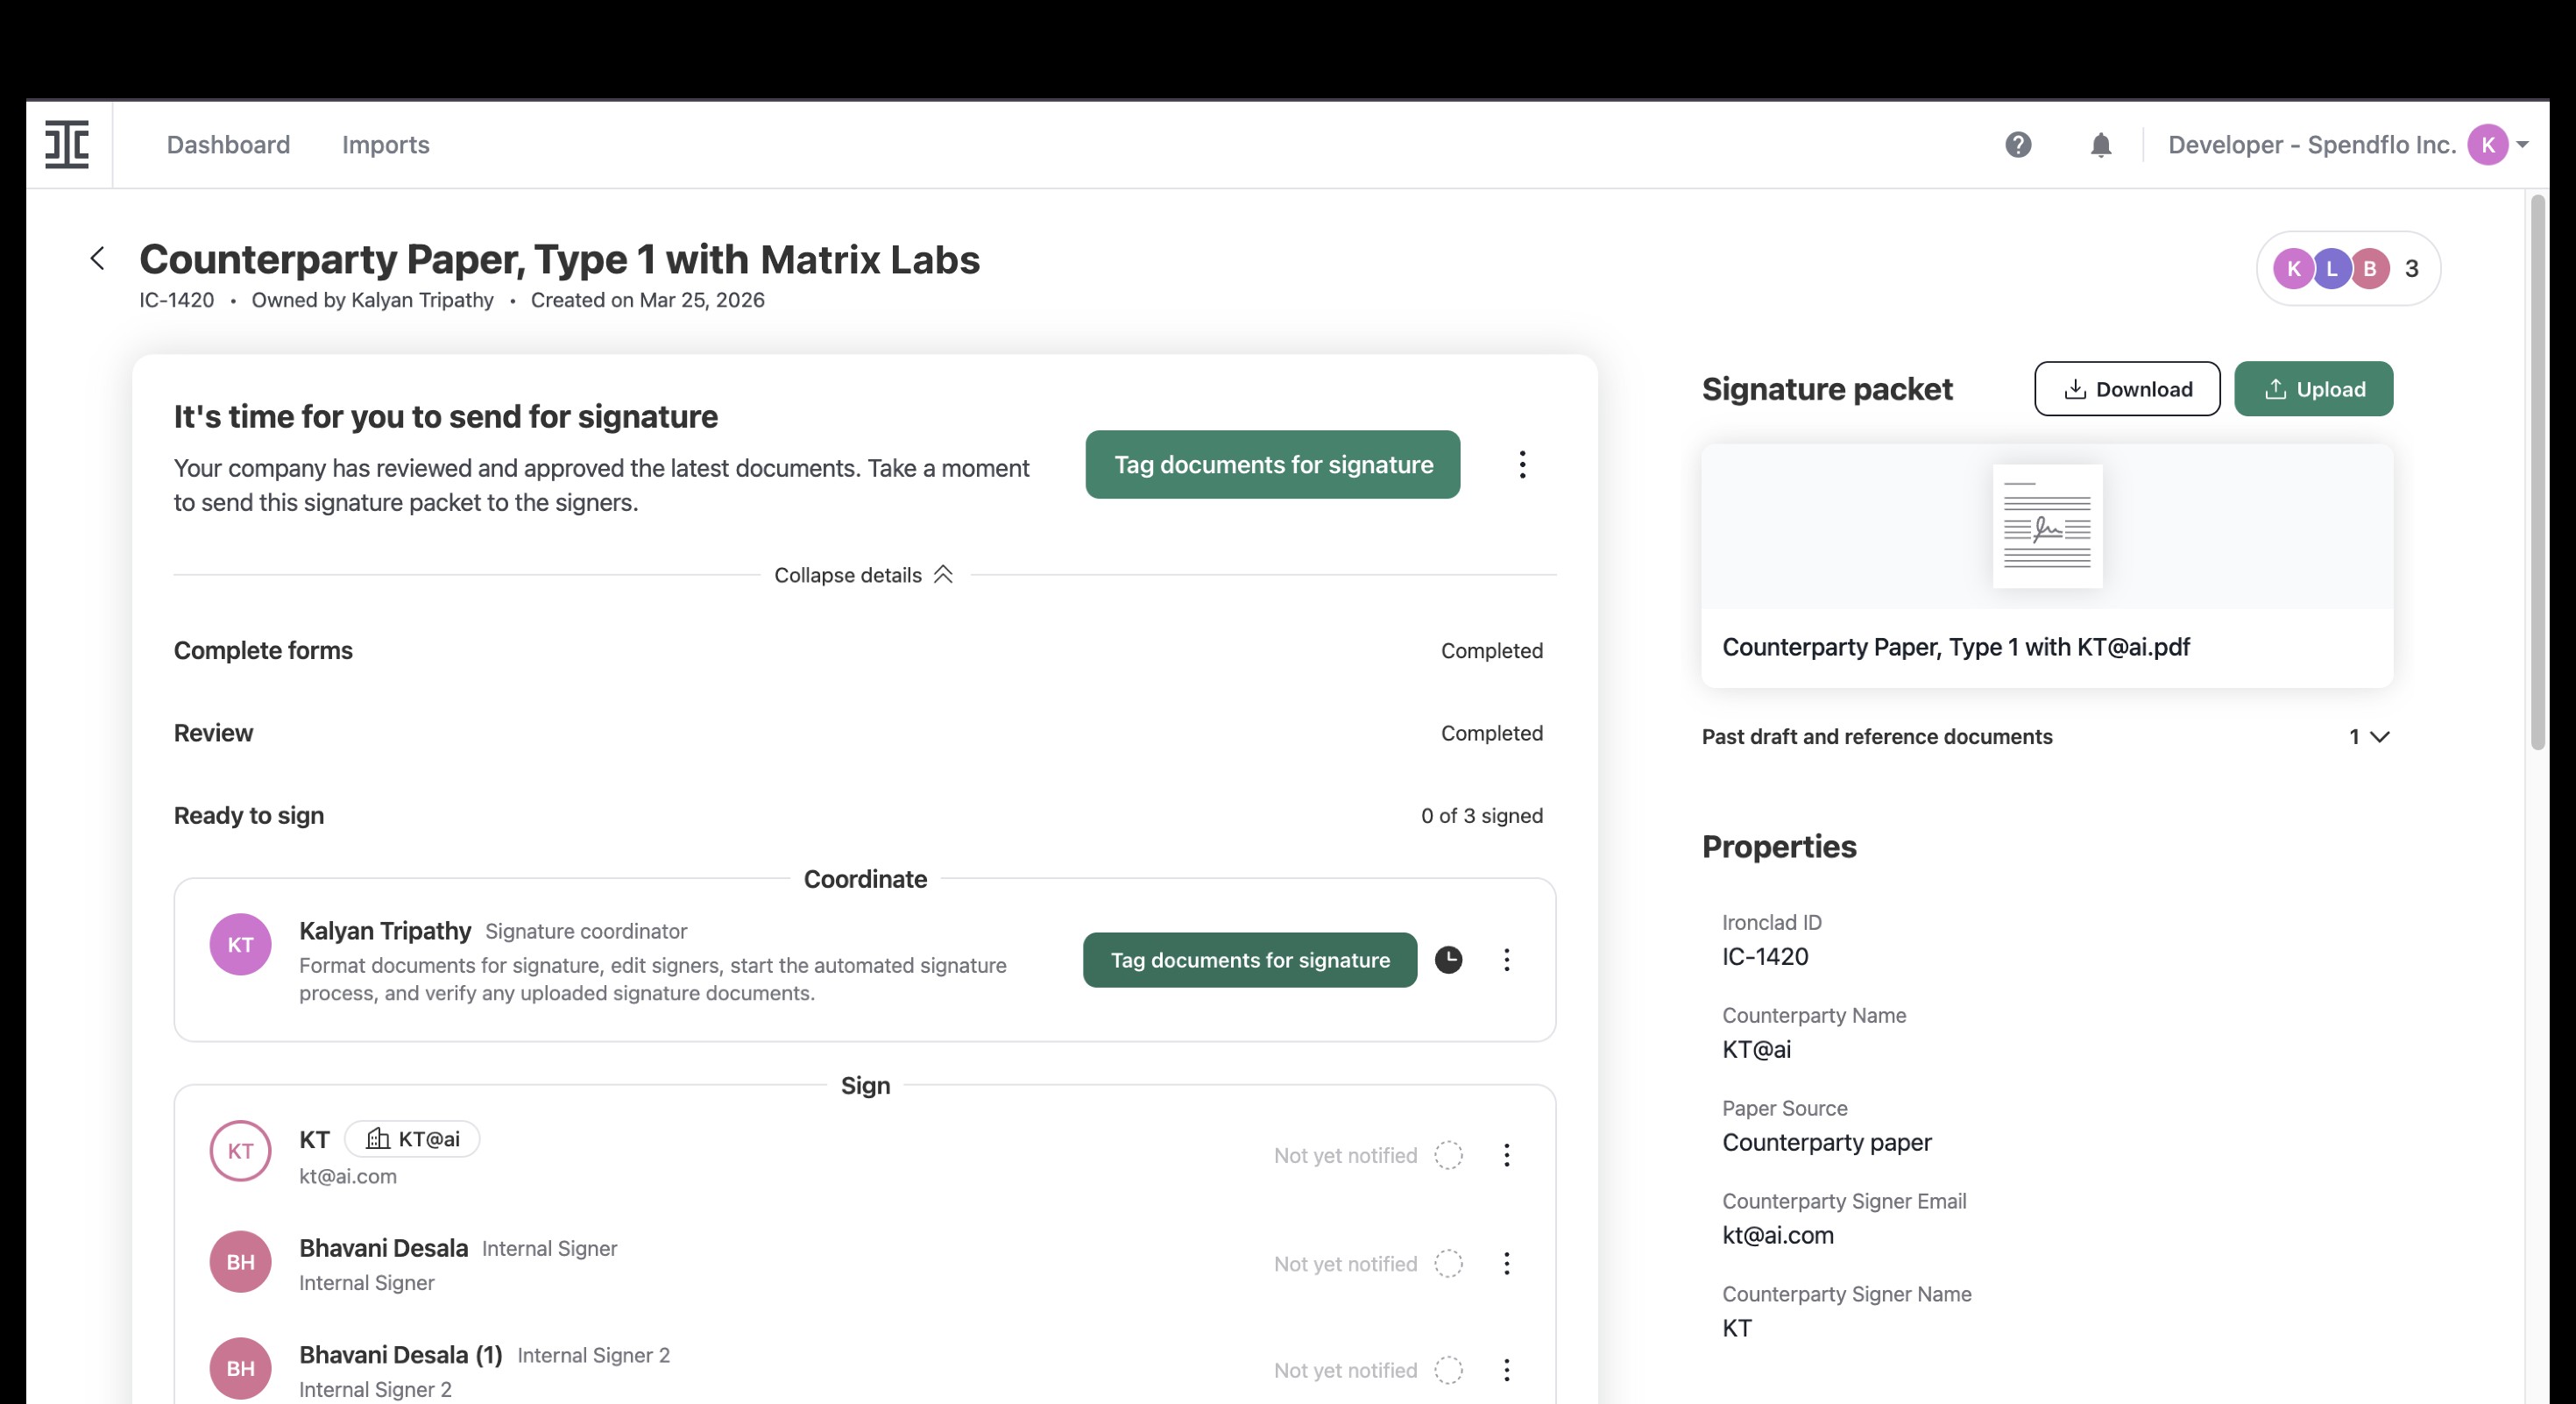
- Execute Legal Approval in Ironclad: Click Approve or Continue to Complete on the Legal Approval node to open the integrated Ironclad platform. Review the generated contract details and click Tag documents for signature.
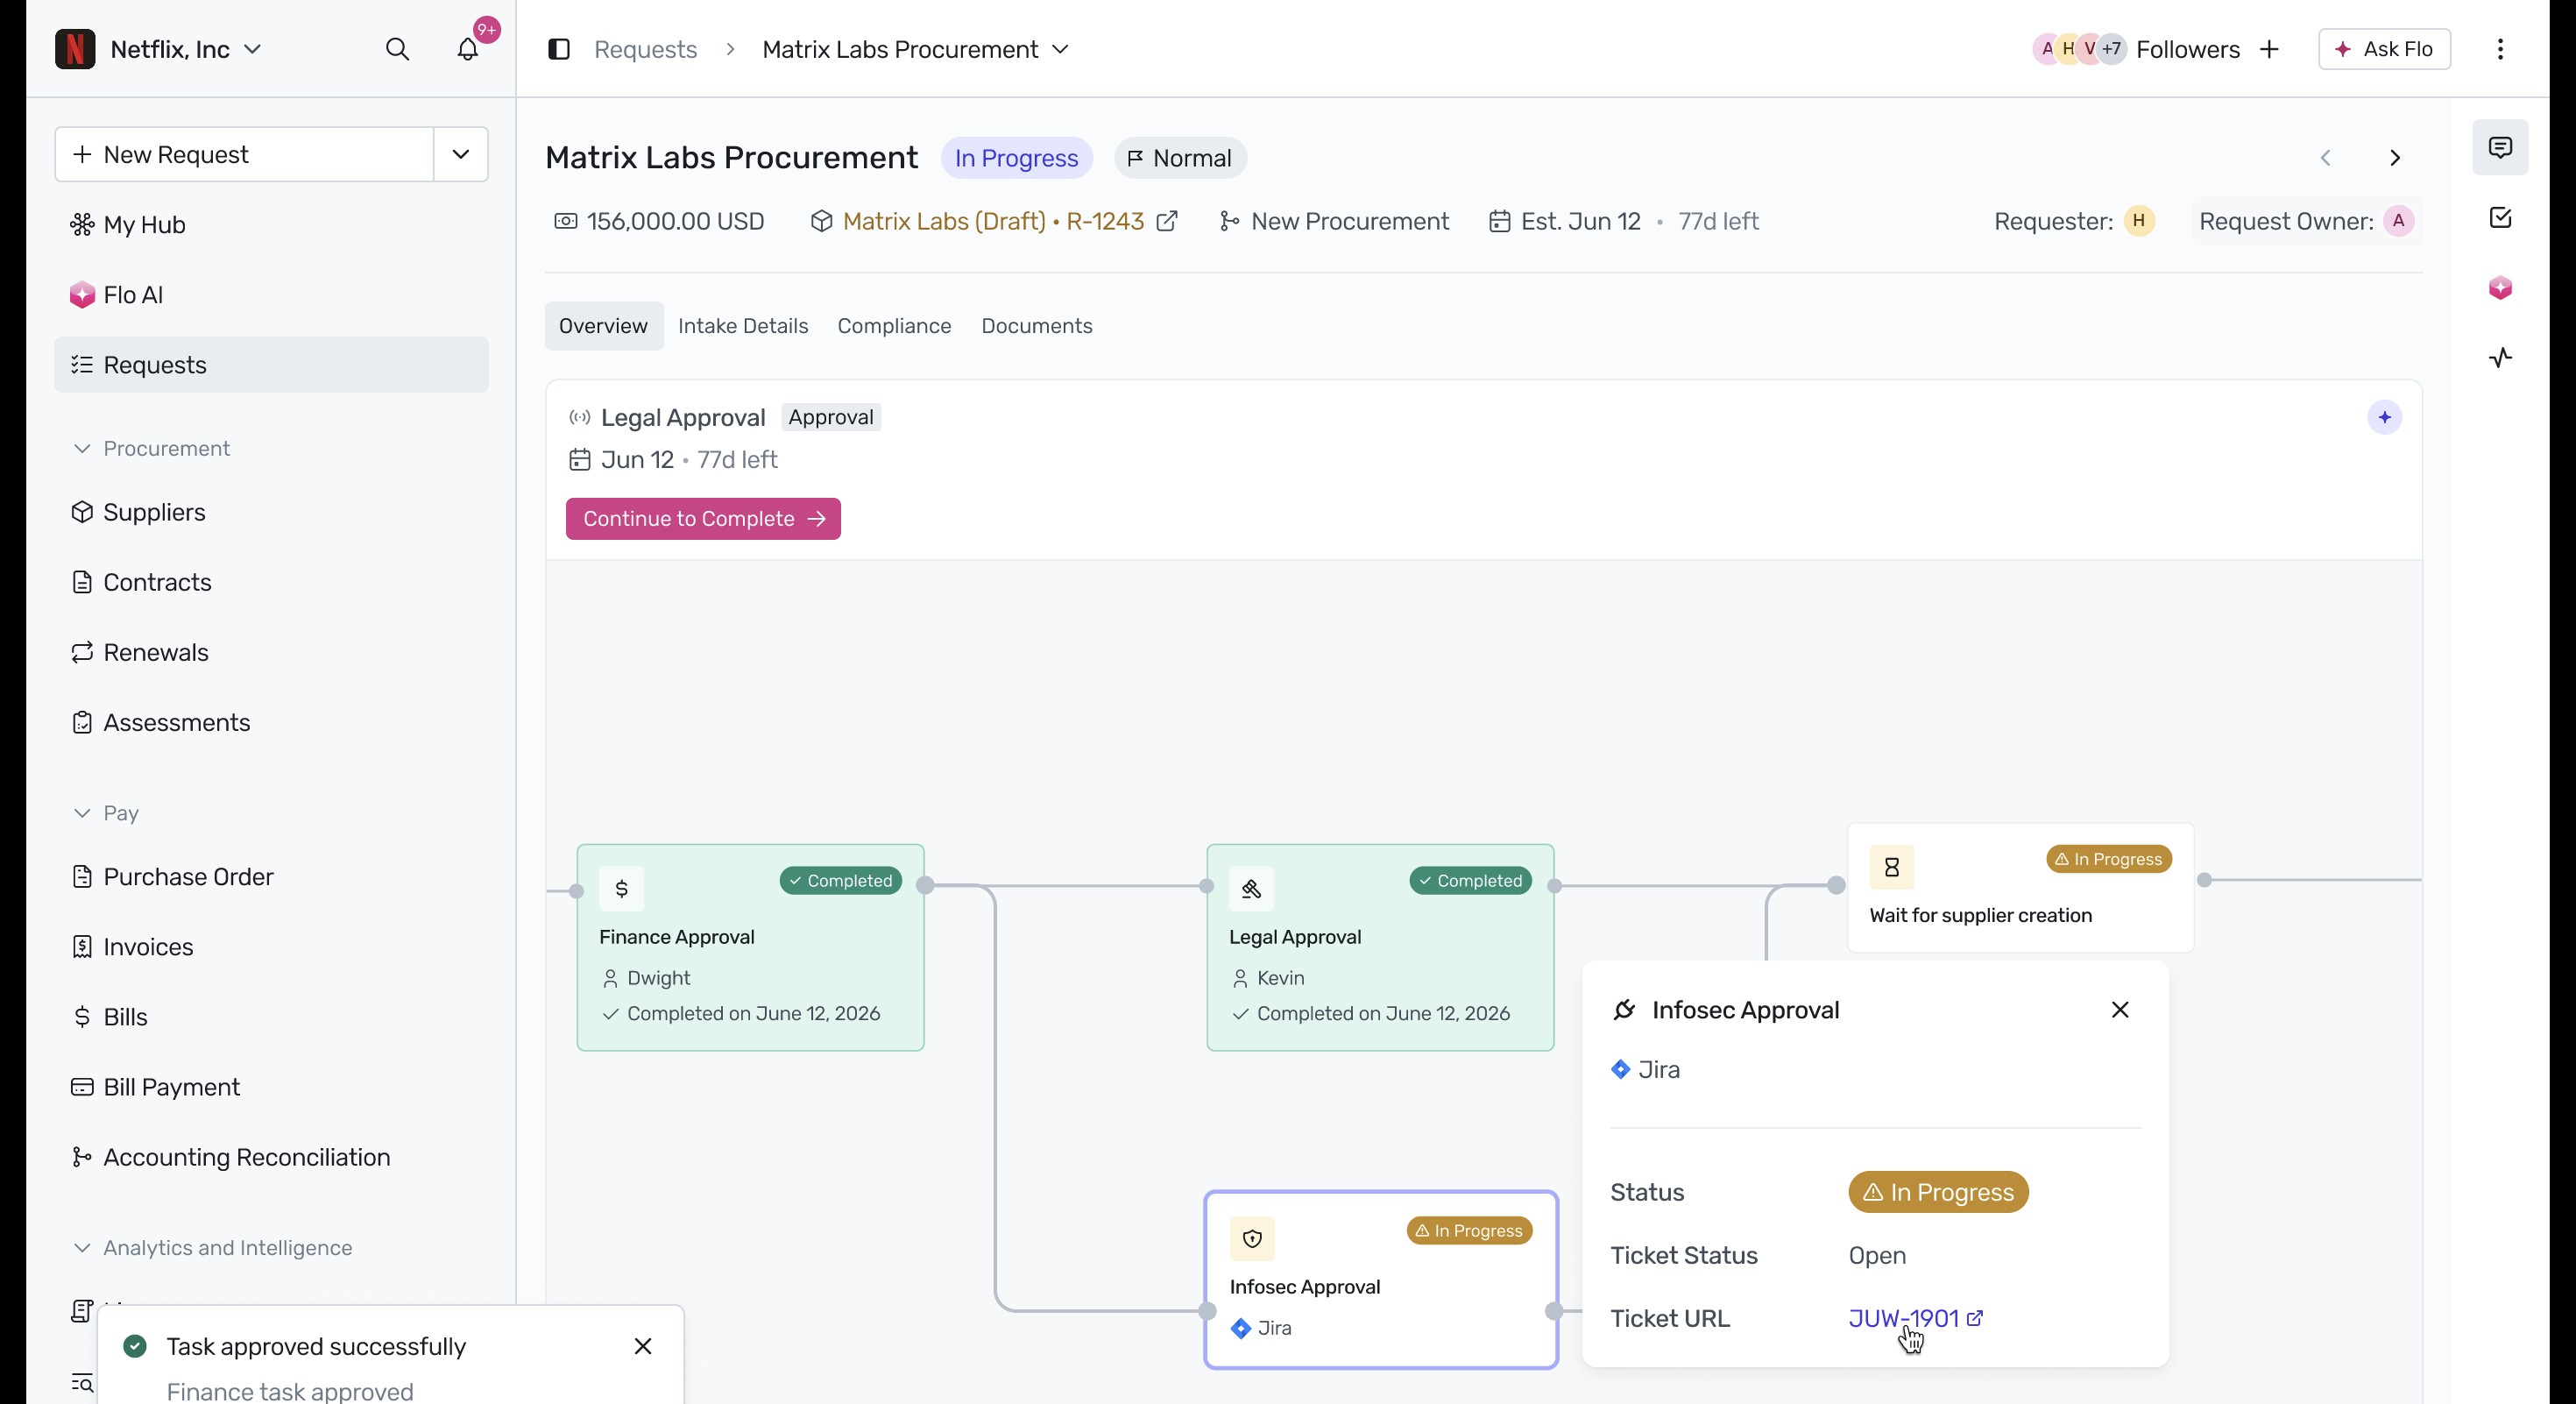
- Resolve Infosec Approval in Jira: Click the Infosec Approval node to view the integrated Jira Service Management ticket status. Click the Ticket URL to open it in Jira.
 In Jira, verify that the security assessment issue is resolved and marked as Closed.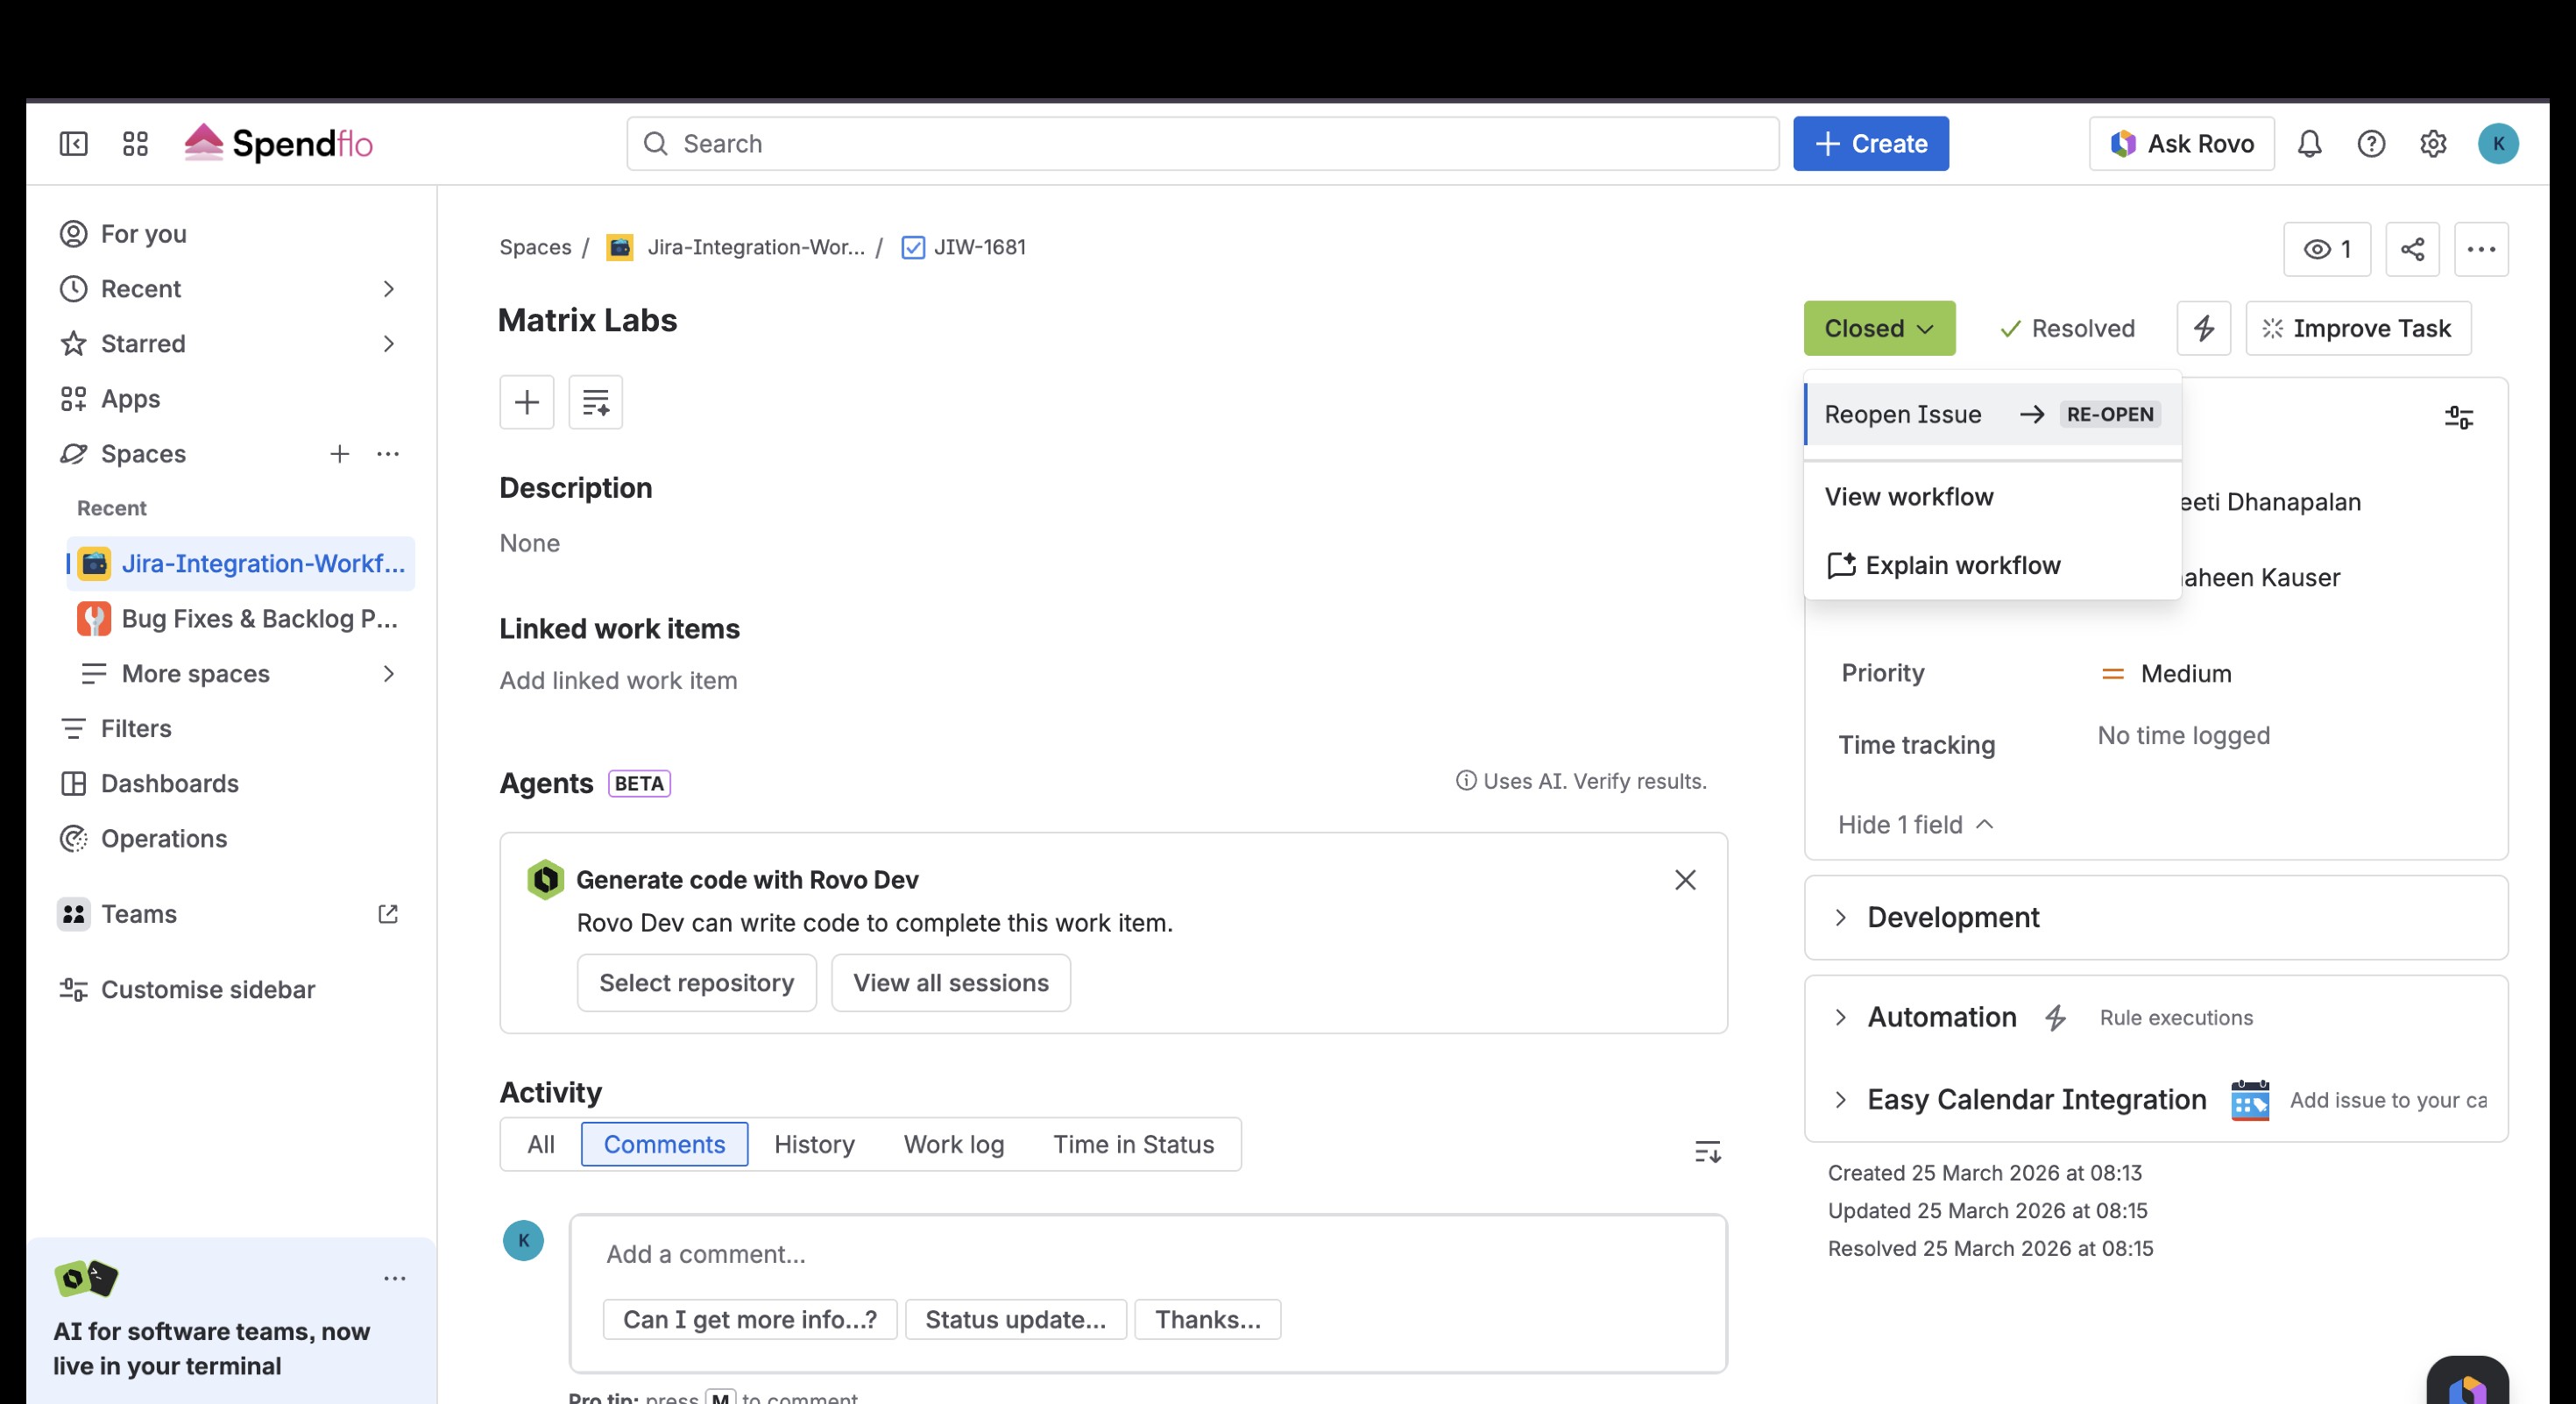
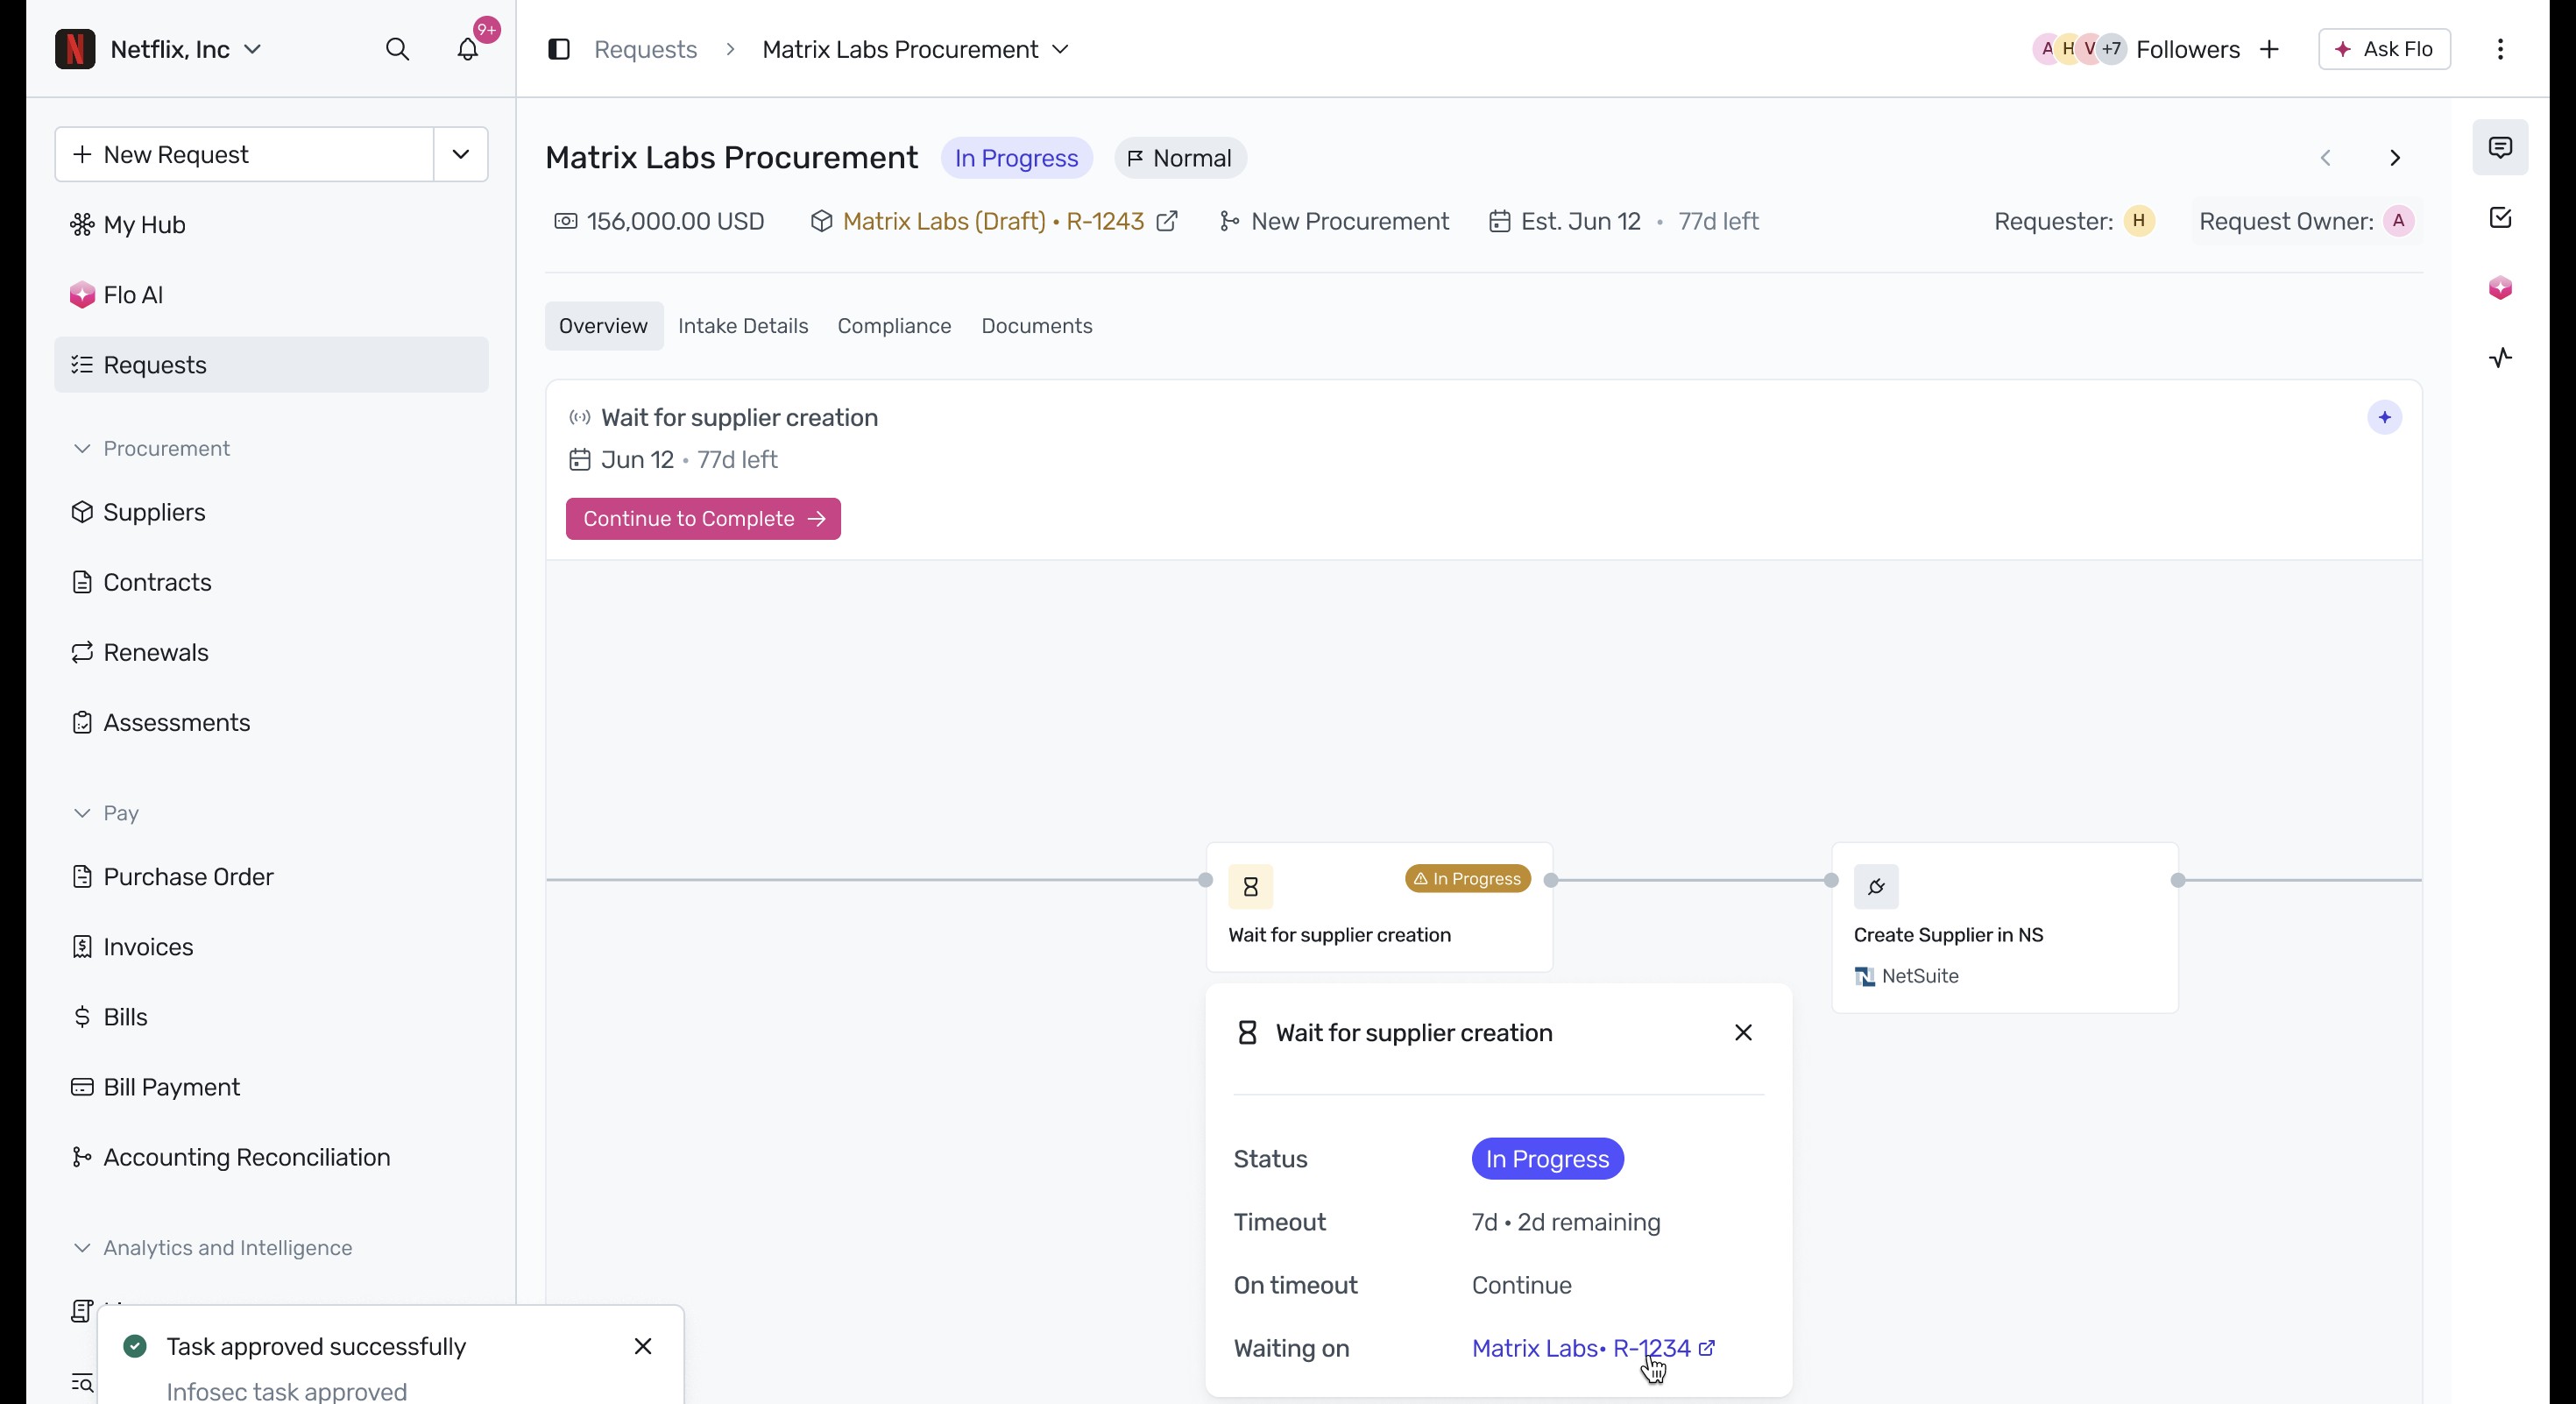
- Supplier Onboarding and Assessment: Click the Wait for supplier creation node to check the onboarding status.
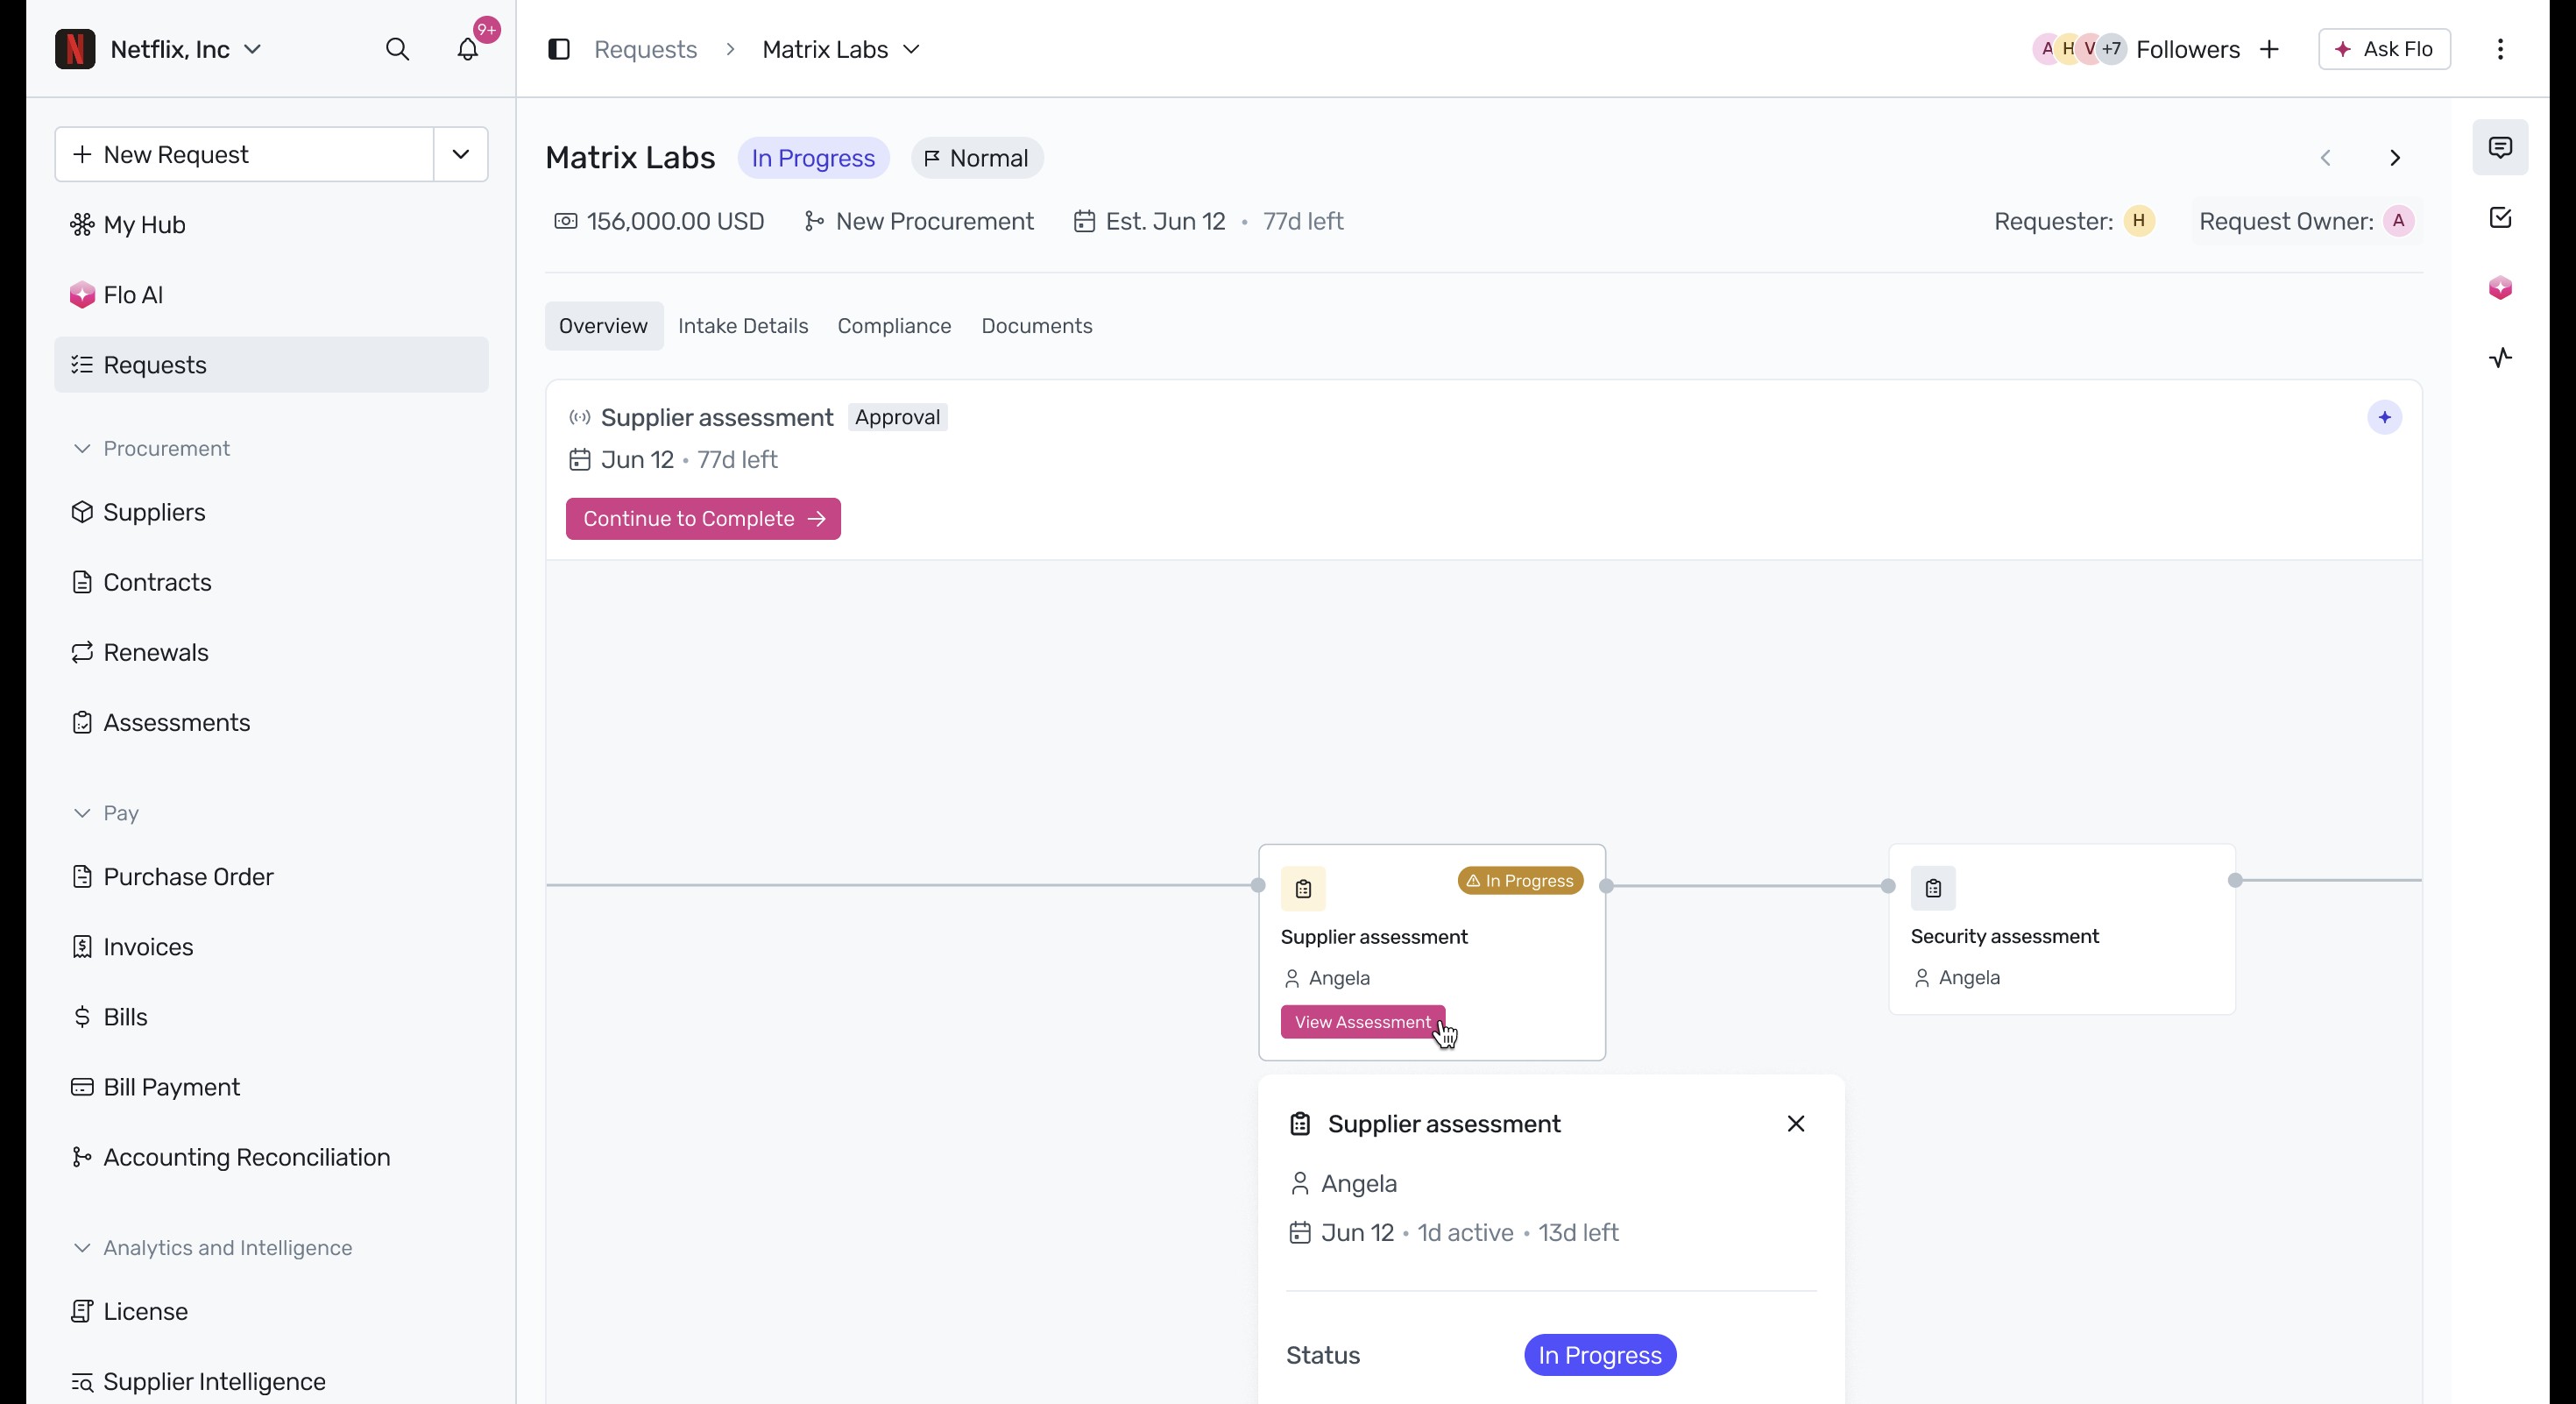
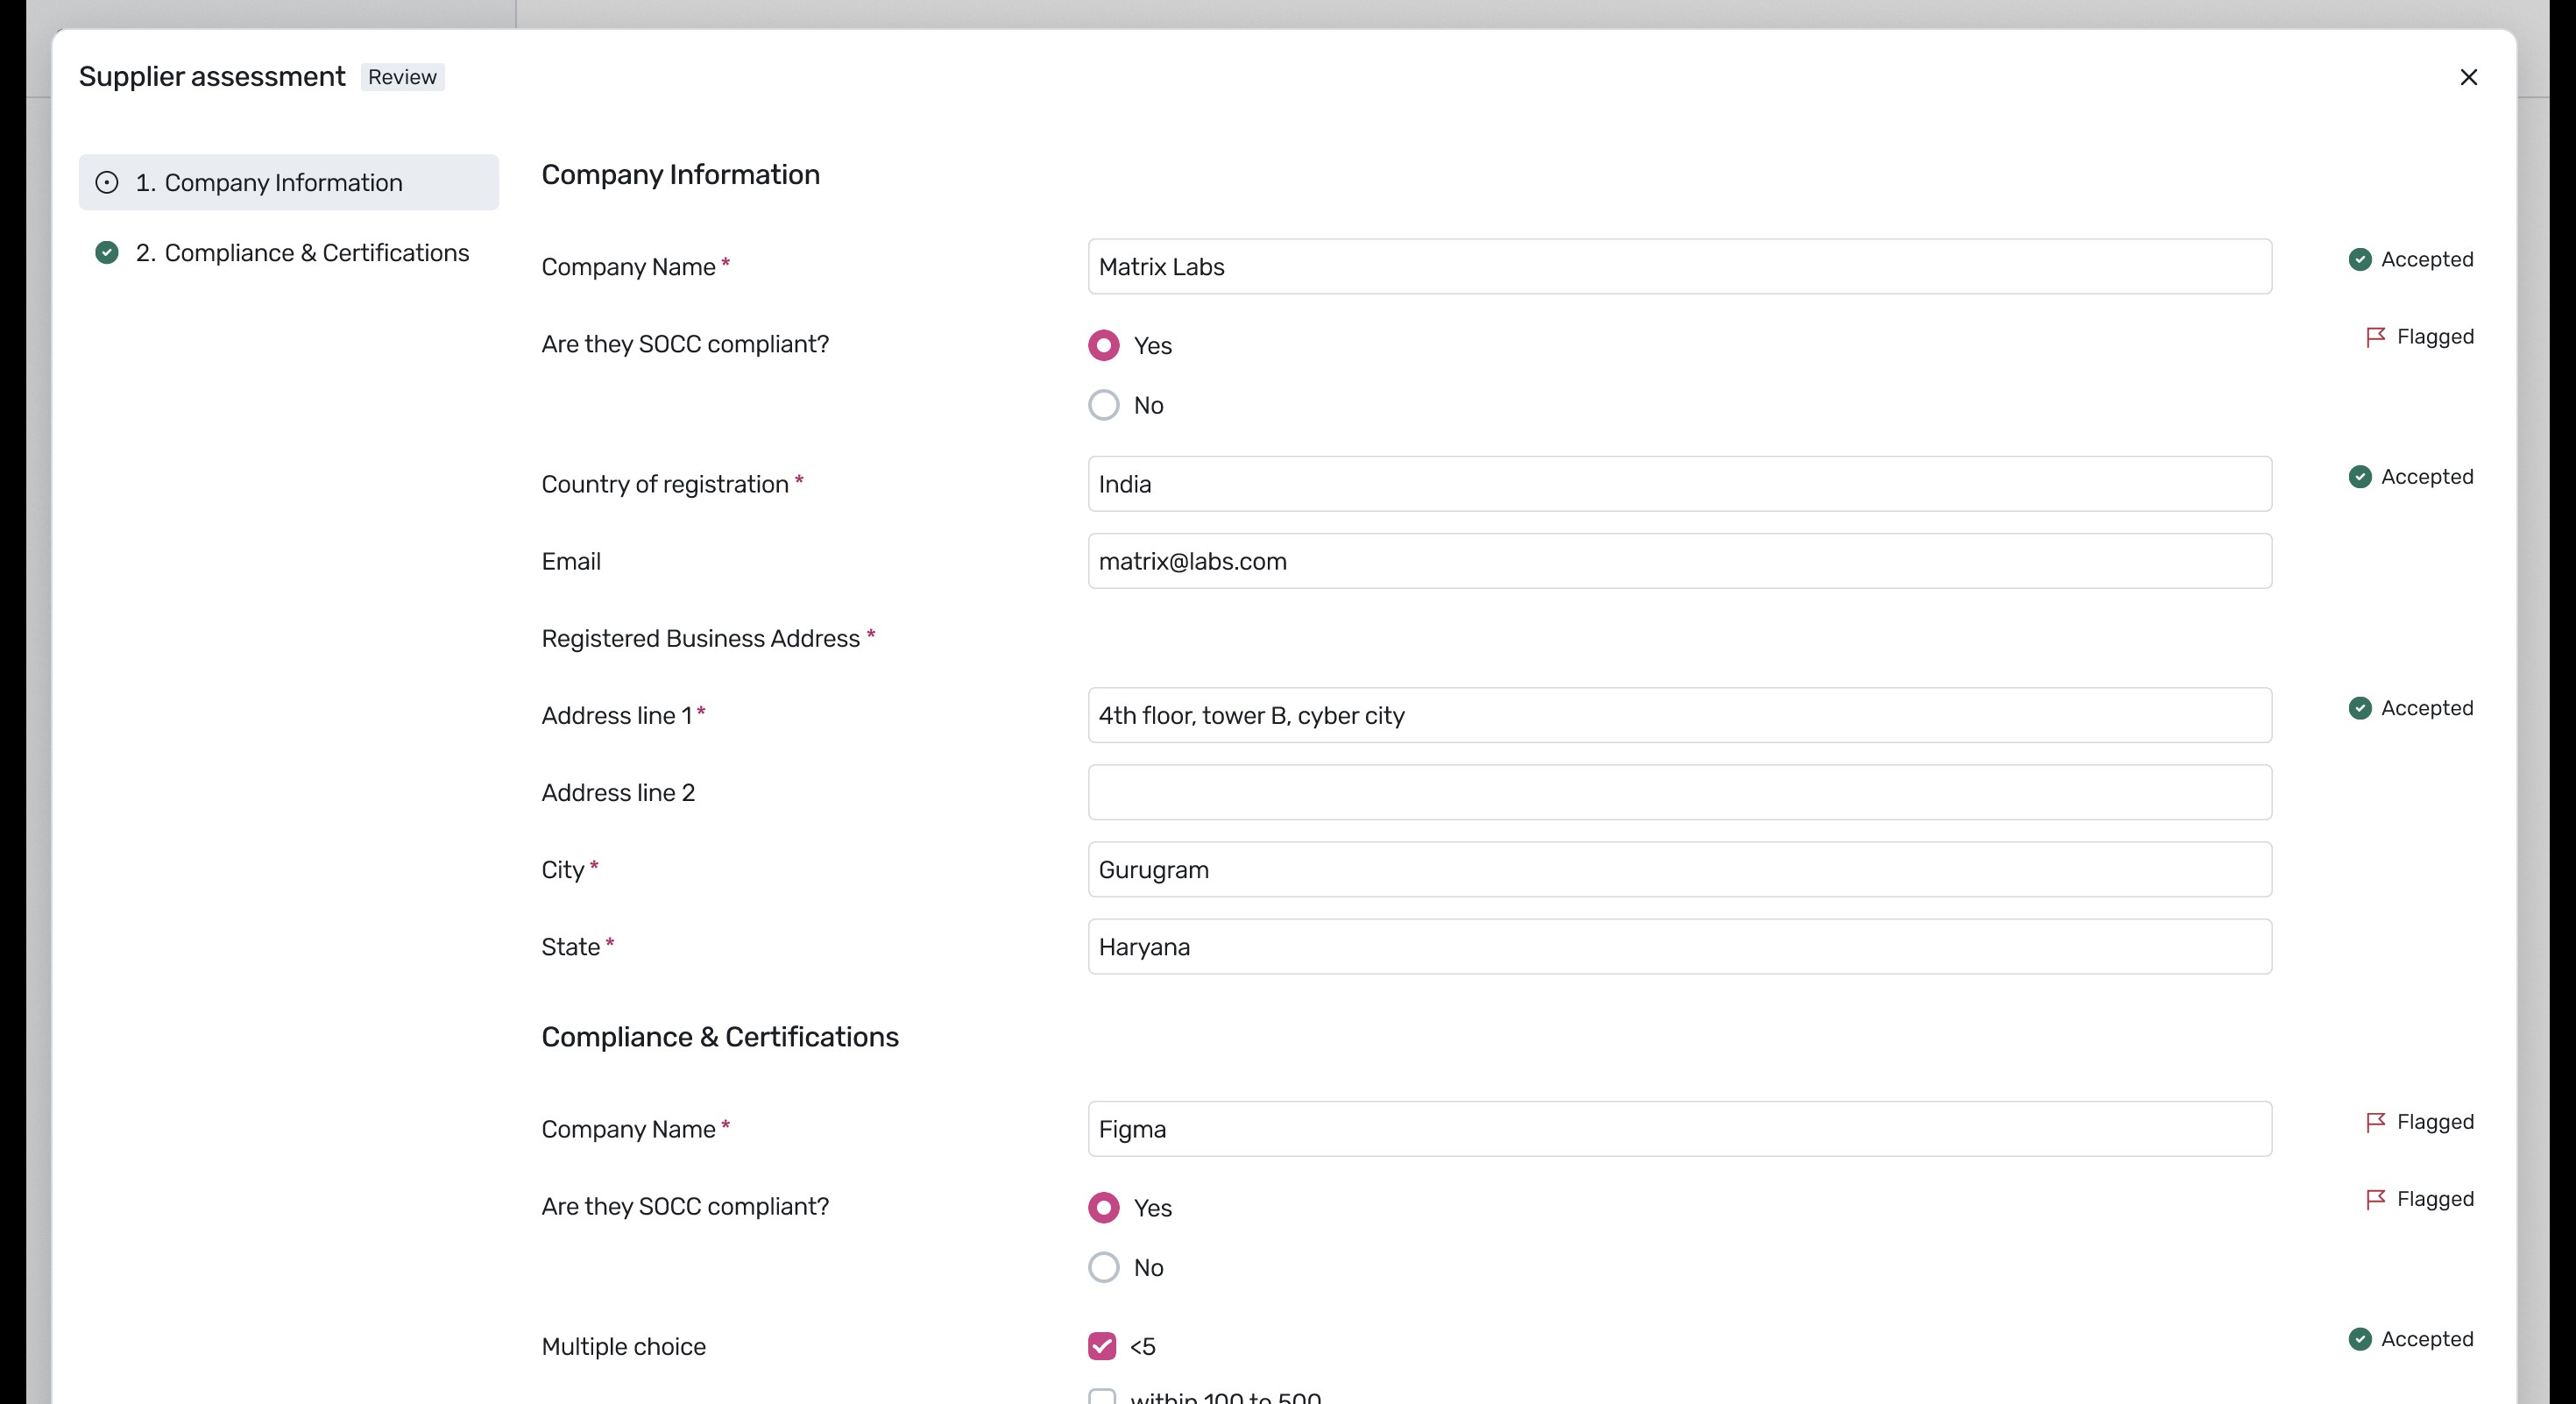
 Once onboarding starts, click View Assessment on the active Supplier assessment task.
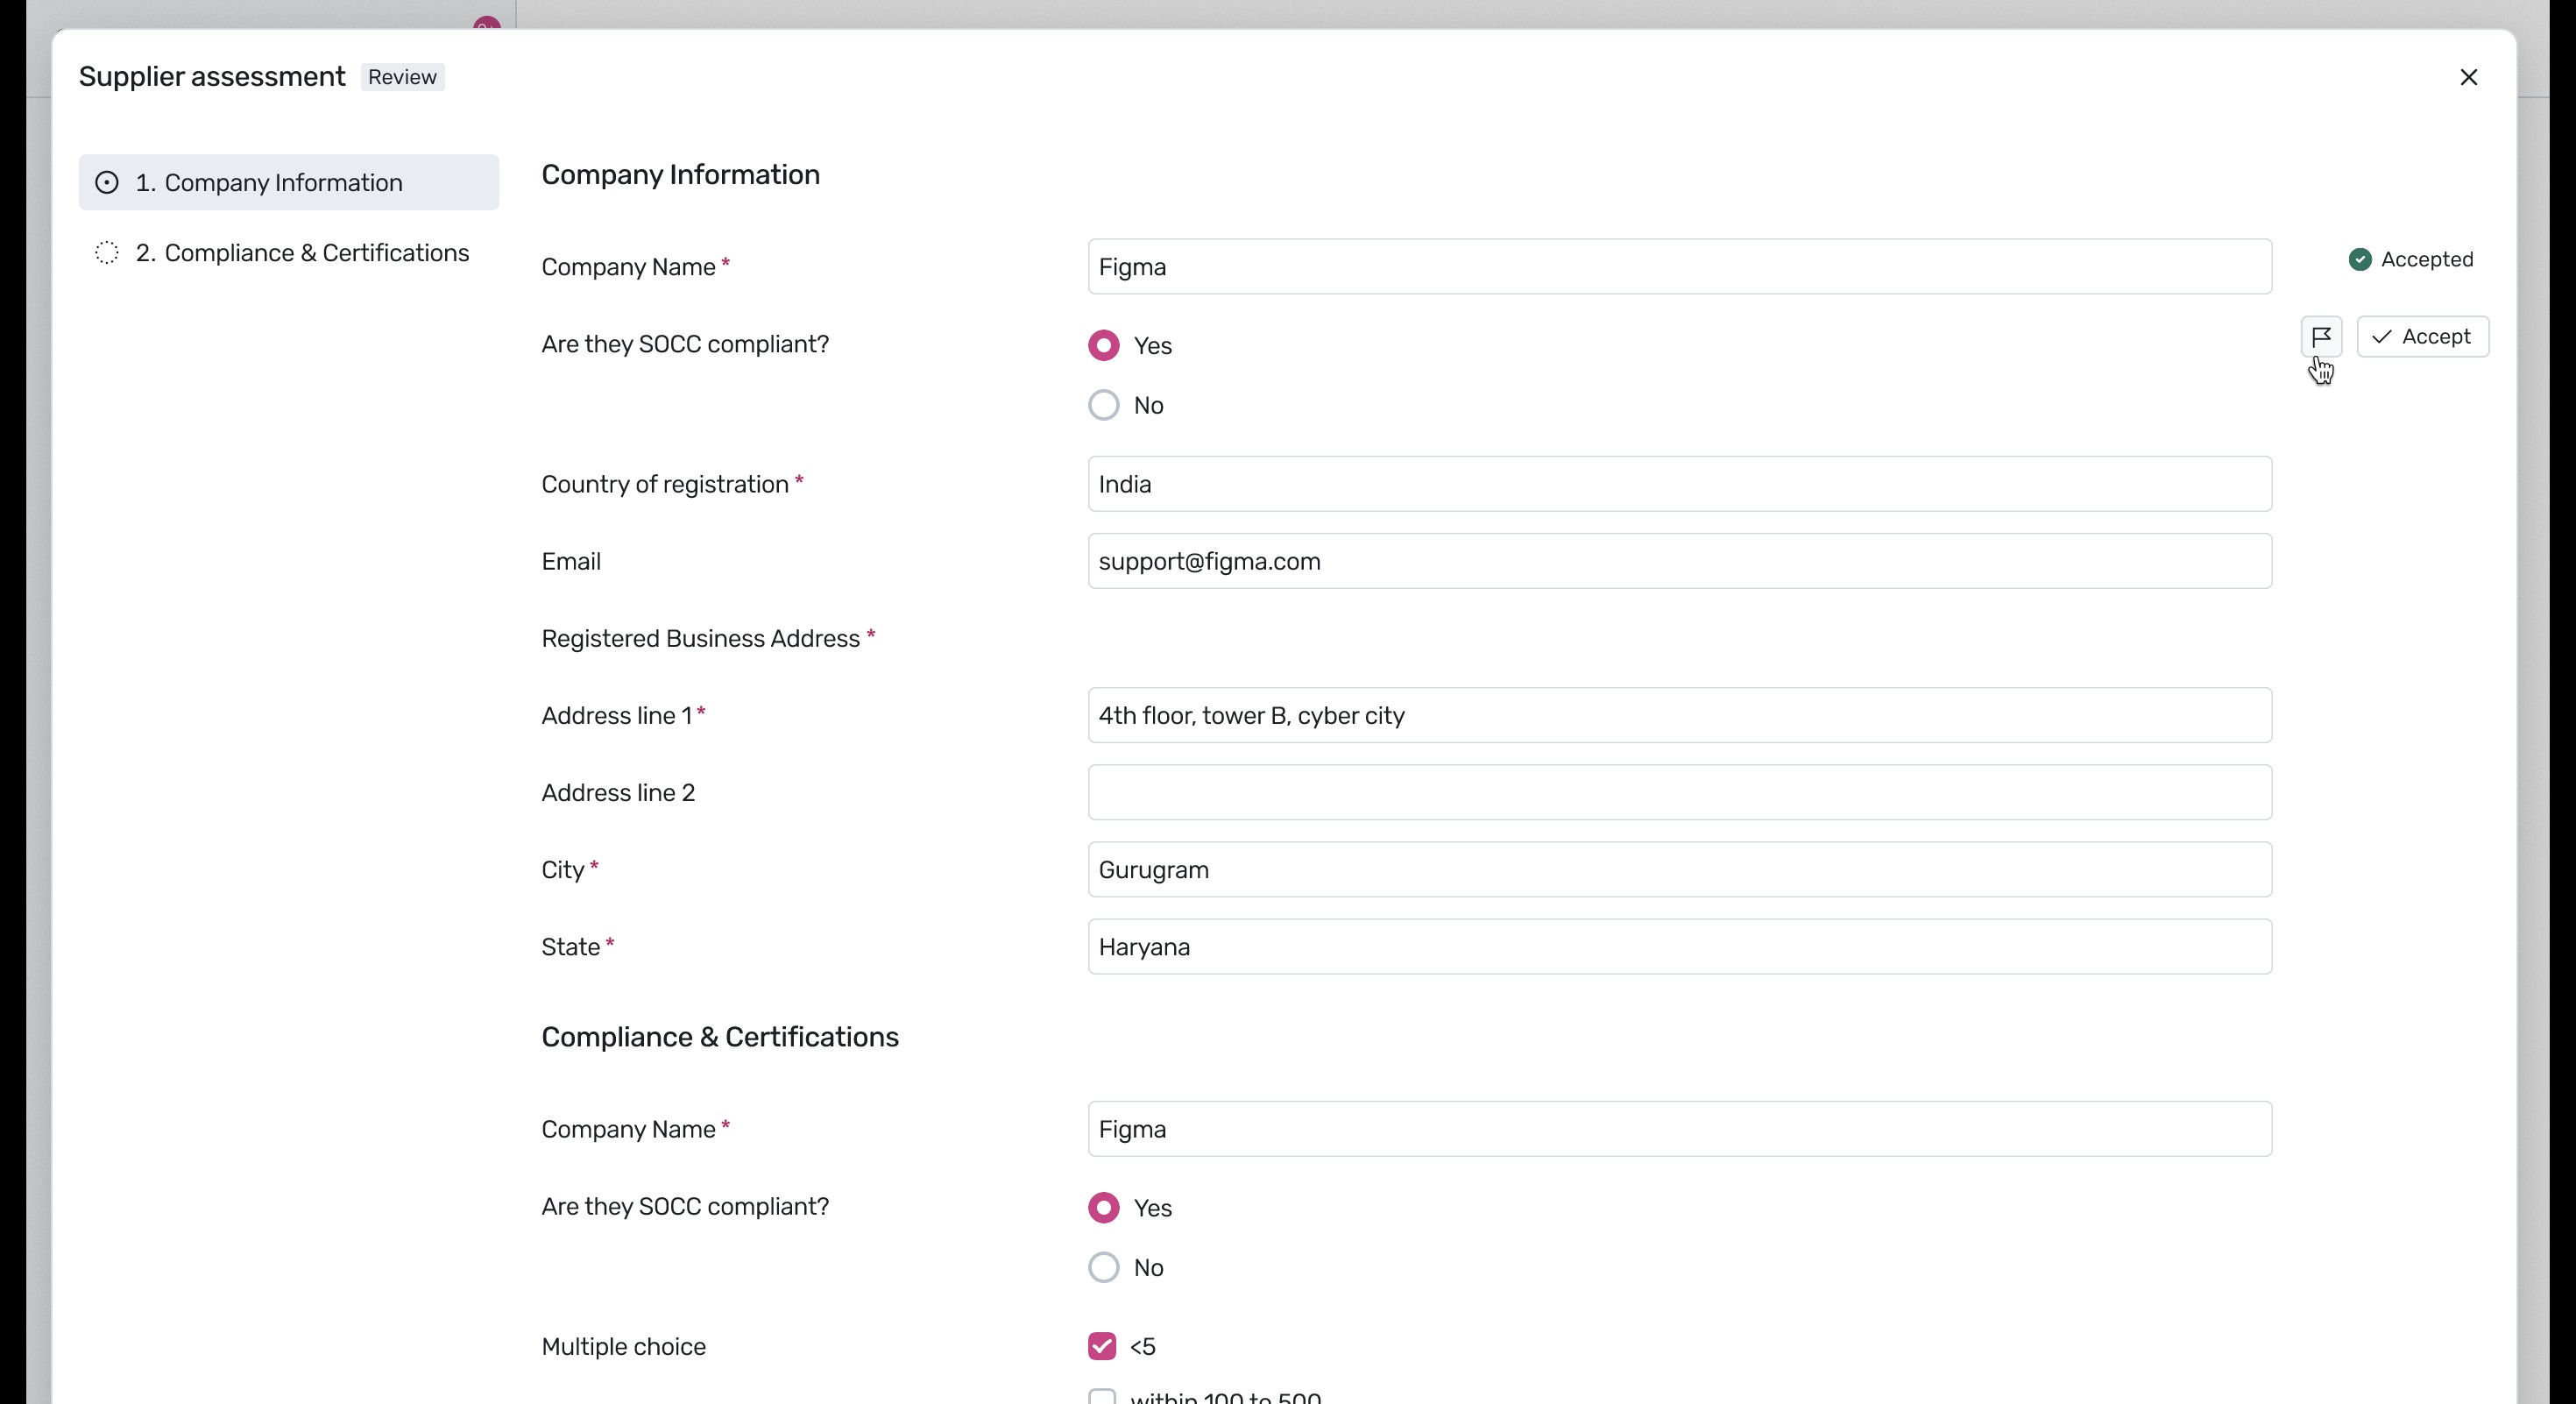
  In the Supplier Assessment modal, review responses. To flag a response for clarification, click the flag icon next to the field.
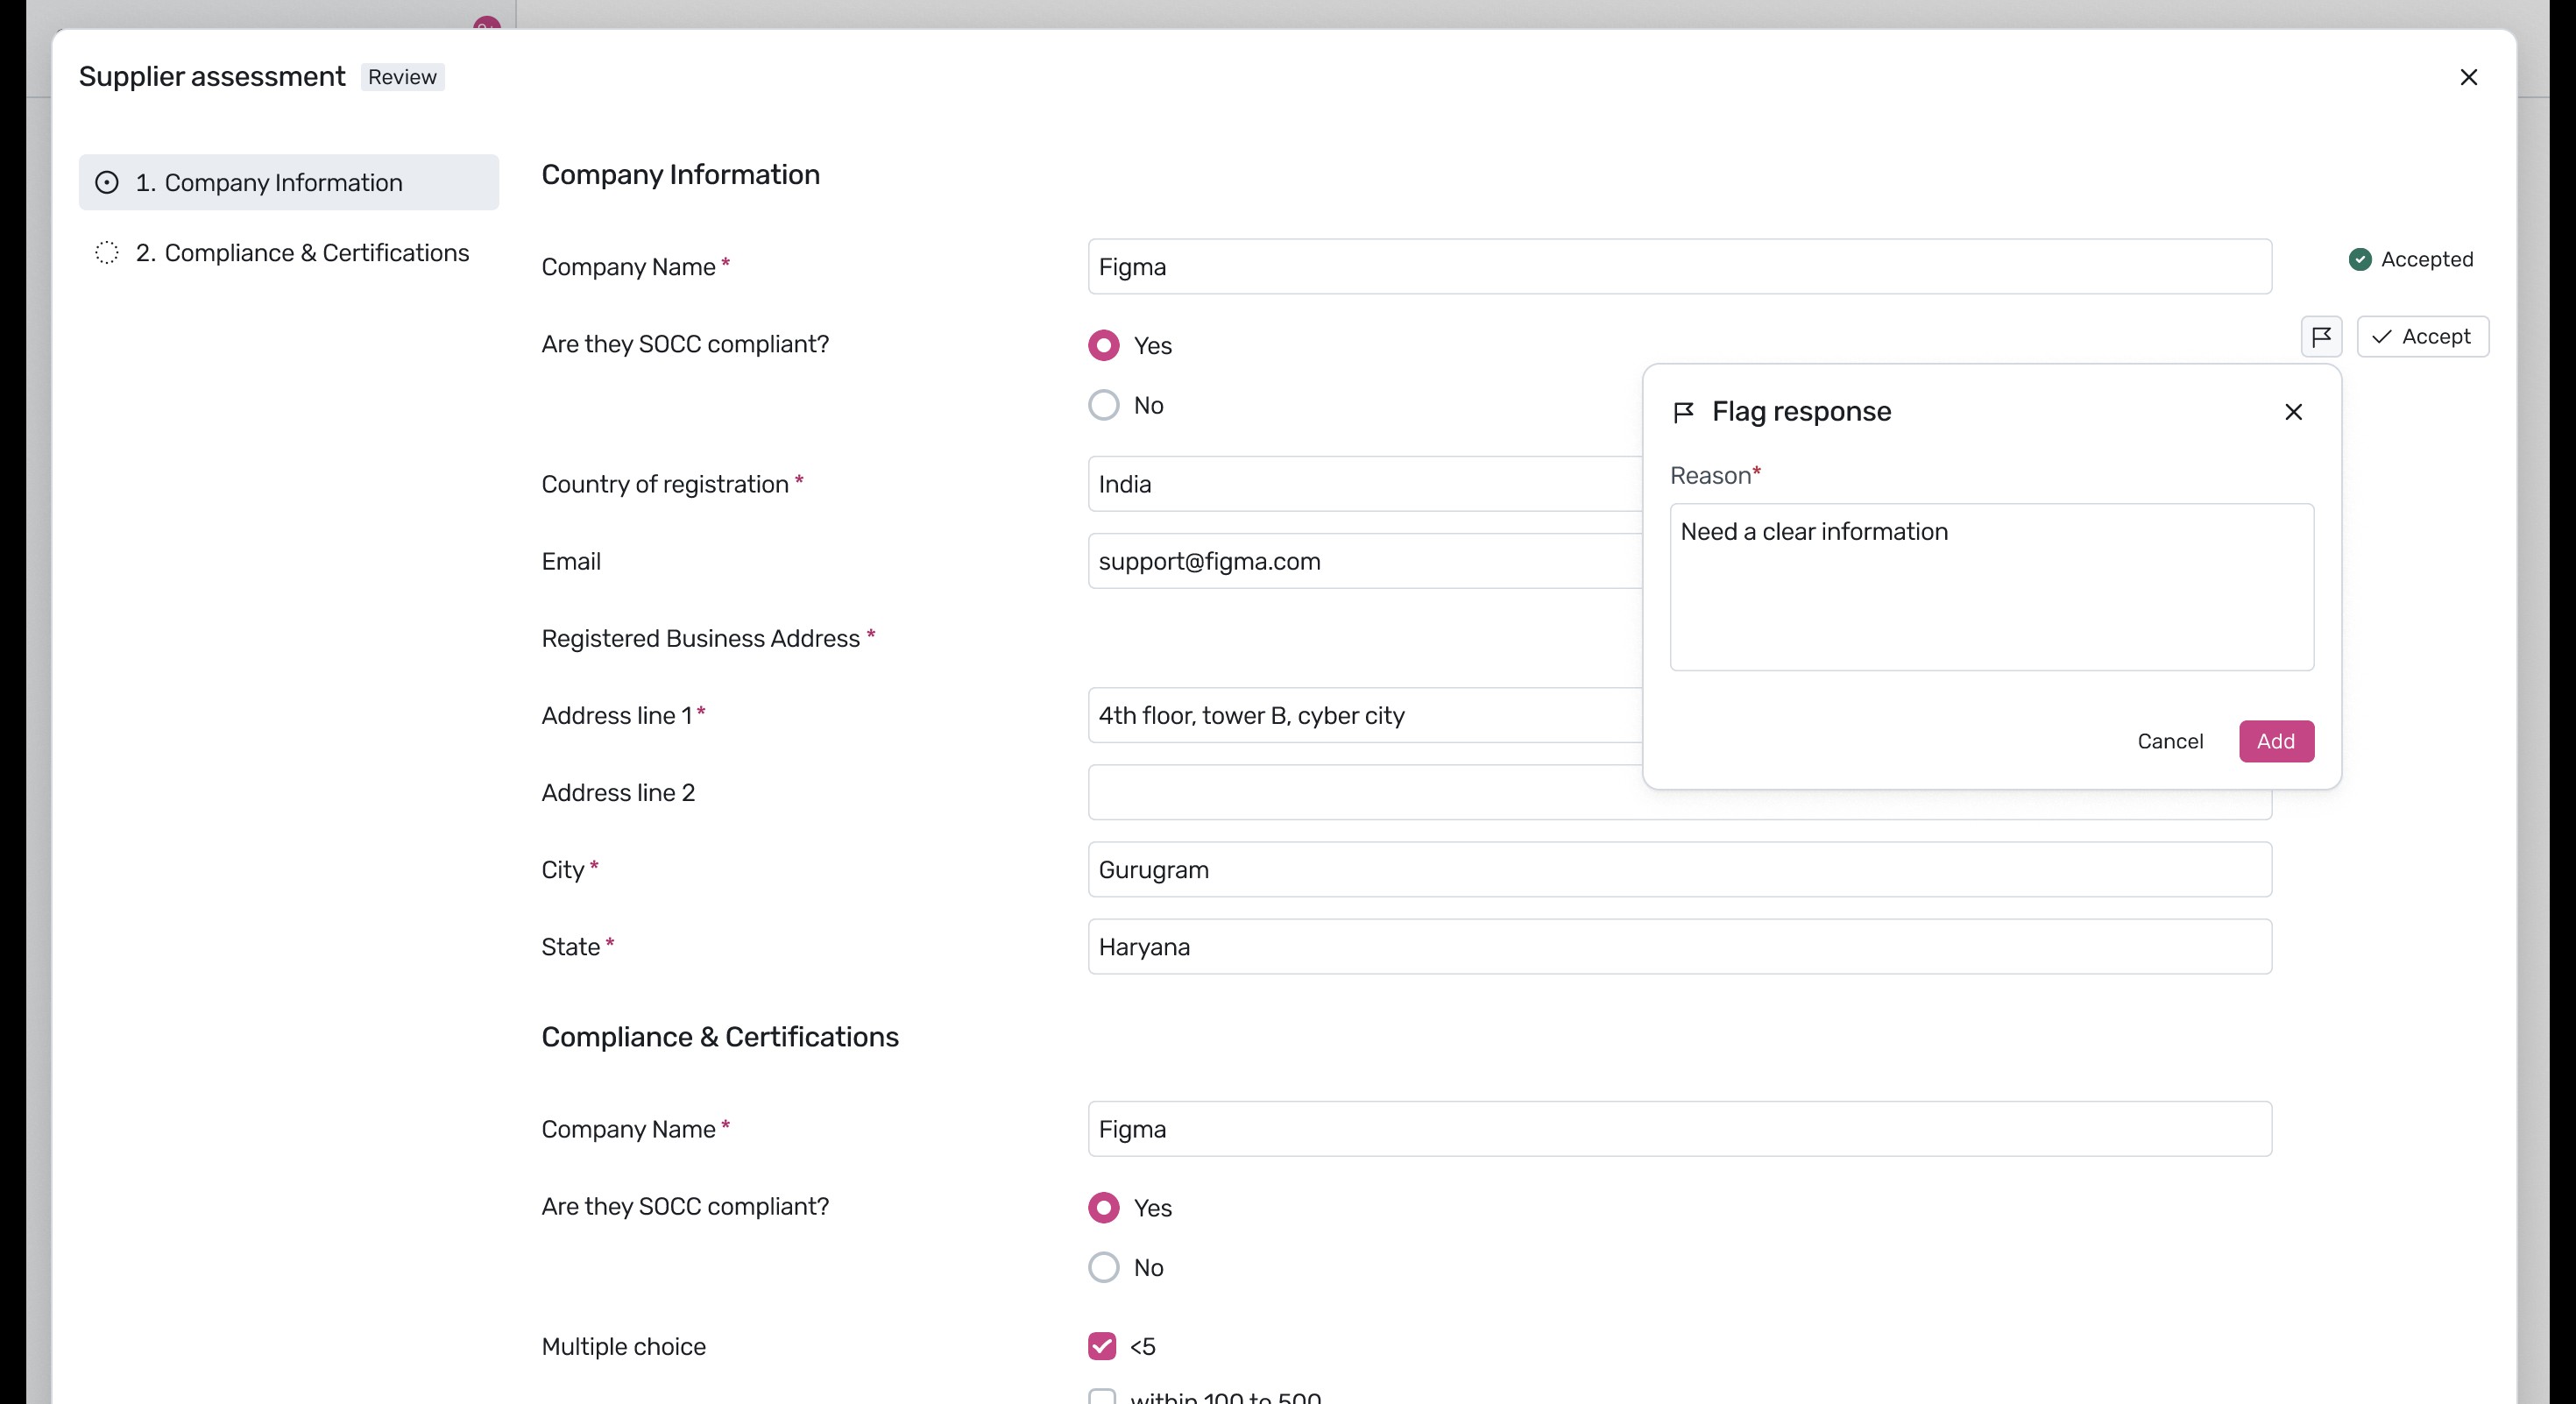
  Enter the reason for flagging and click Add.
  The flagged fields will highlight, prompting the supplier to update them.
  Once completed, click View Request to return to the main workflow.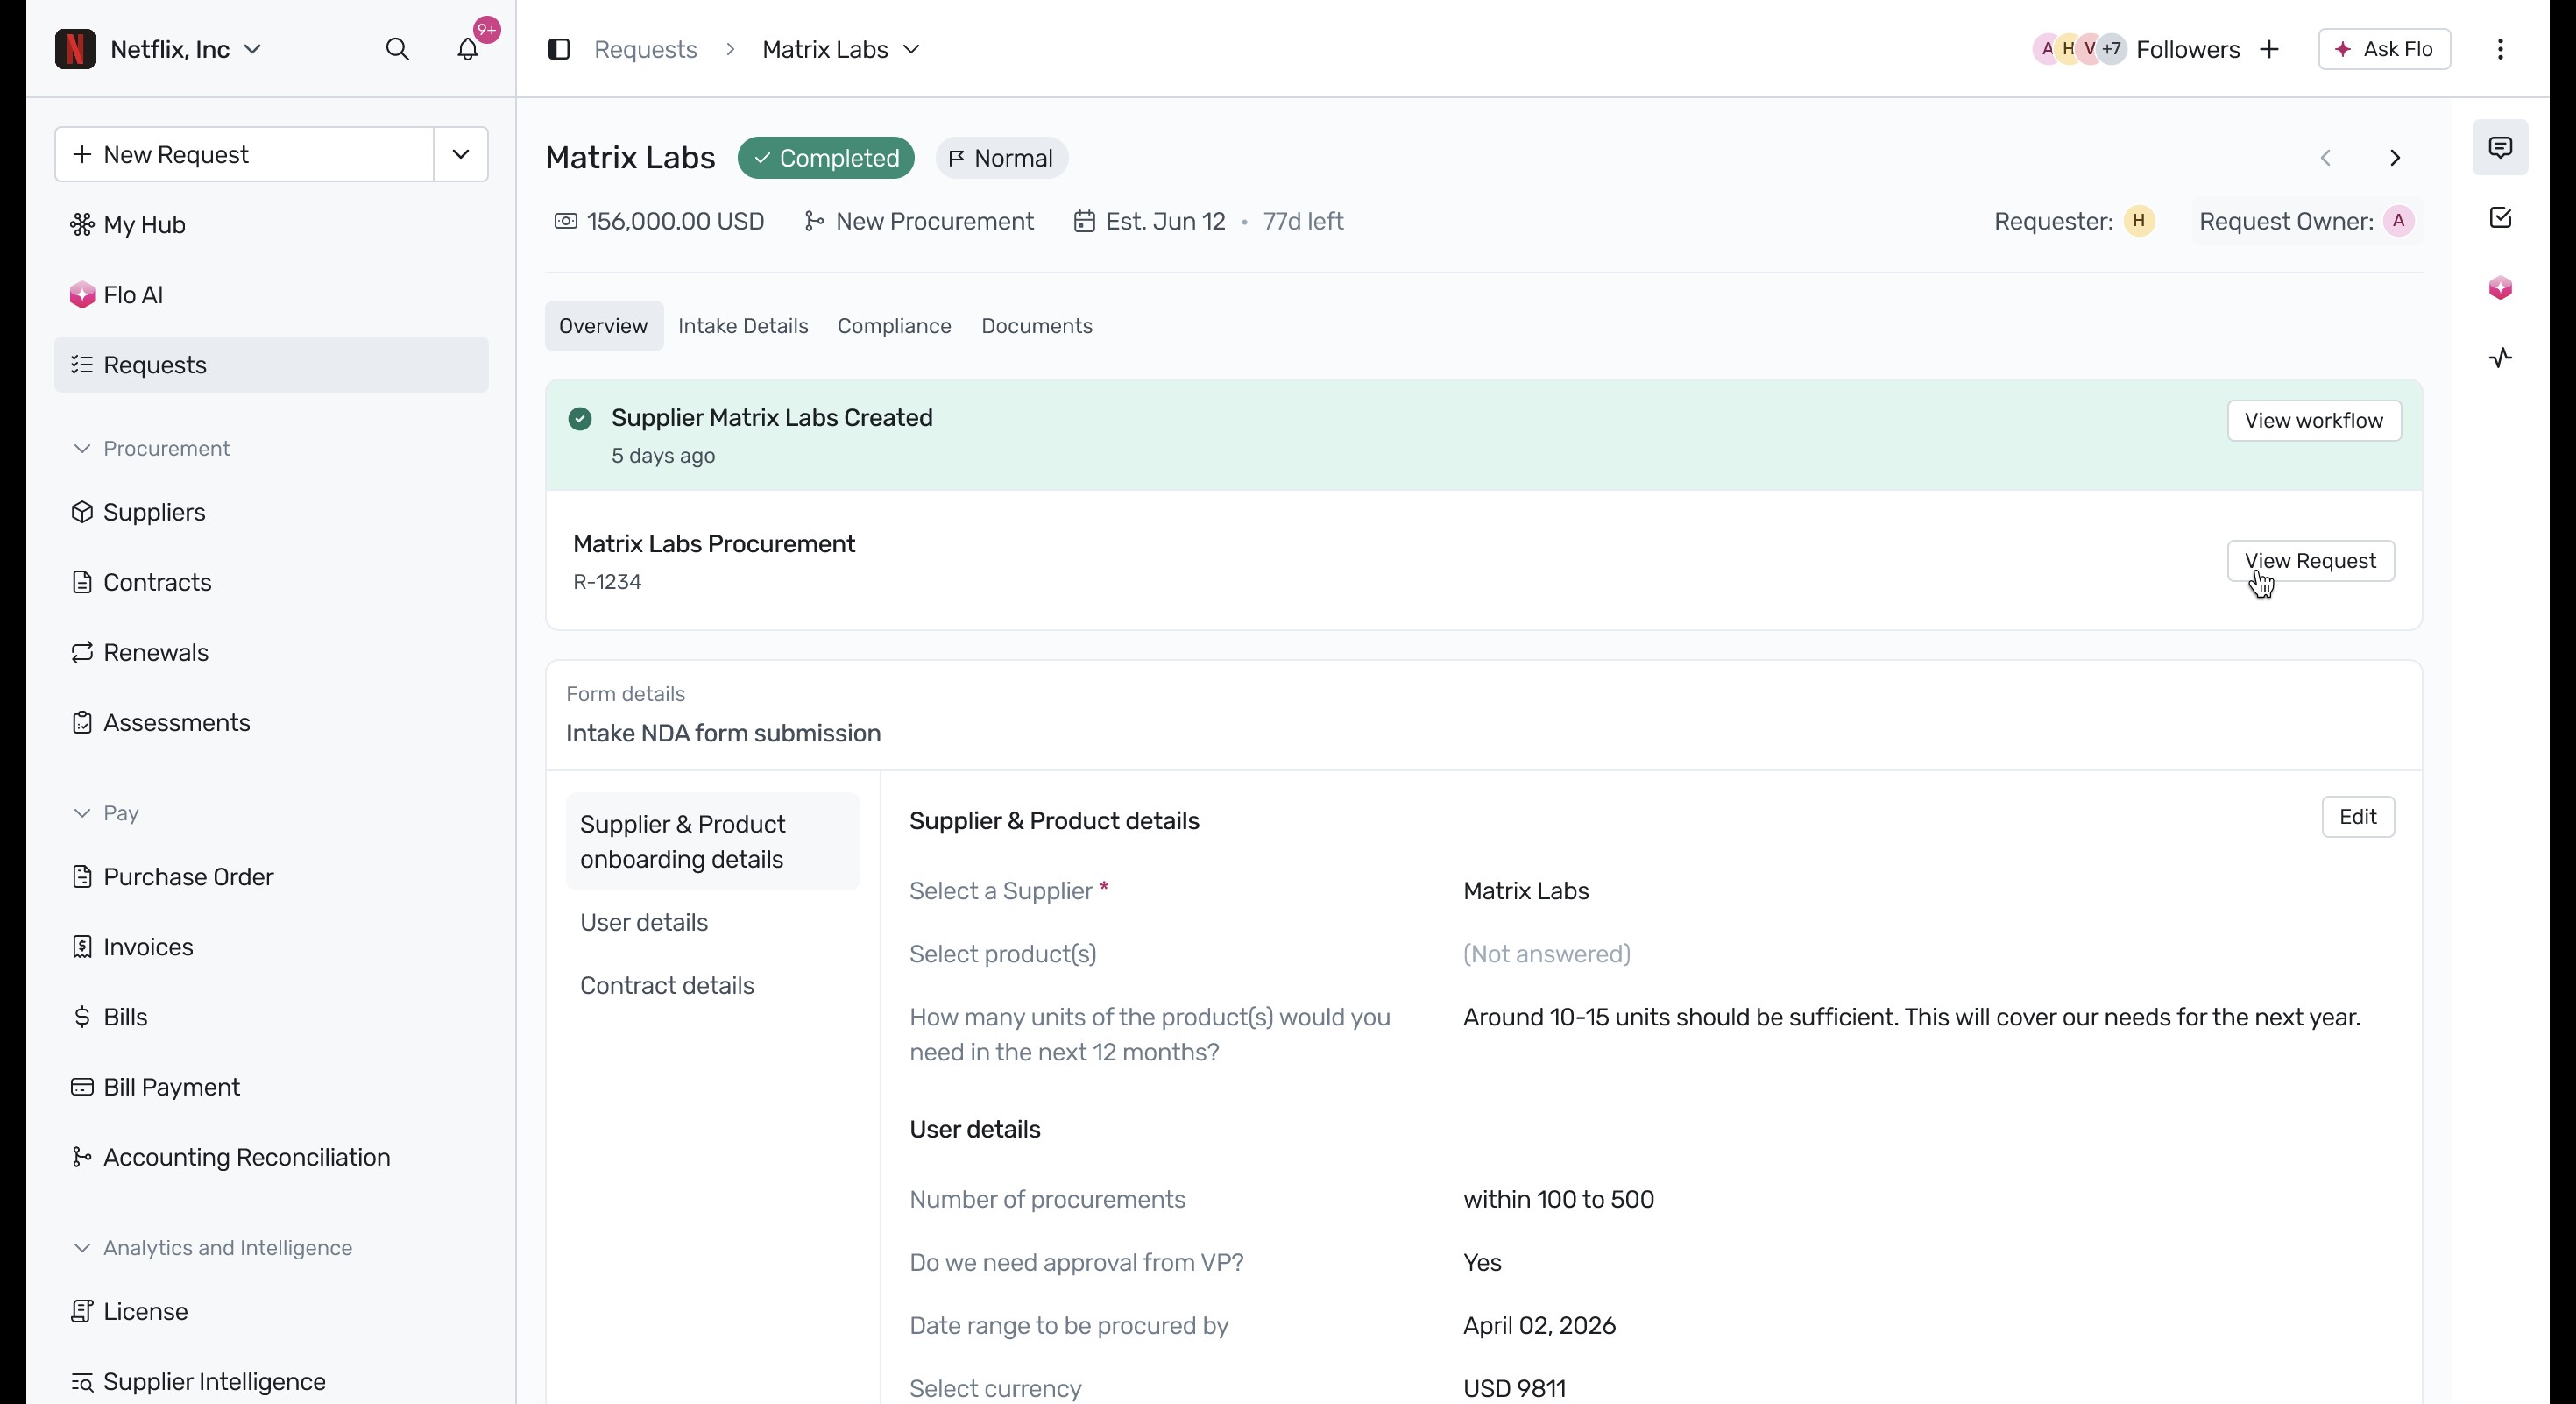
- Verify NetSuite Integrations: Click the Create Supplier in NS node and select the Supplier URL to verify the vendor record in NetSuite.
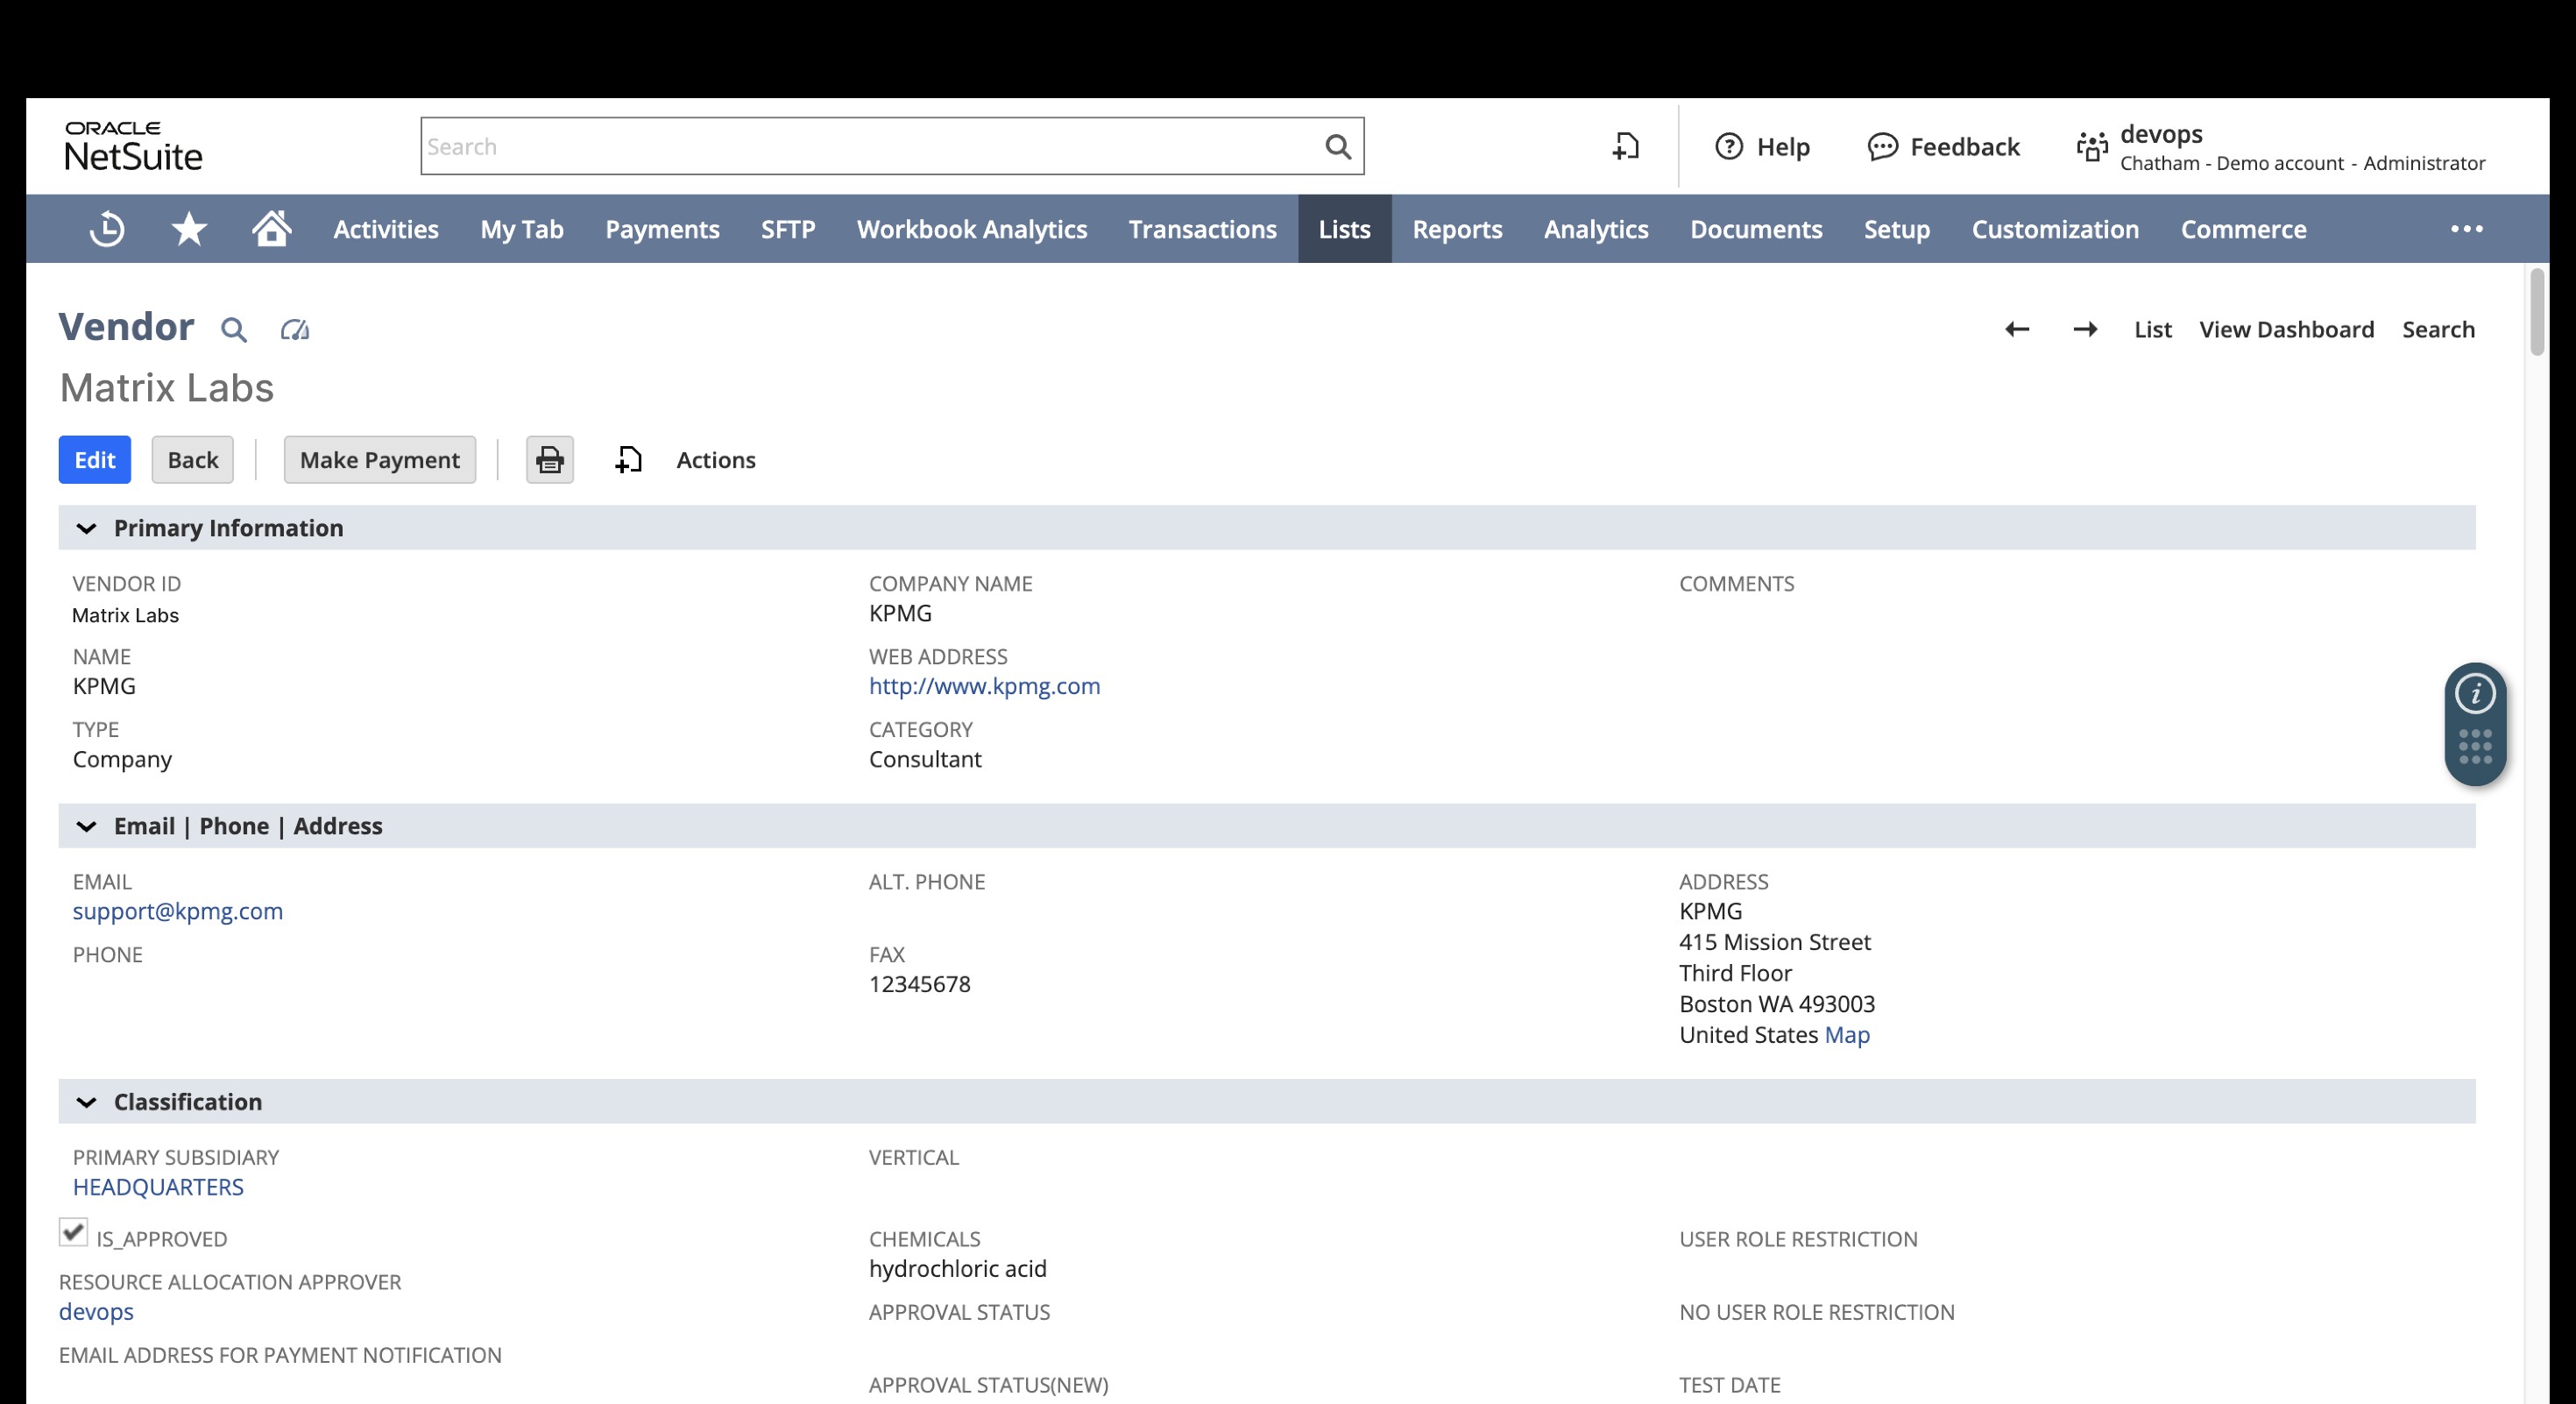
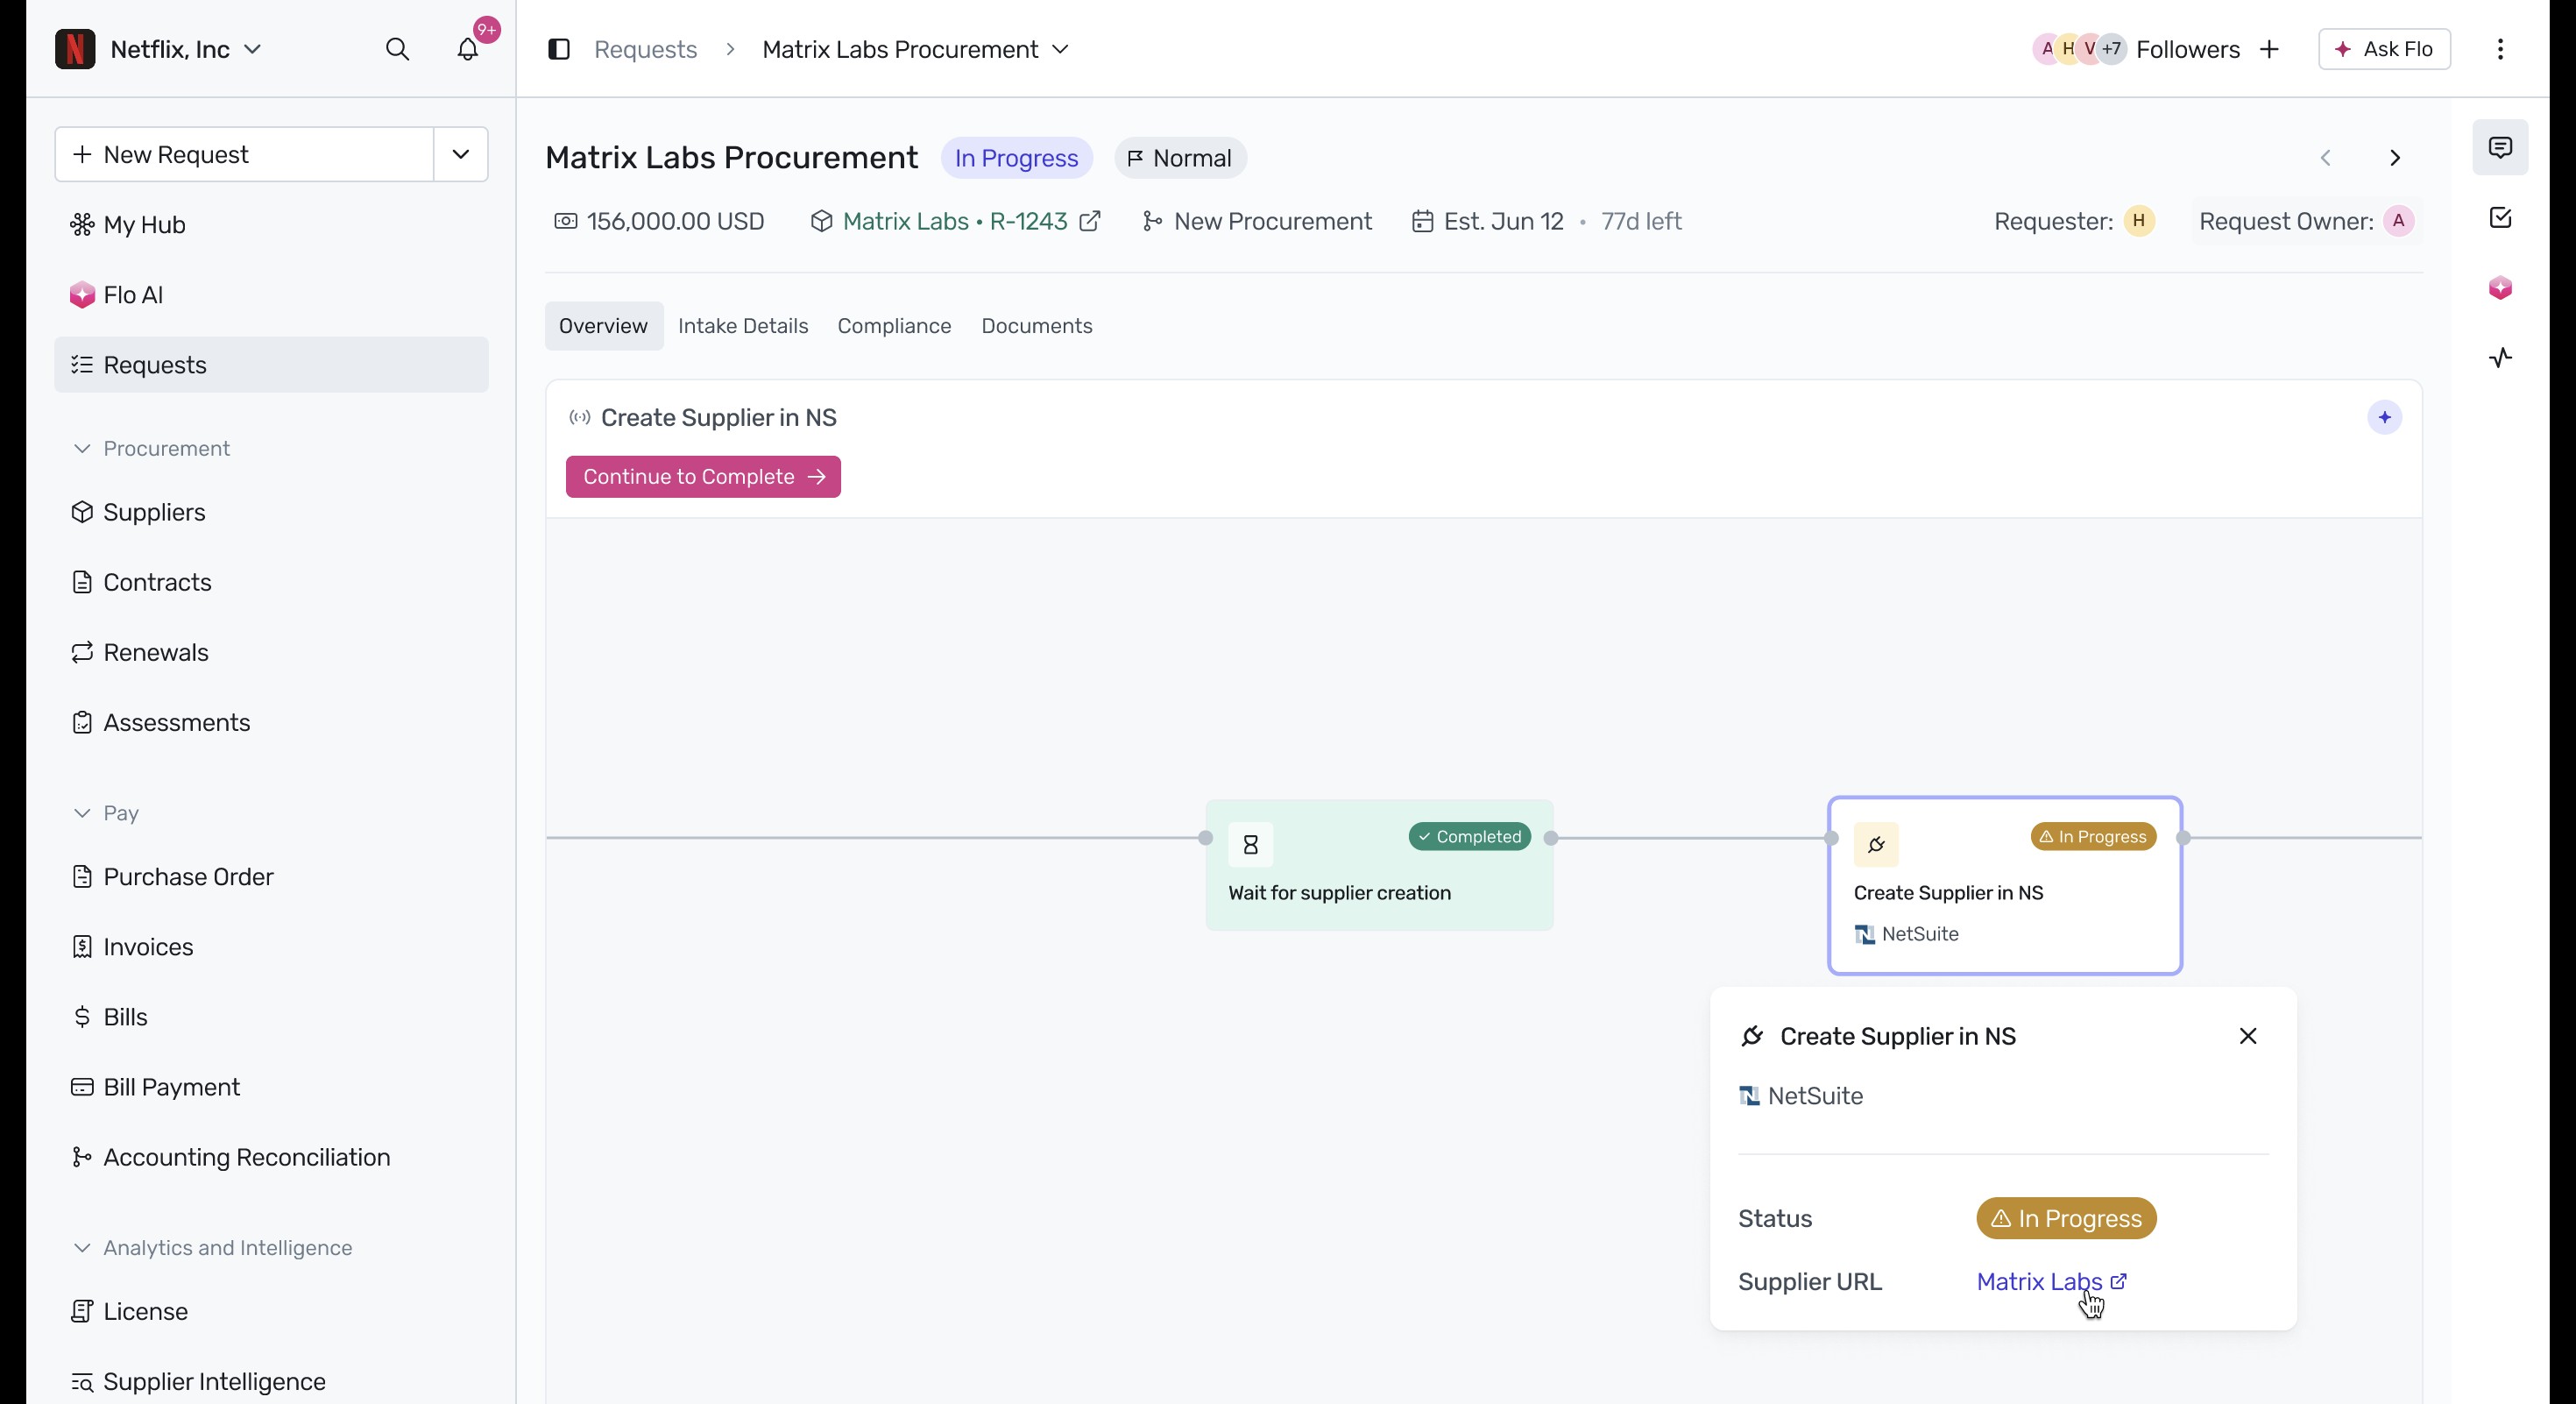 Confirm the synced vendor details in NetSuite.
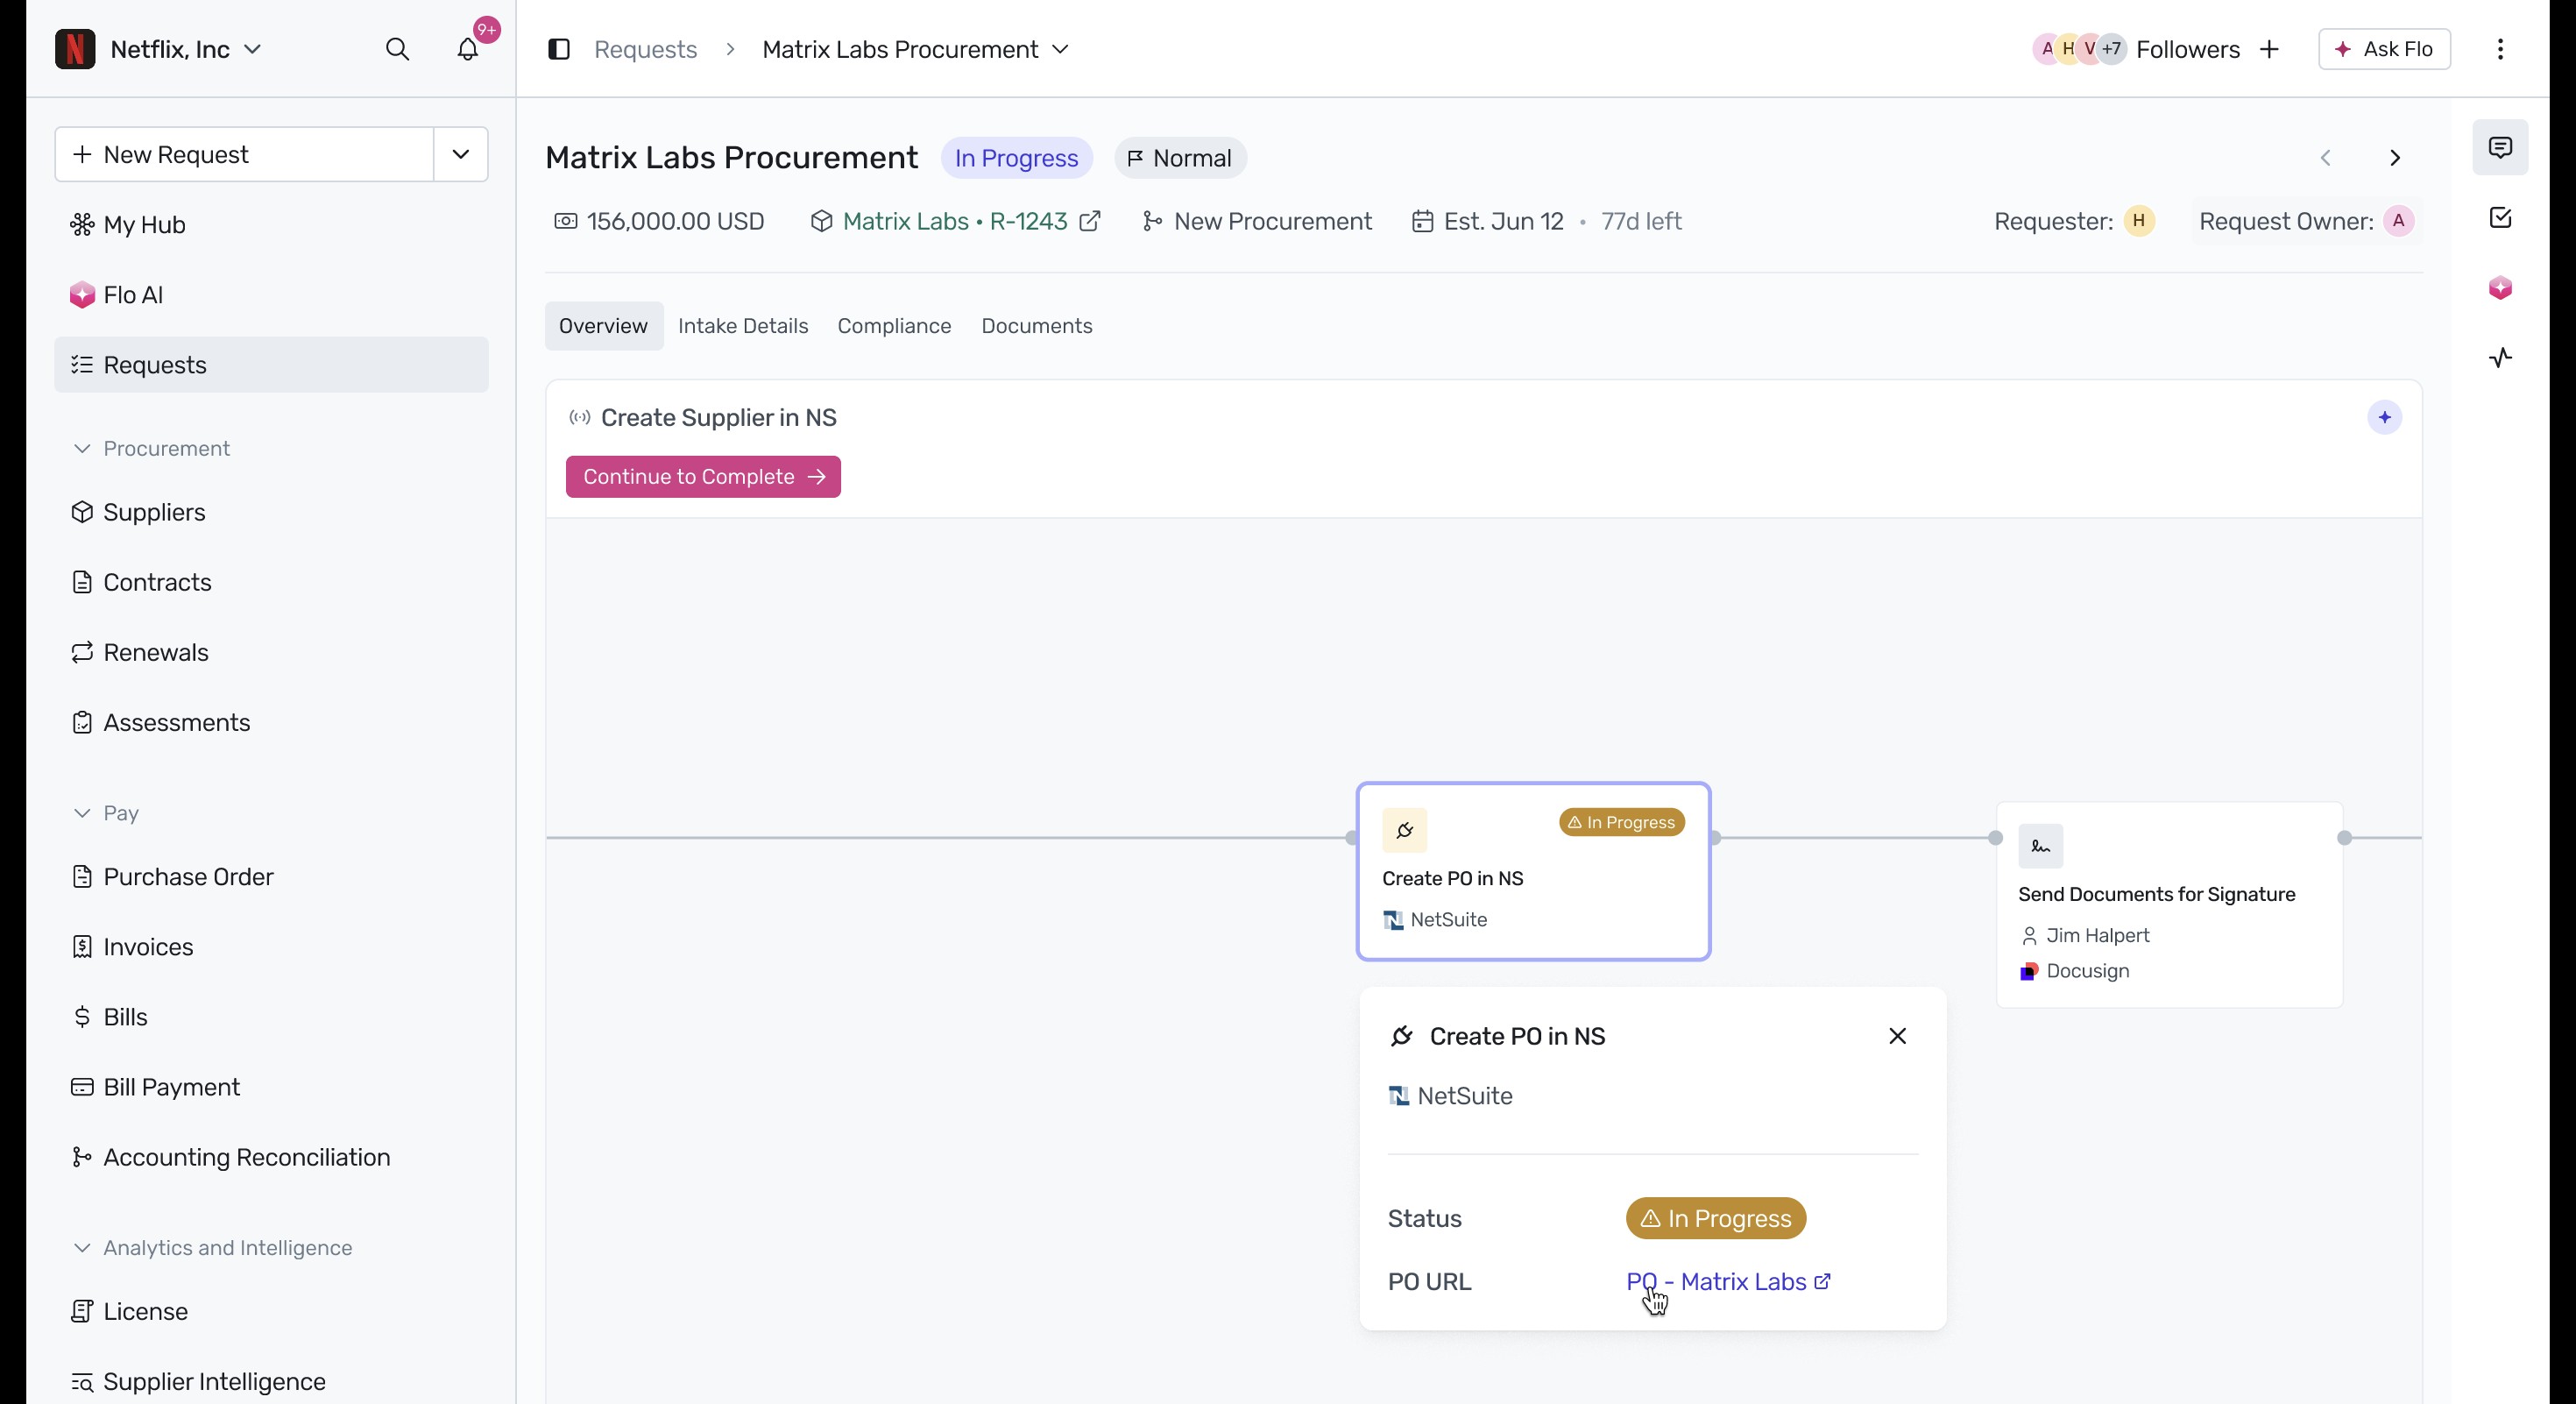
  Next, the system triggers Create PO in NS. Click the node and select the PO URL.
  In NetSuite, verify that the Purchase Order status is Pending Approval.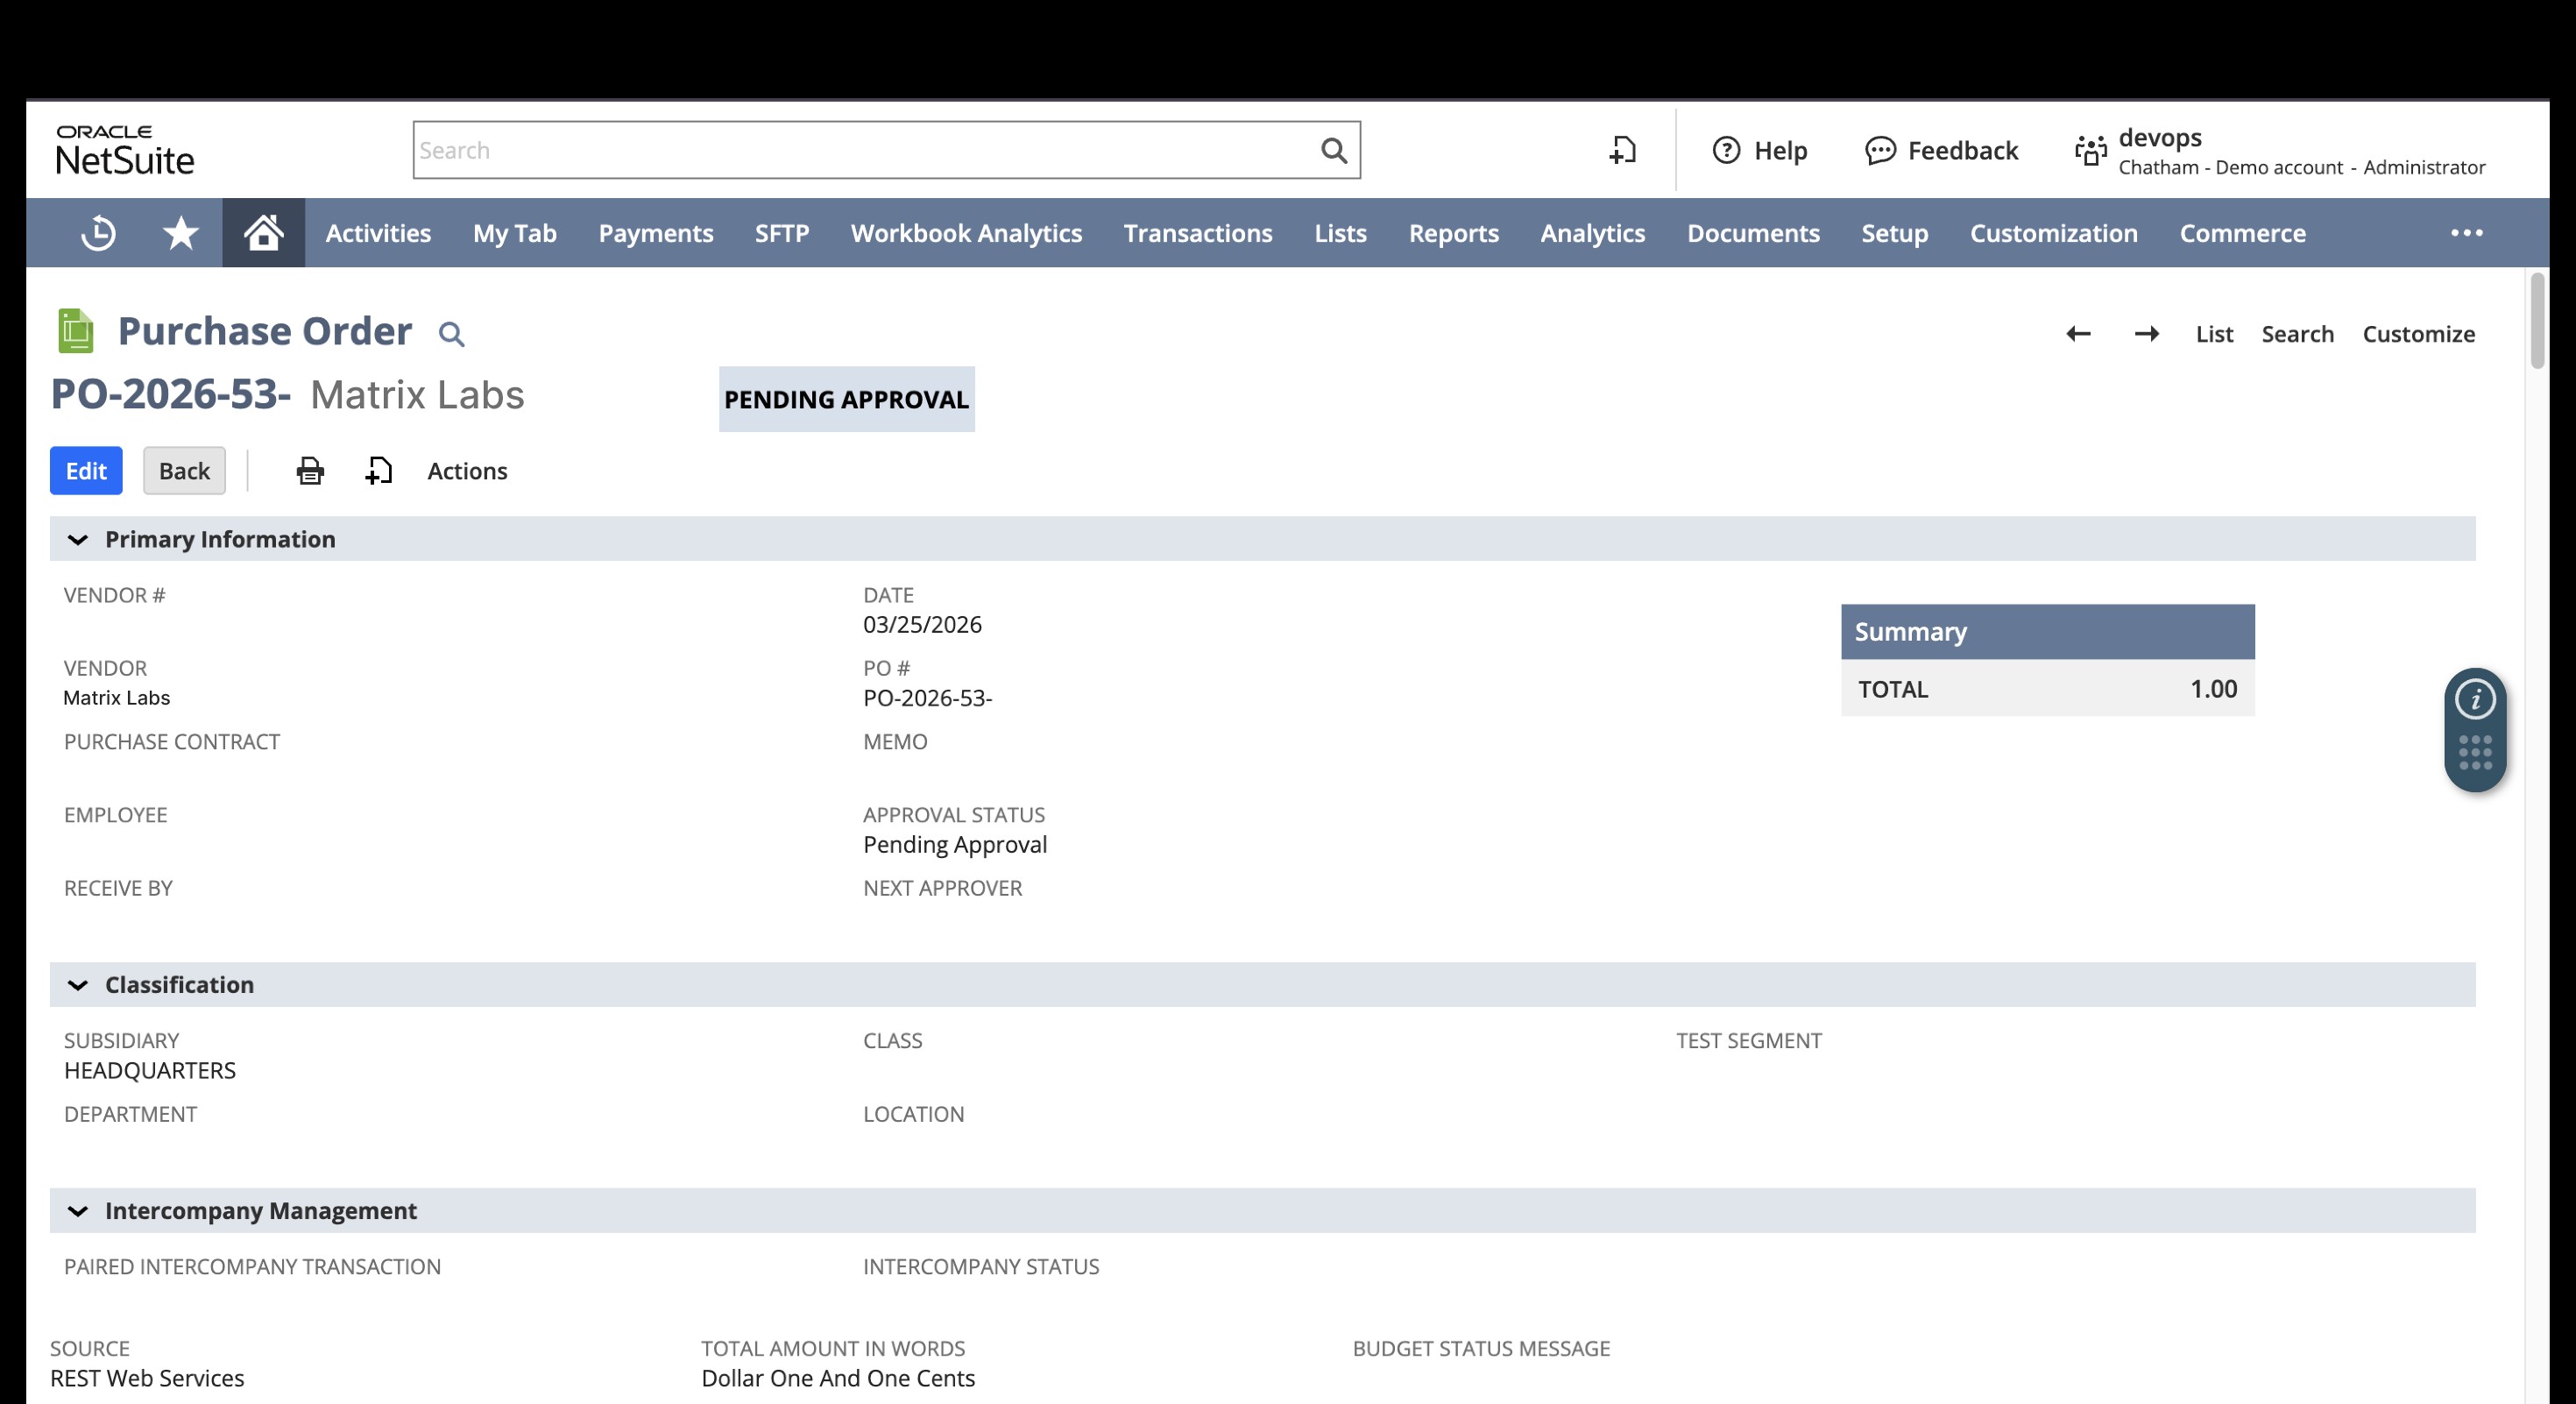
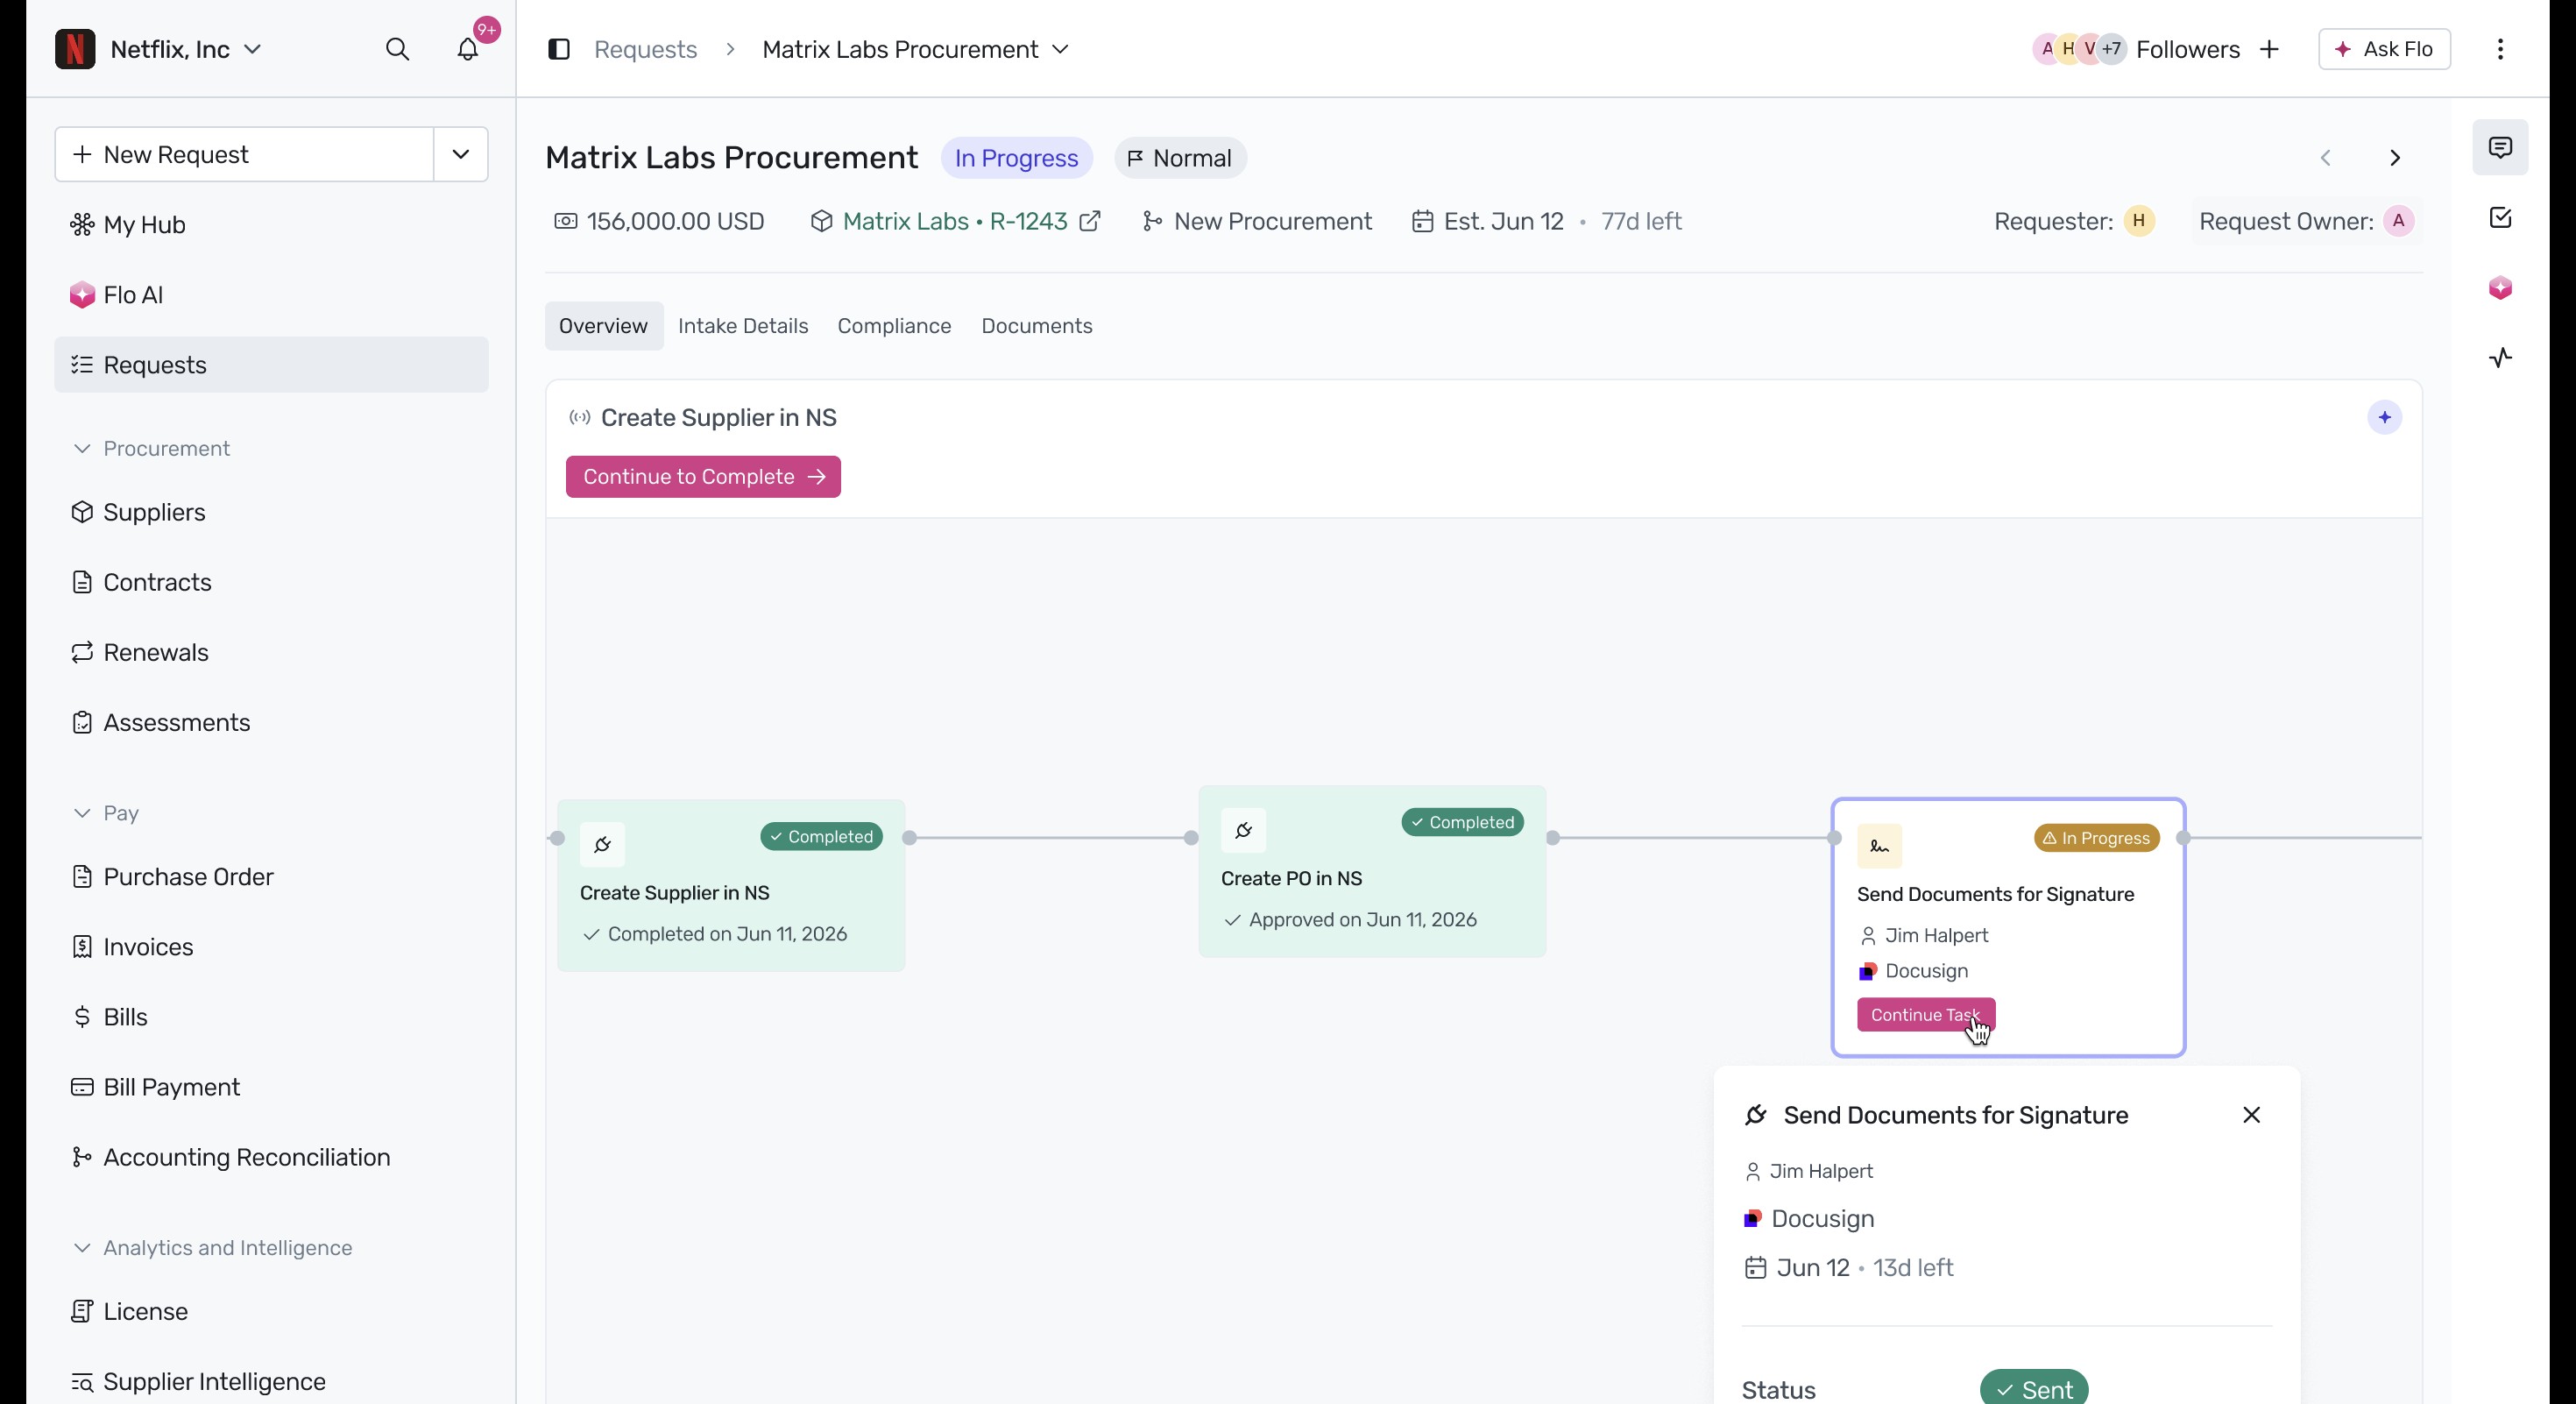
- Send and Sign Documents via DocuSign: Click Continue Task on the Send Documents for Signature node.
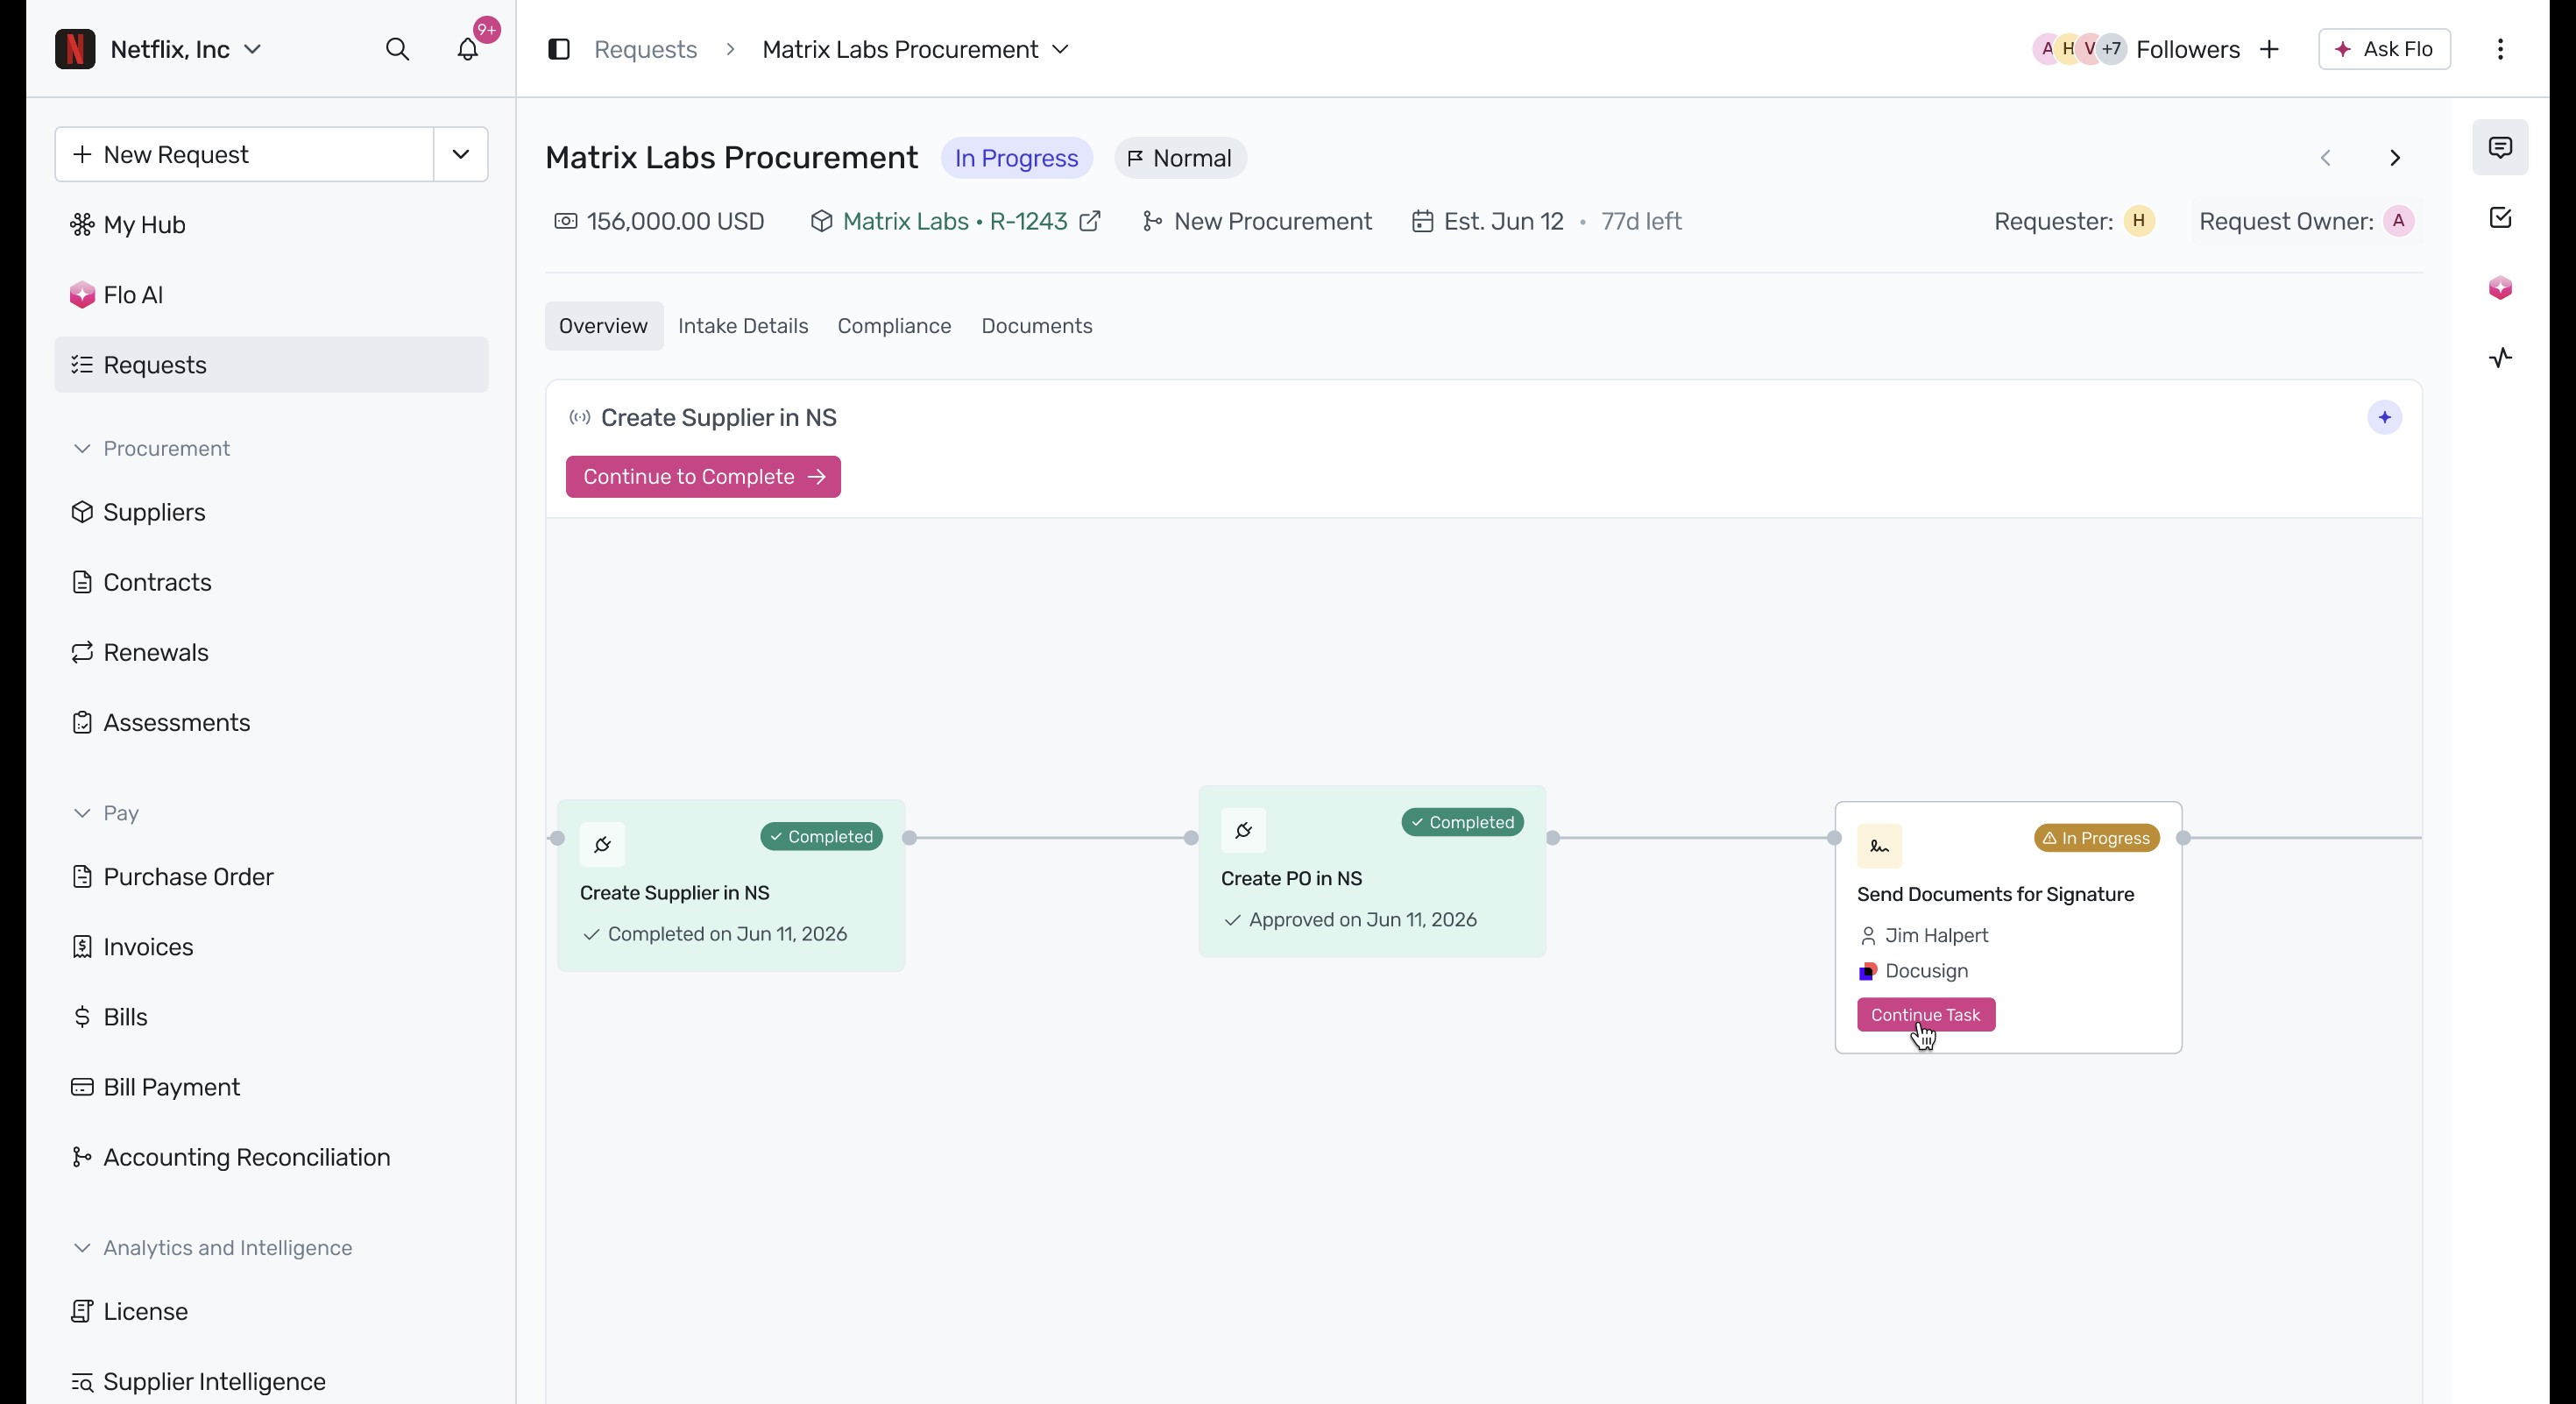 Confirm the documents and recipient details in the DocuSign modal, then click Save and Place Tags.
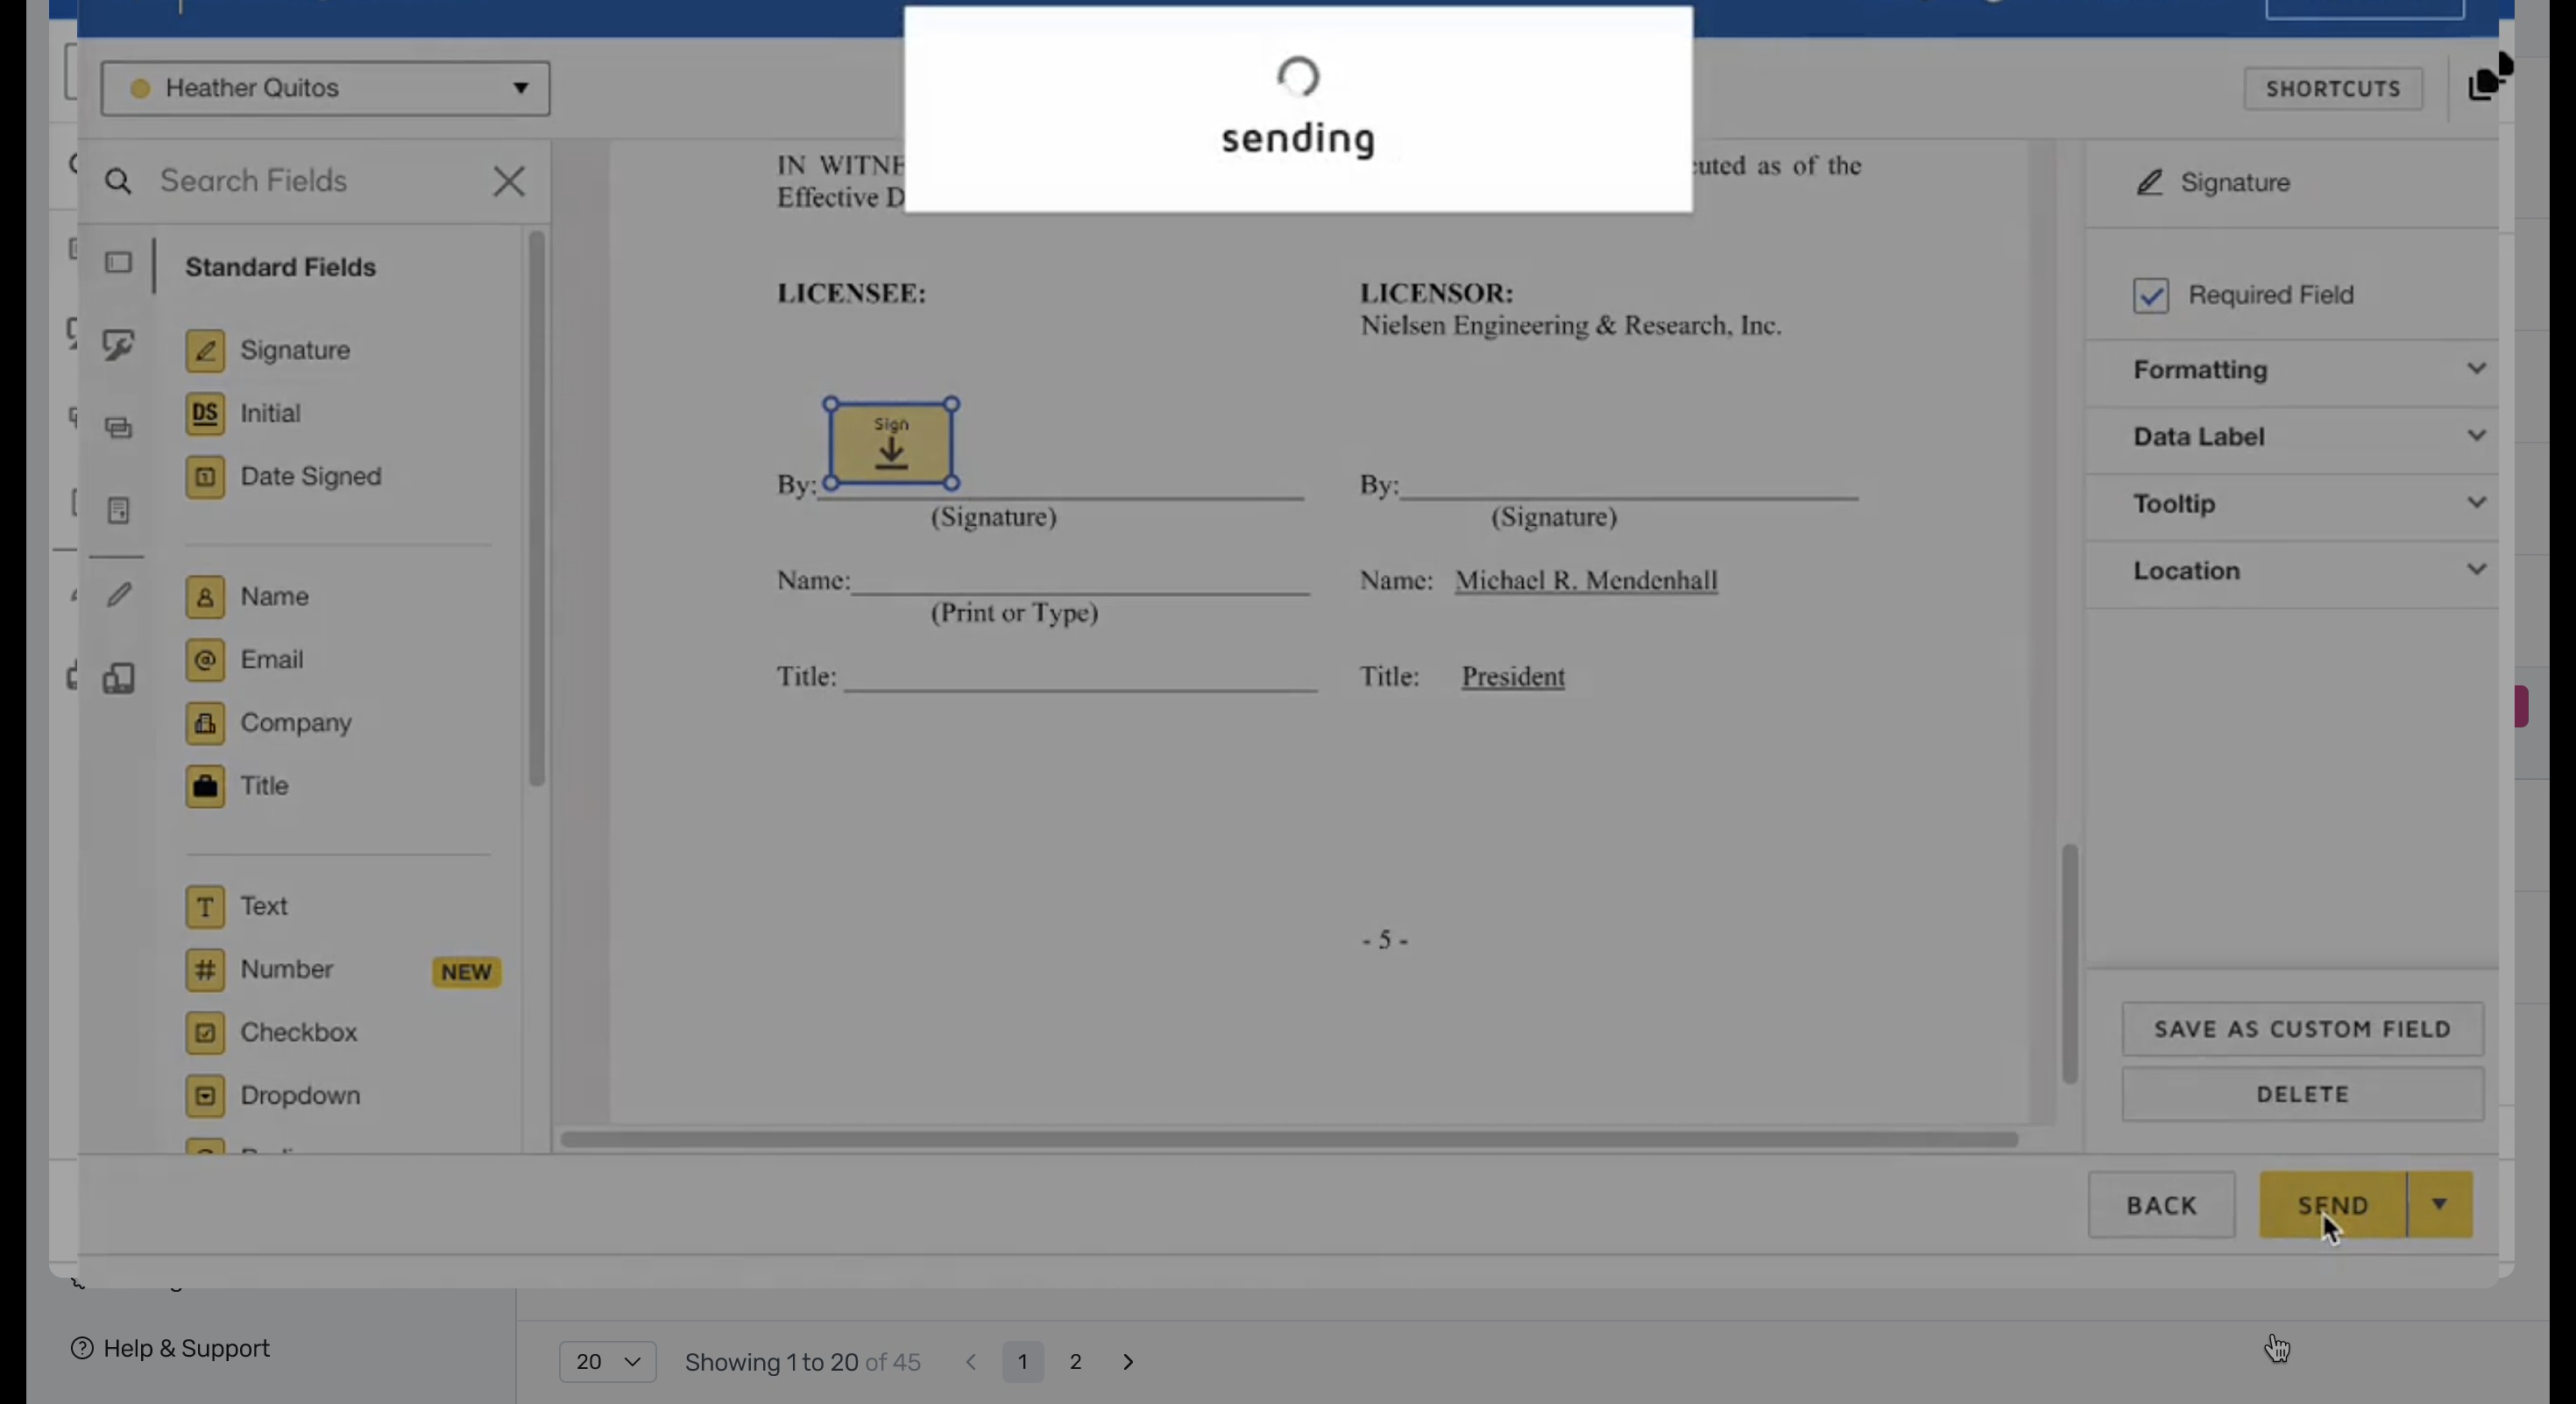
 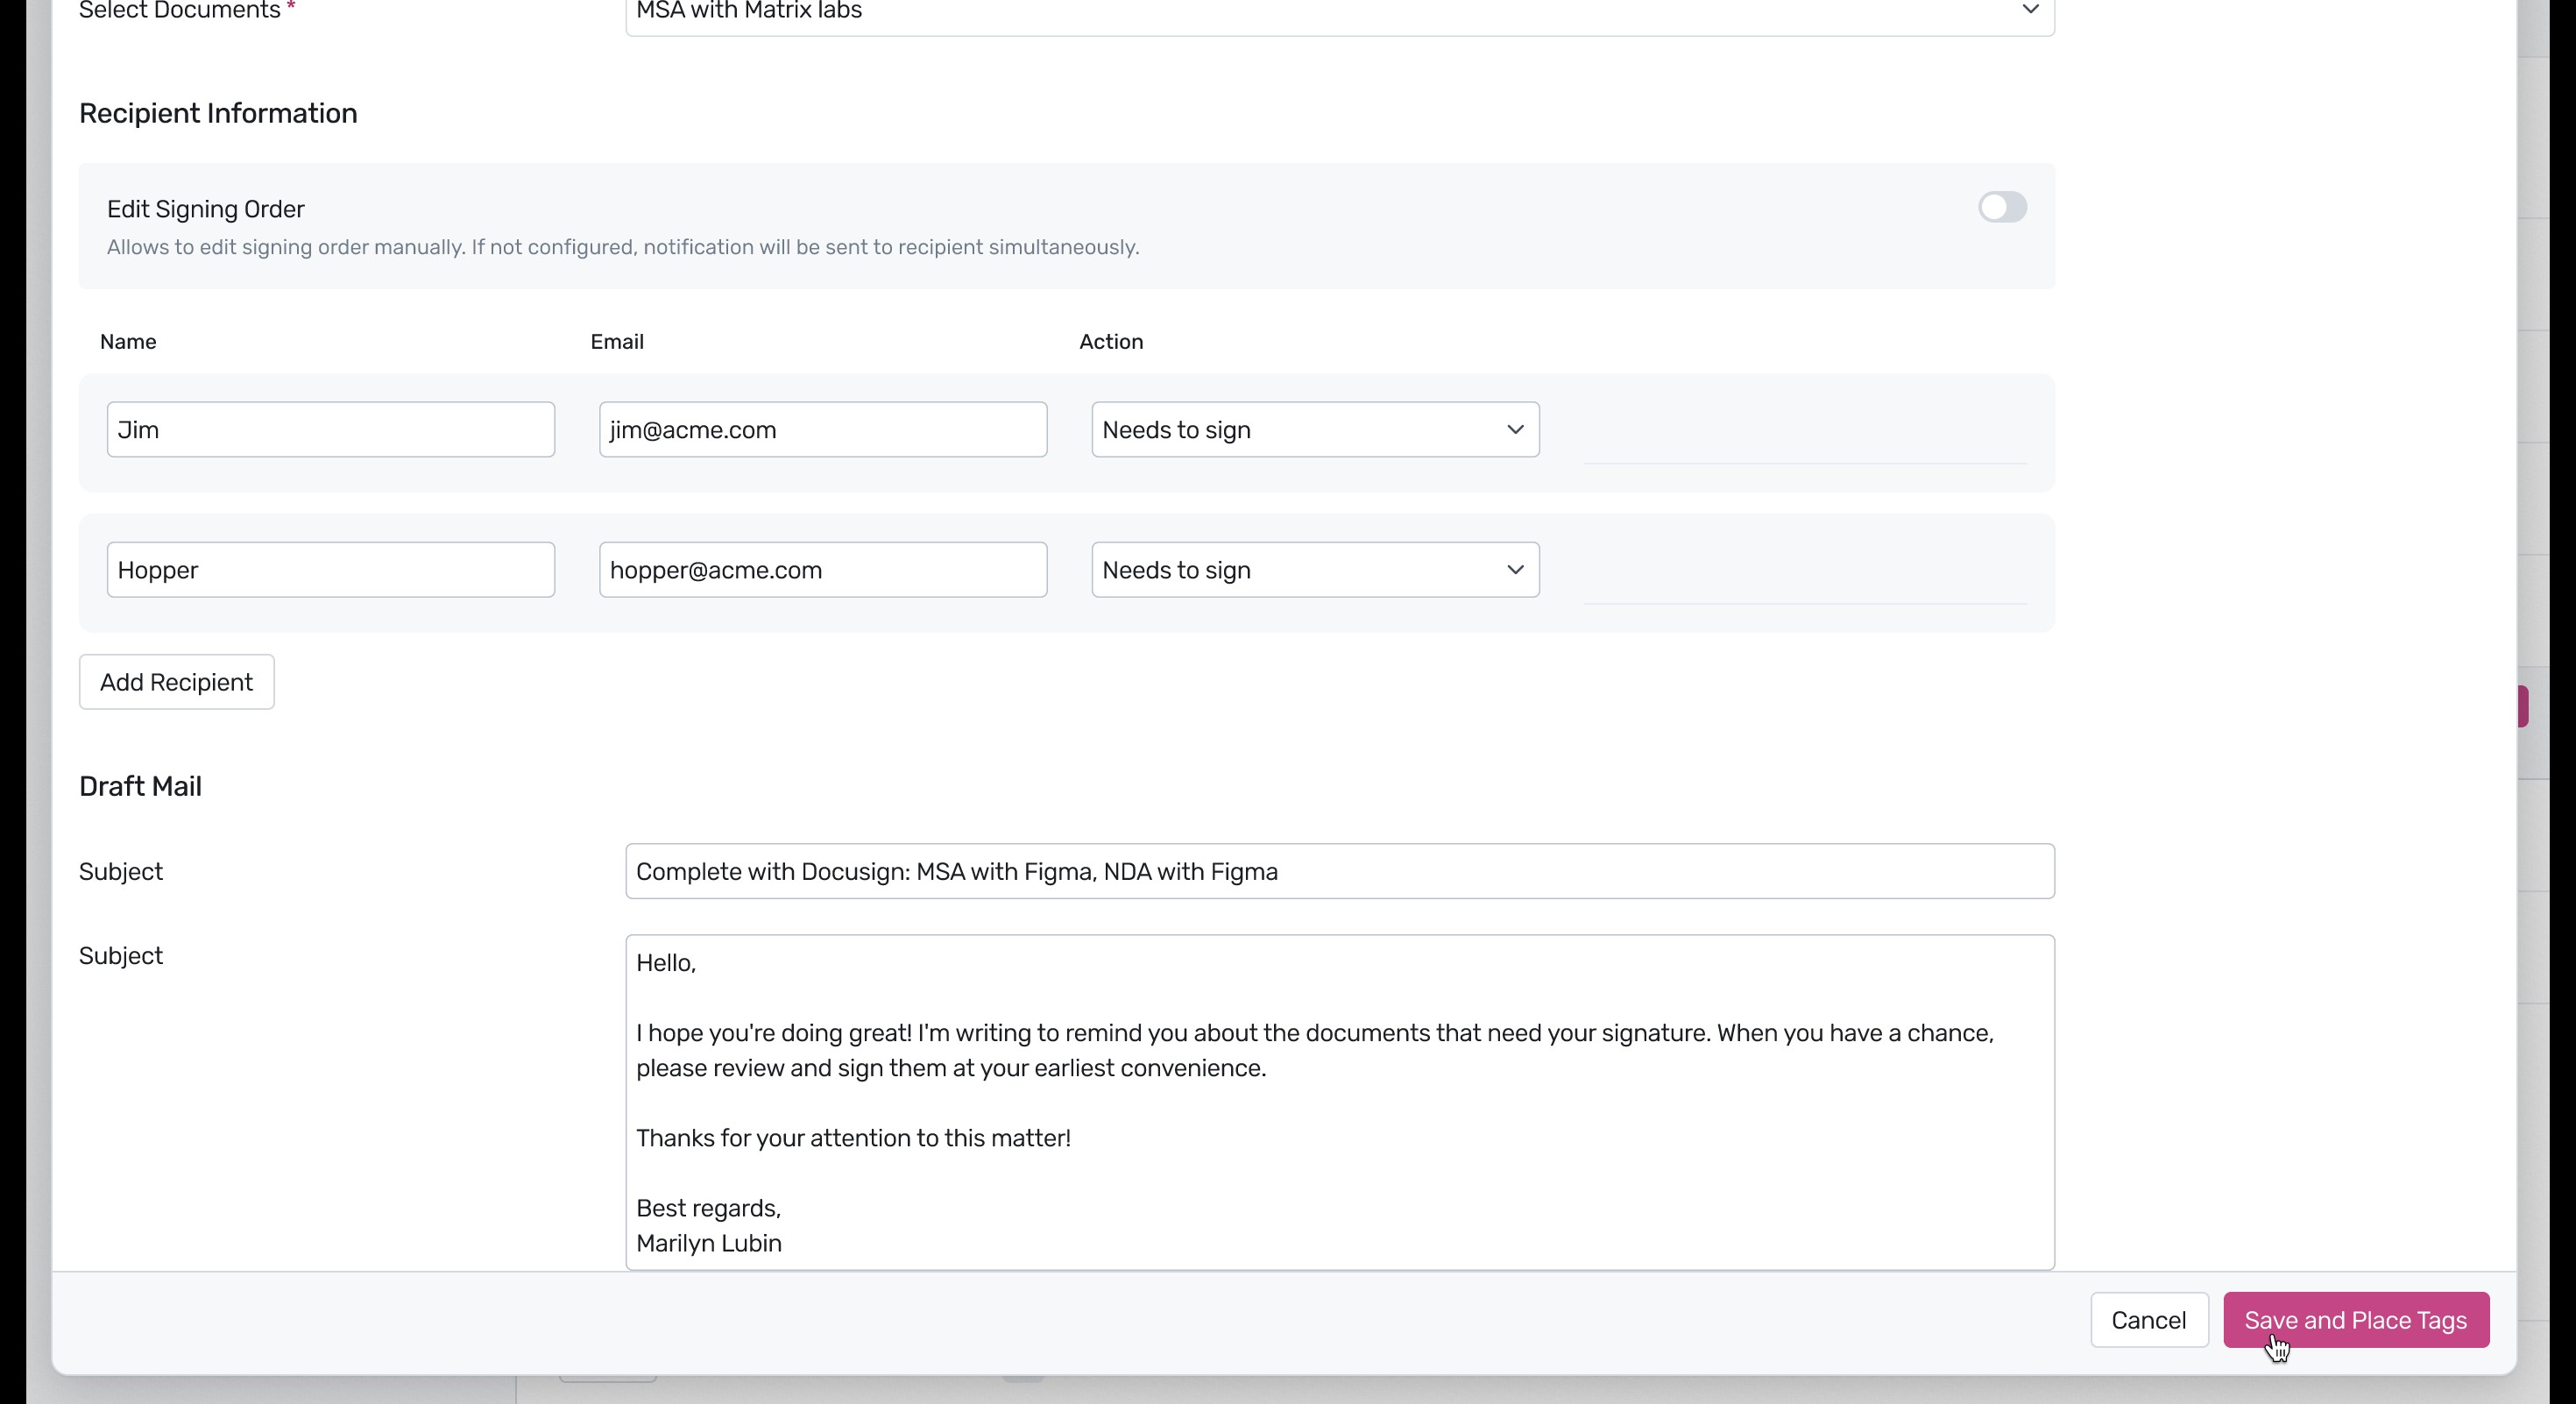 Place signature tags on the document and click Send.
 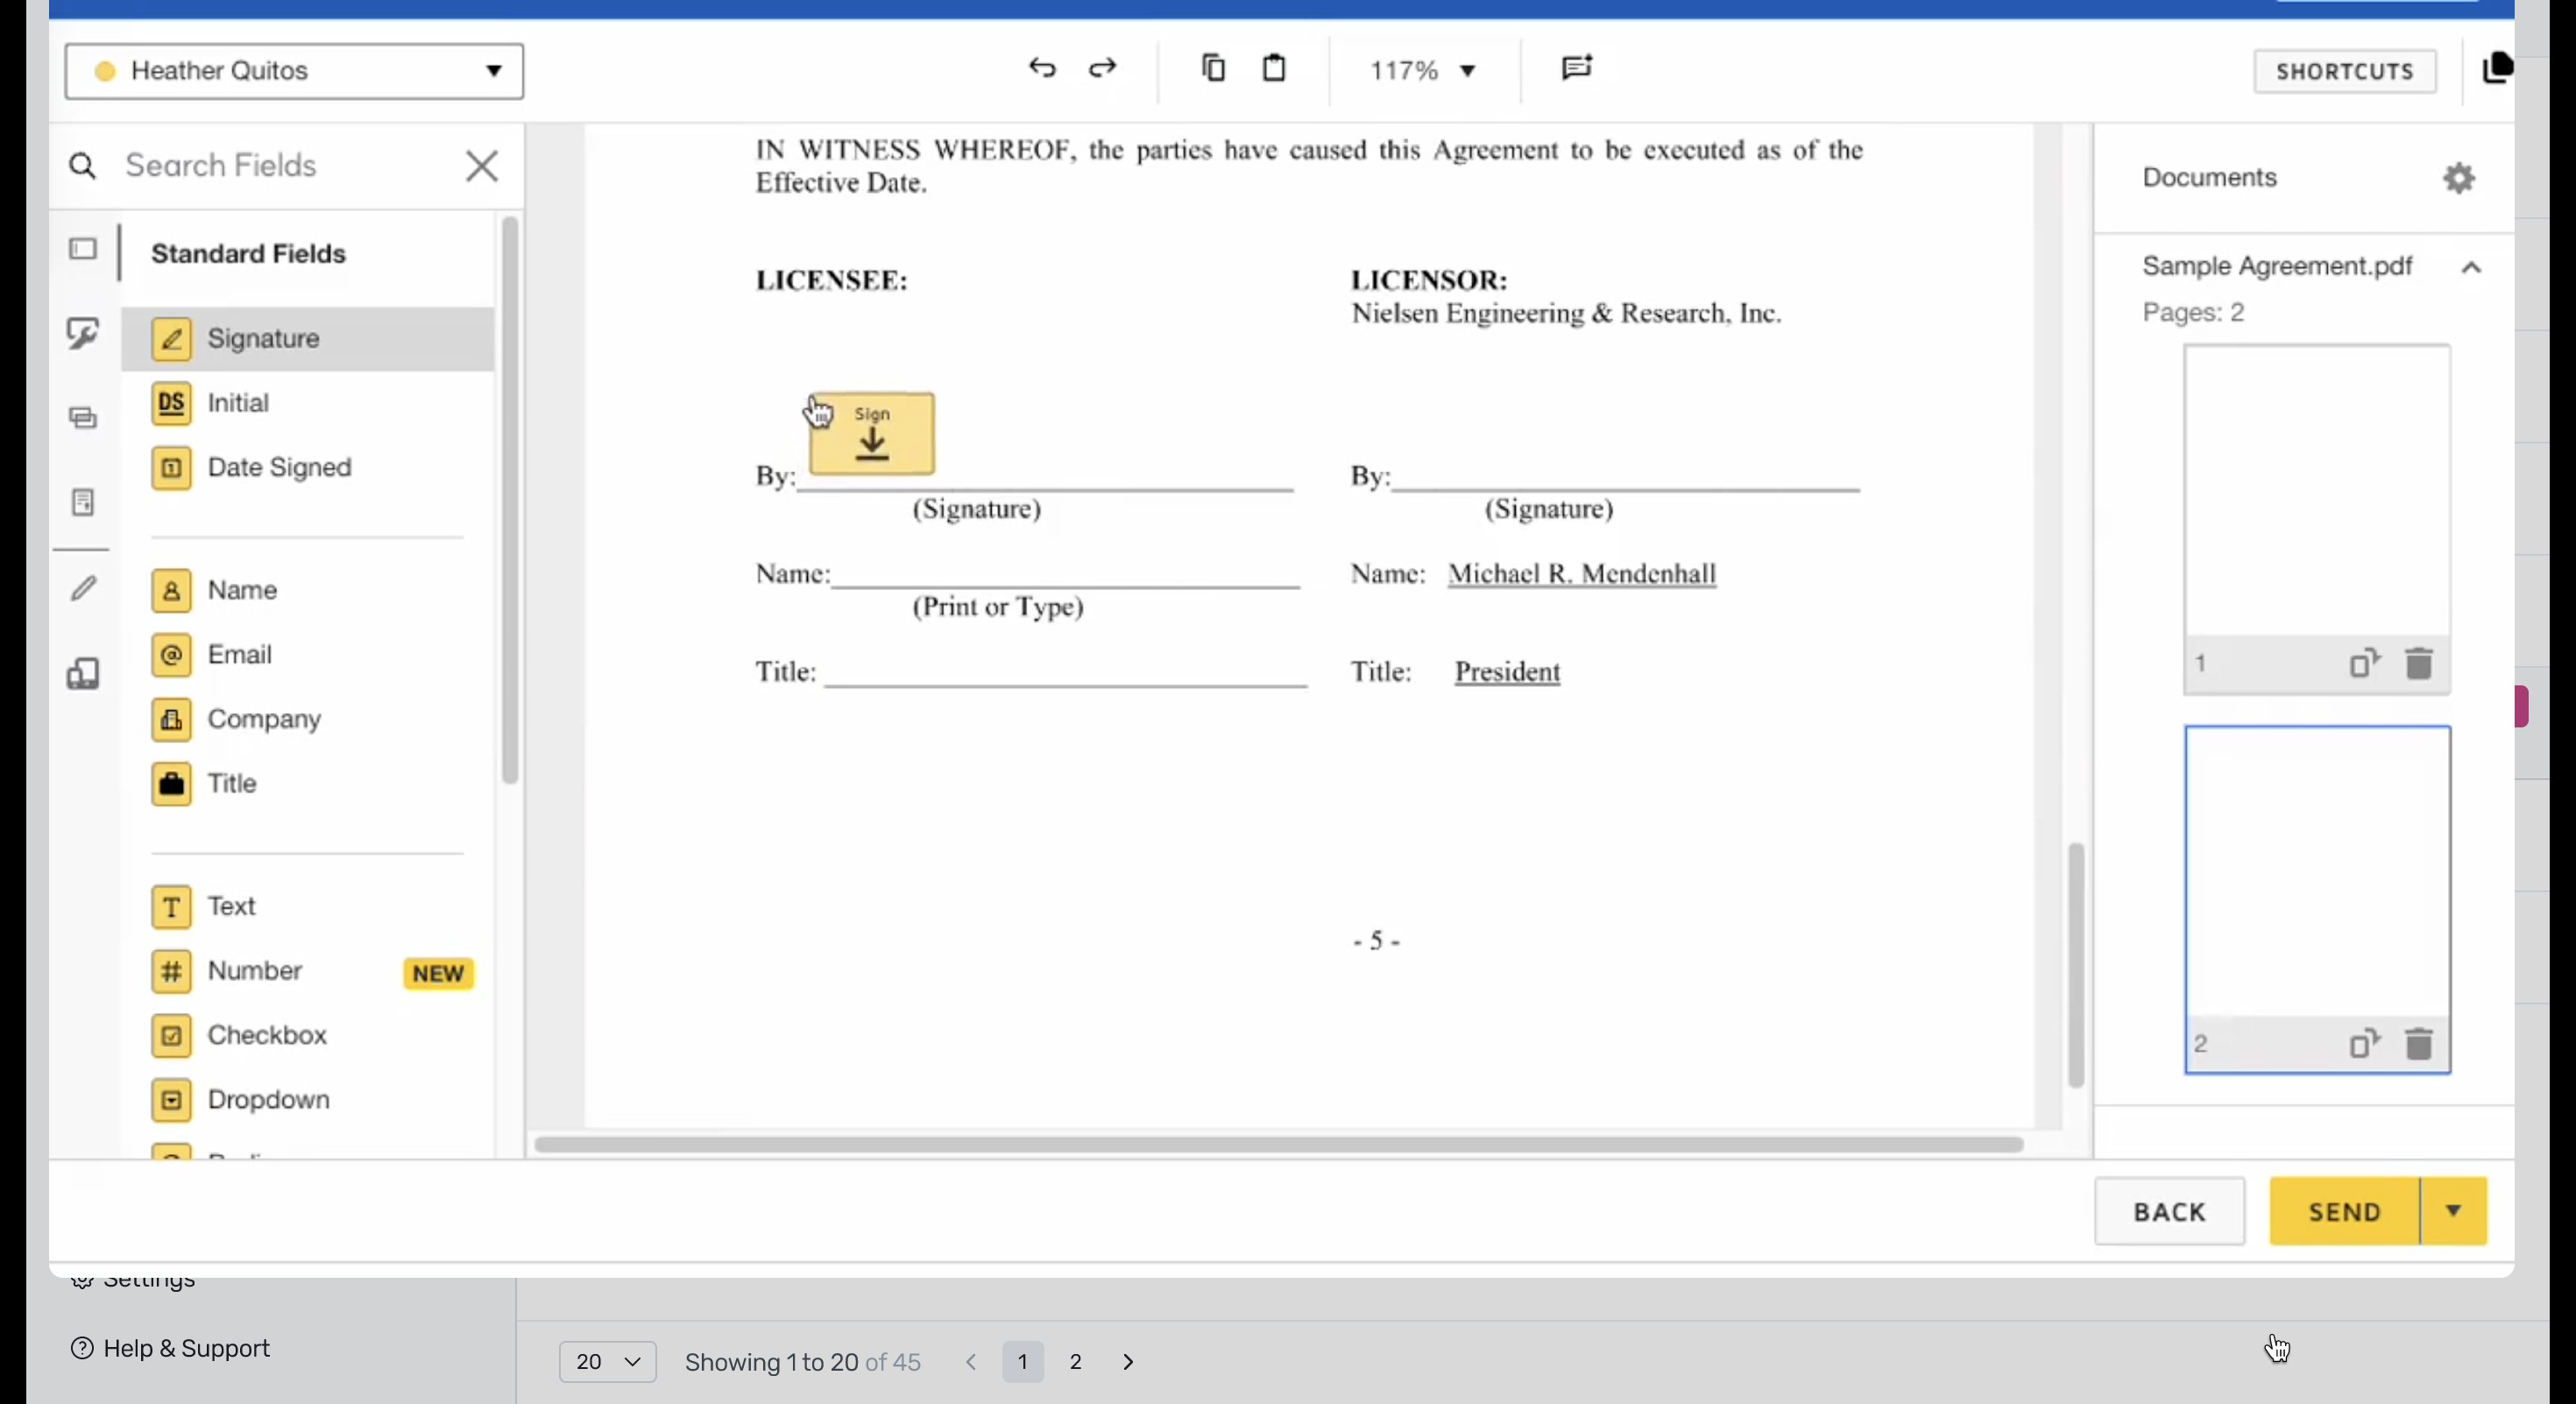 The system will send the document to the recipients.
  The task status will update to Sent. Click Continue Task to open the signing interface.
  The DocuSign signing interface will load.
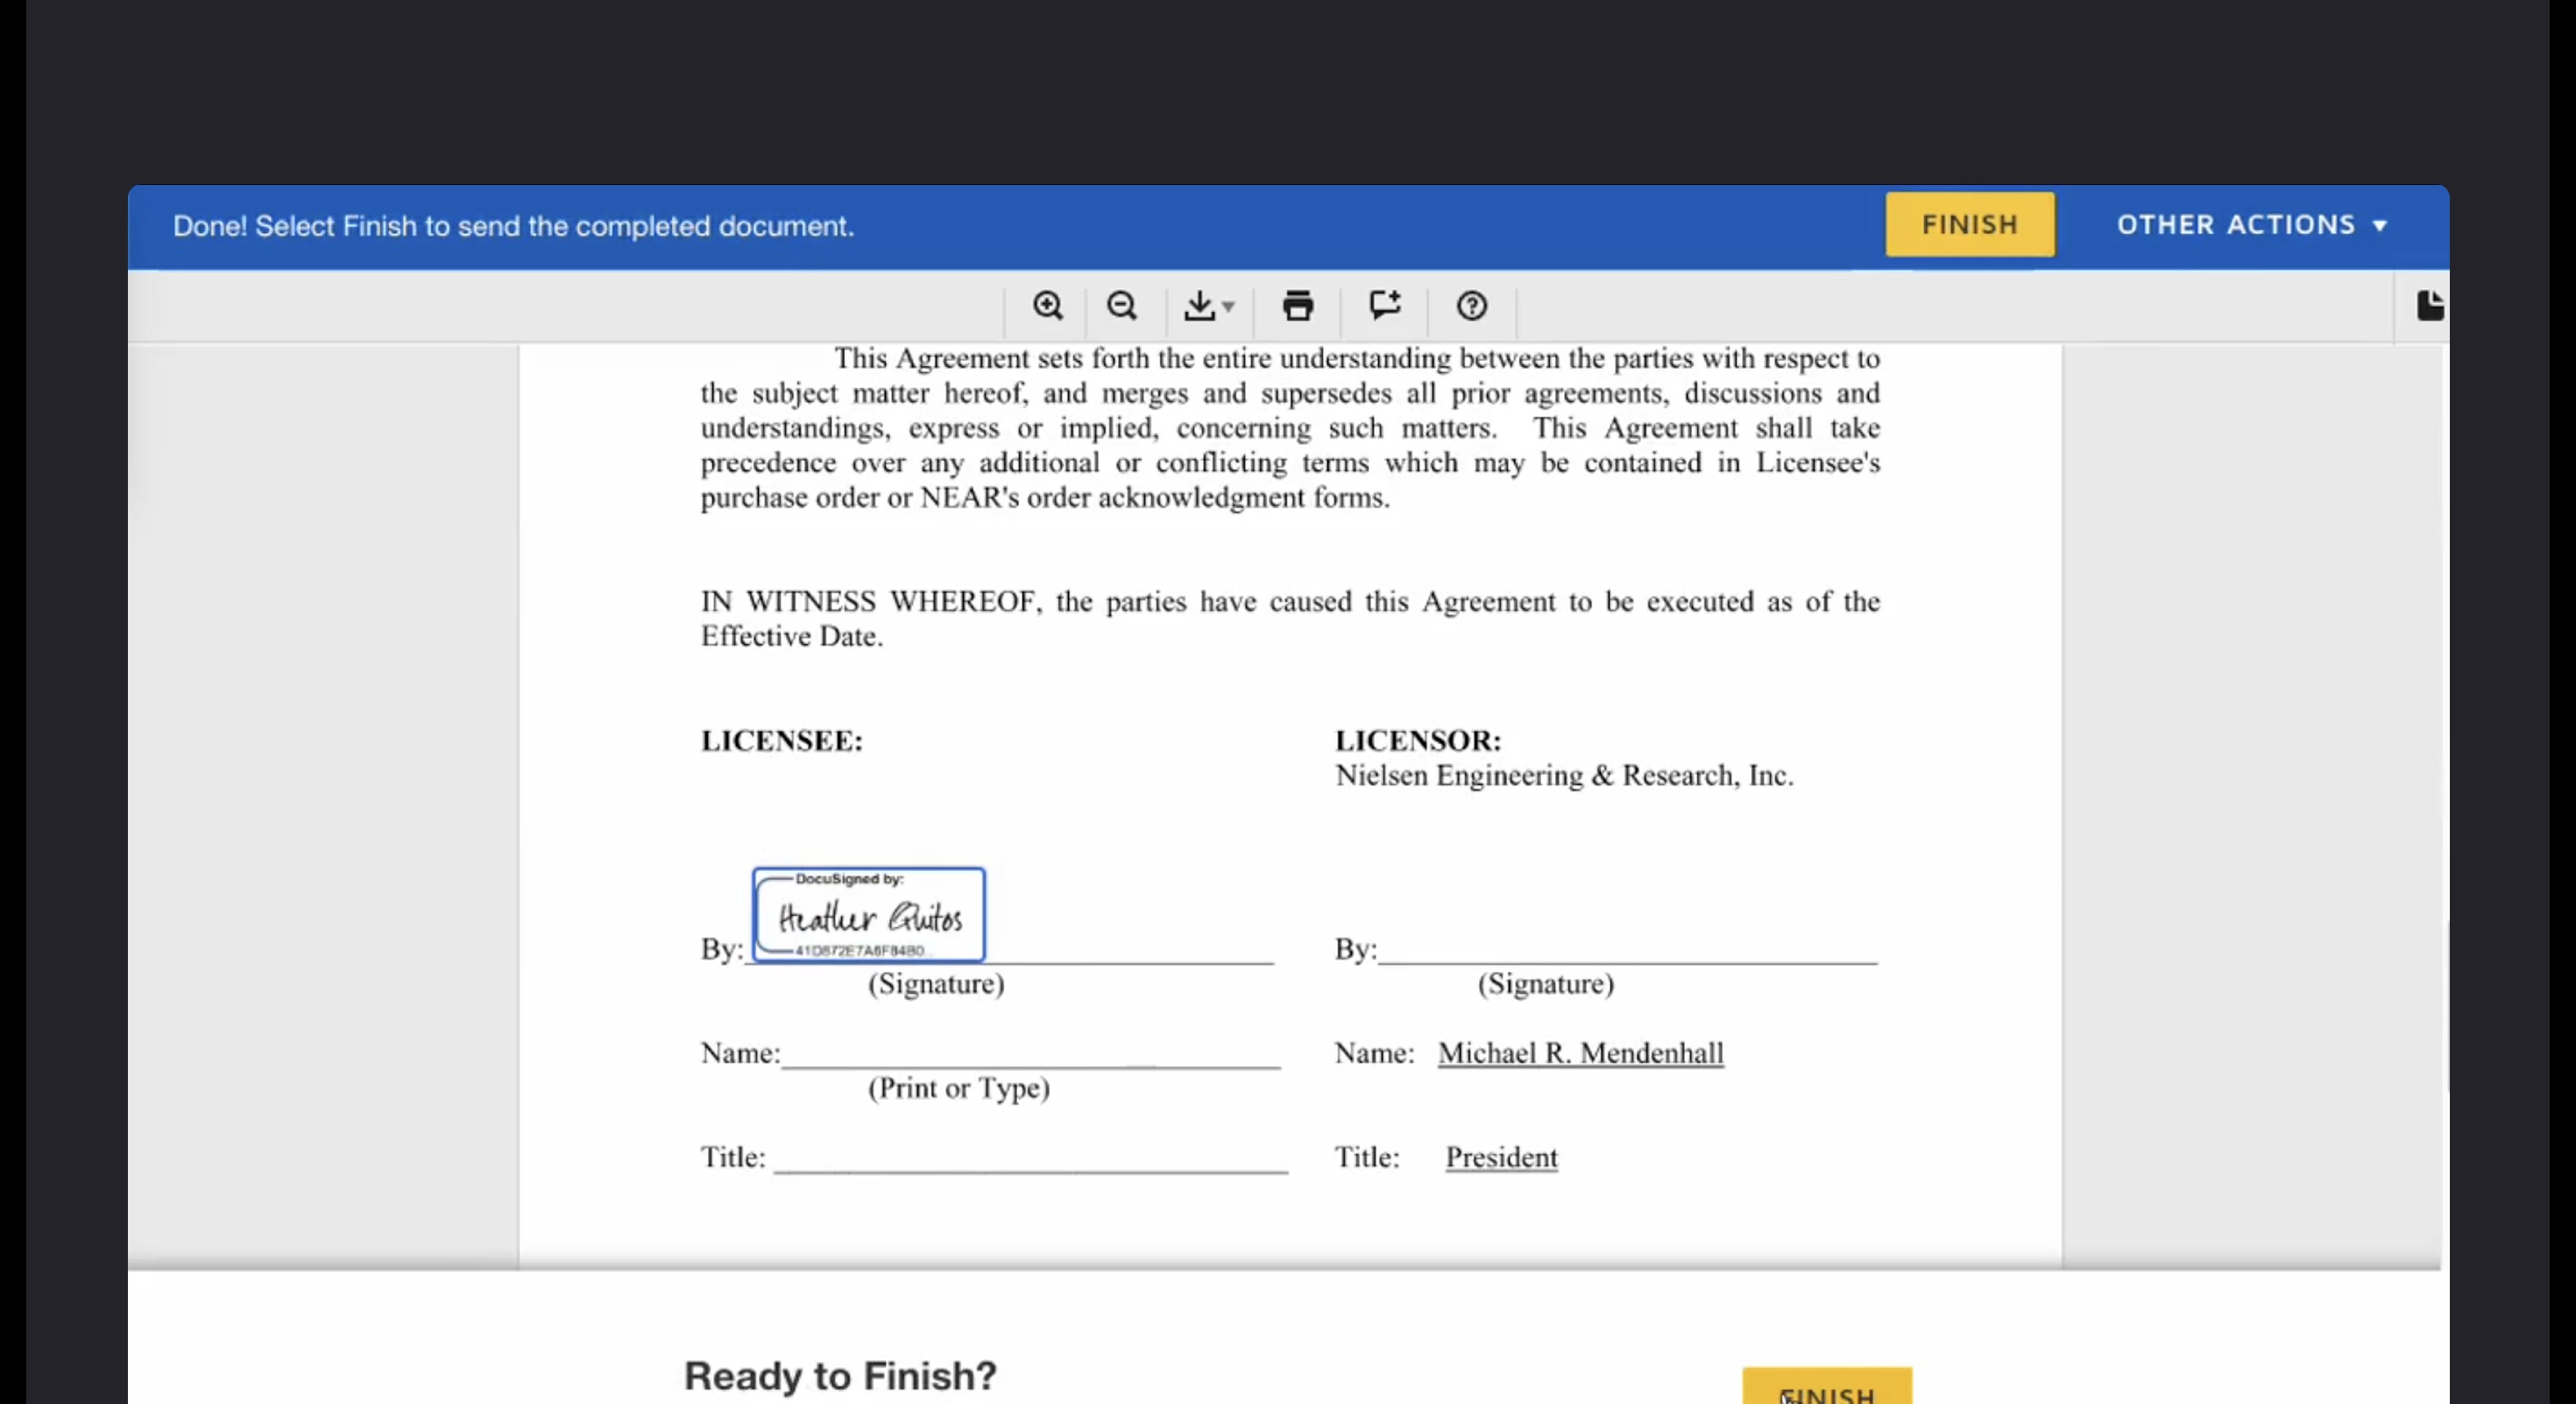
  Click the Sign tag to apply your signature.
 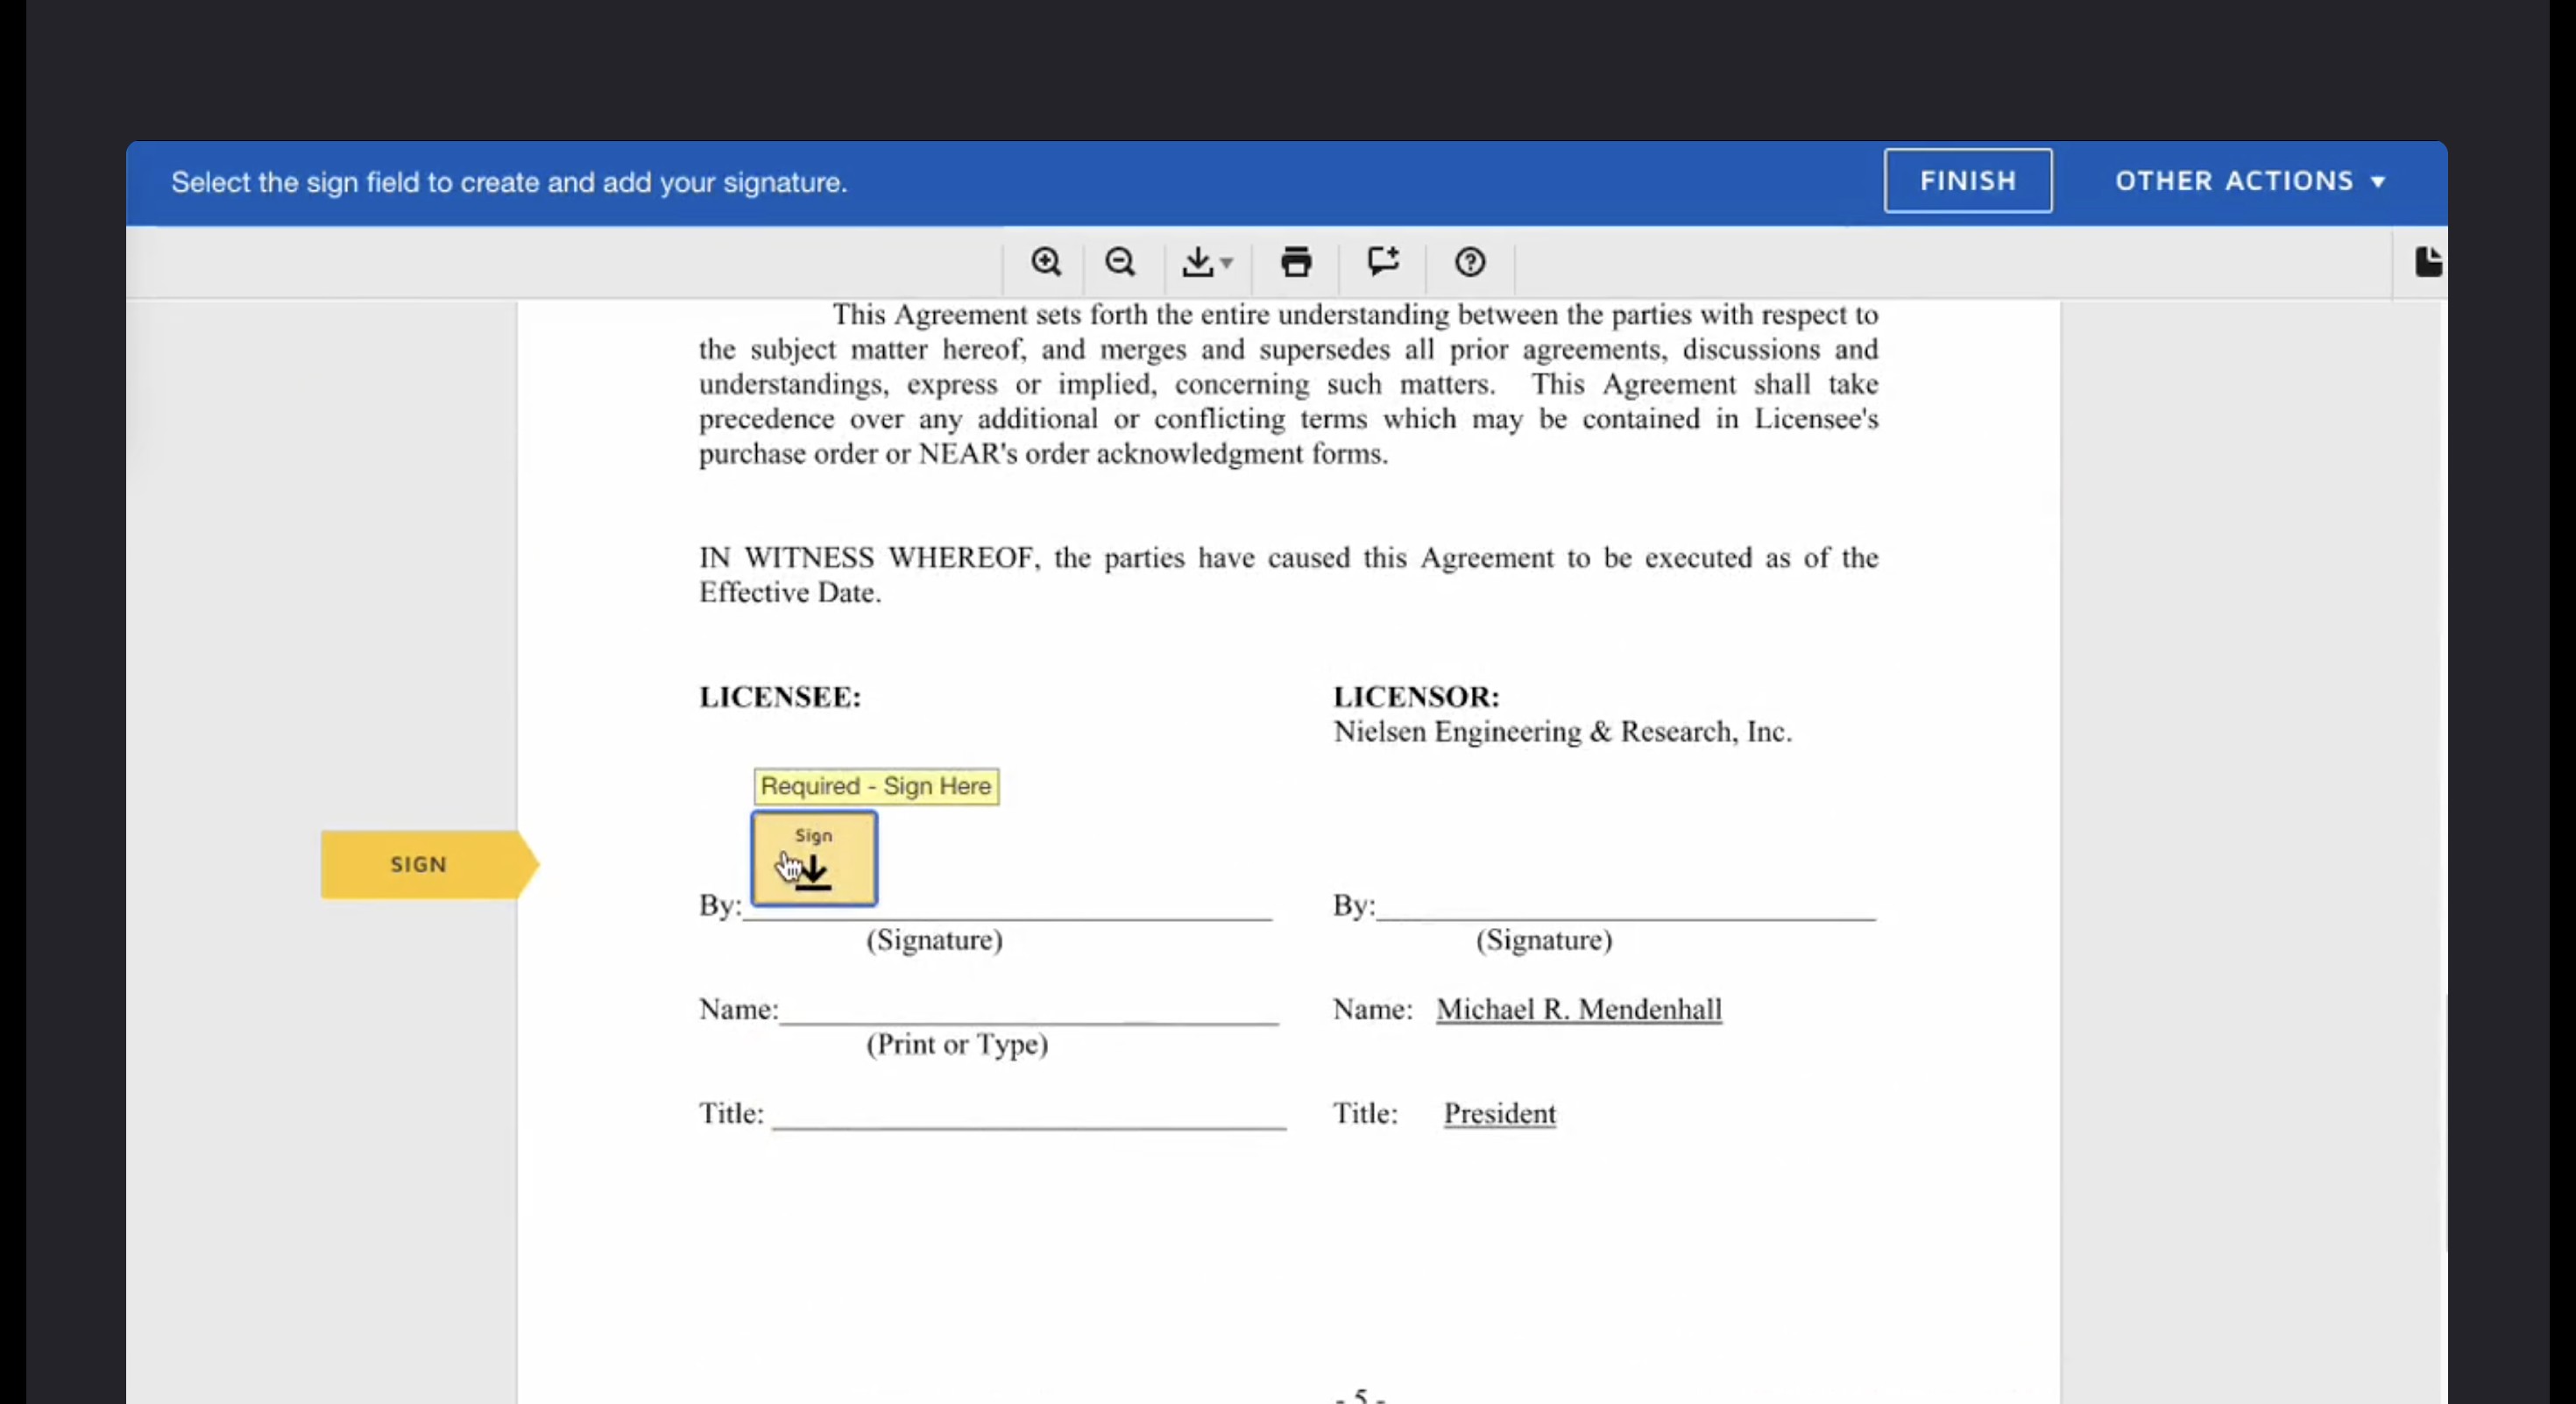 Click Finish to complete the process.
  The workflow diagram will now show the Send Documents for Signature task as fully Completed.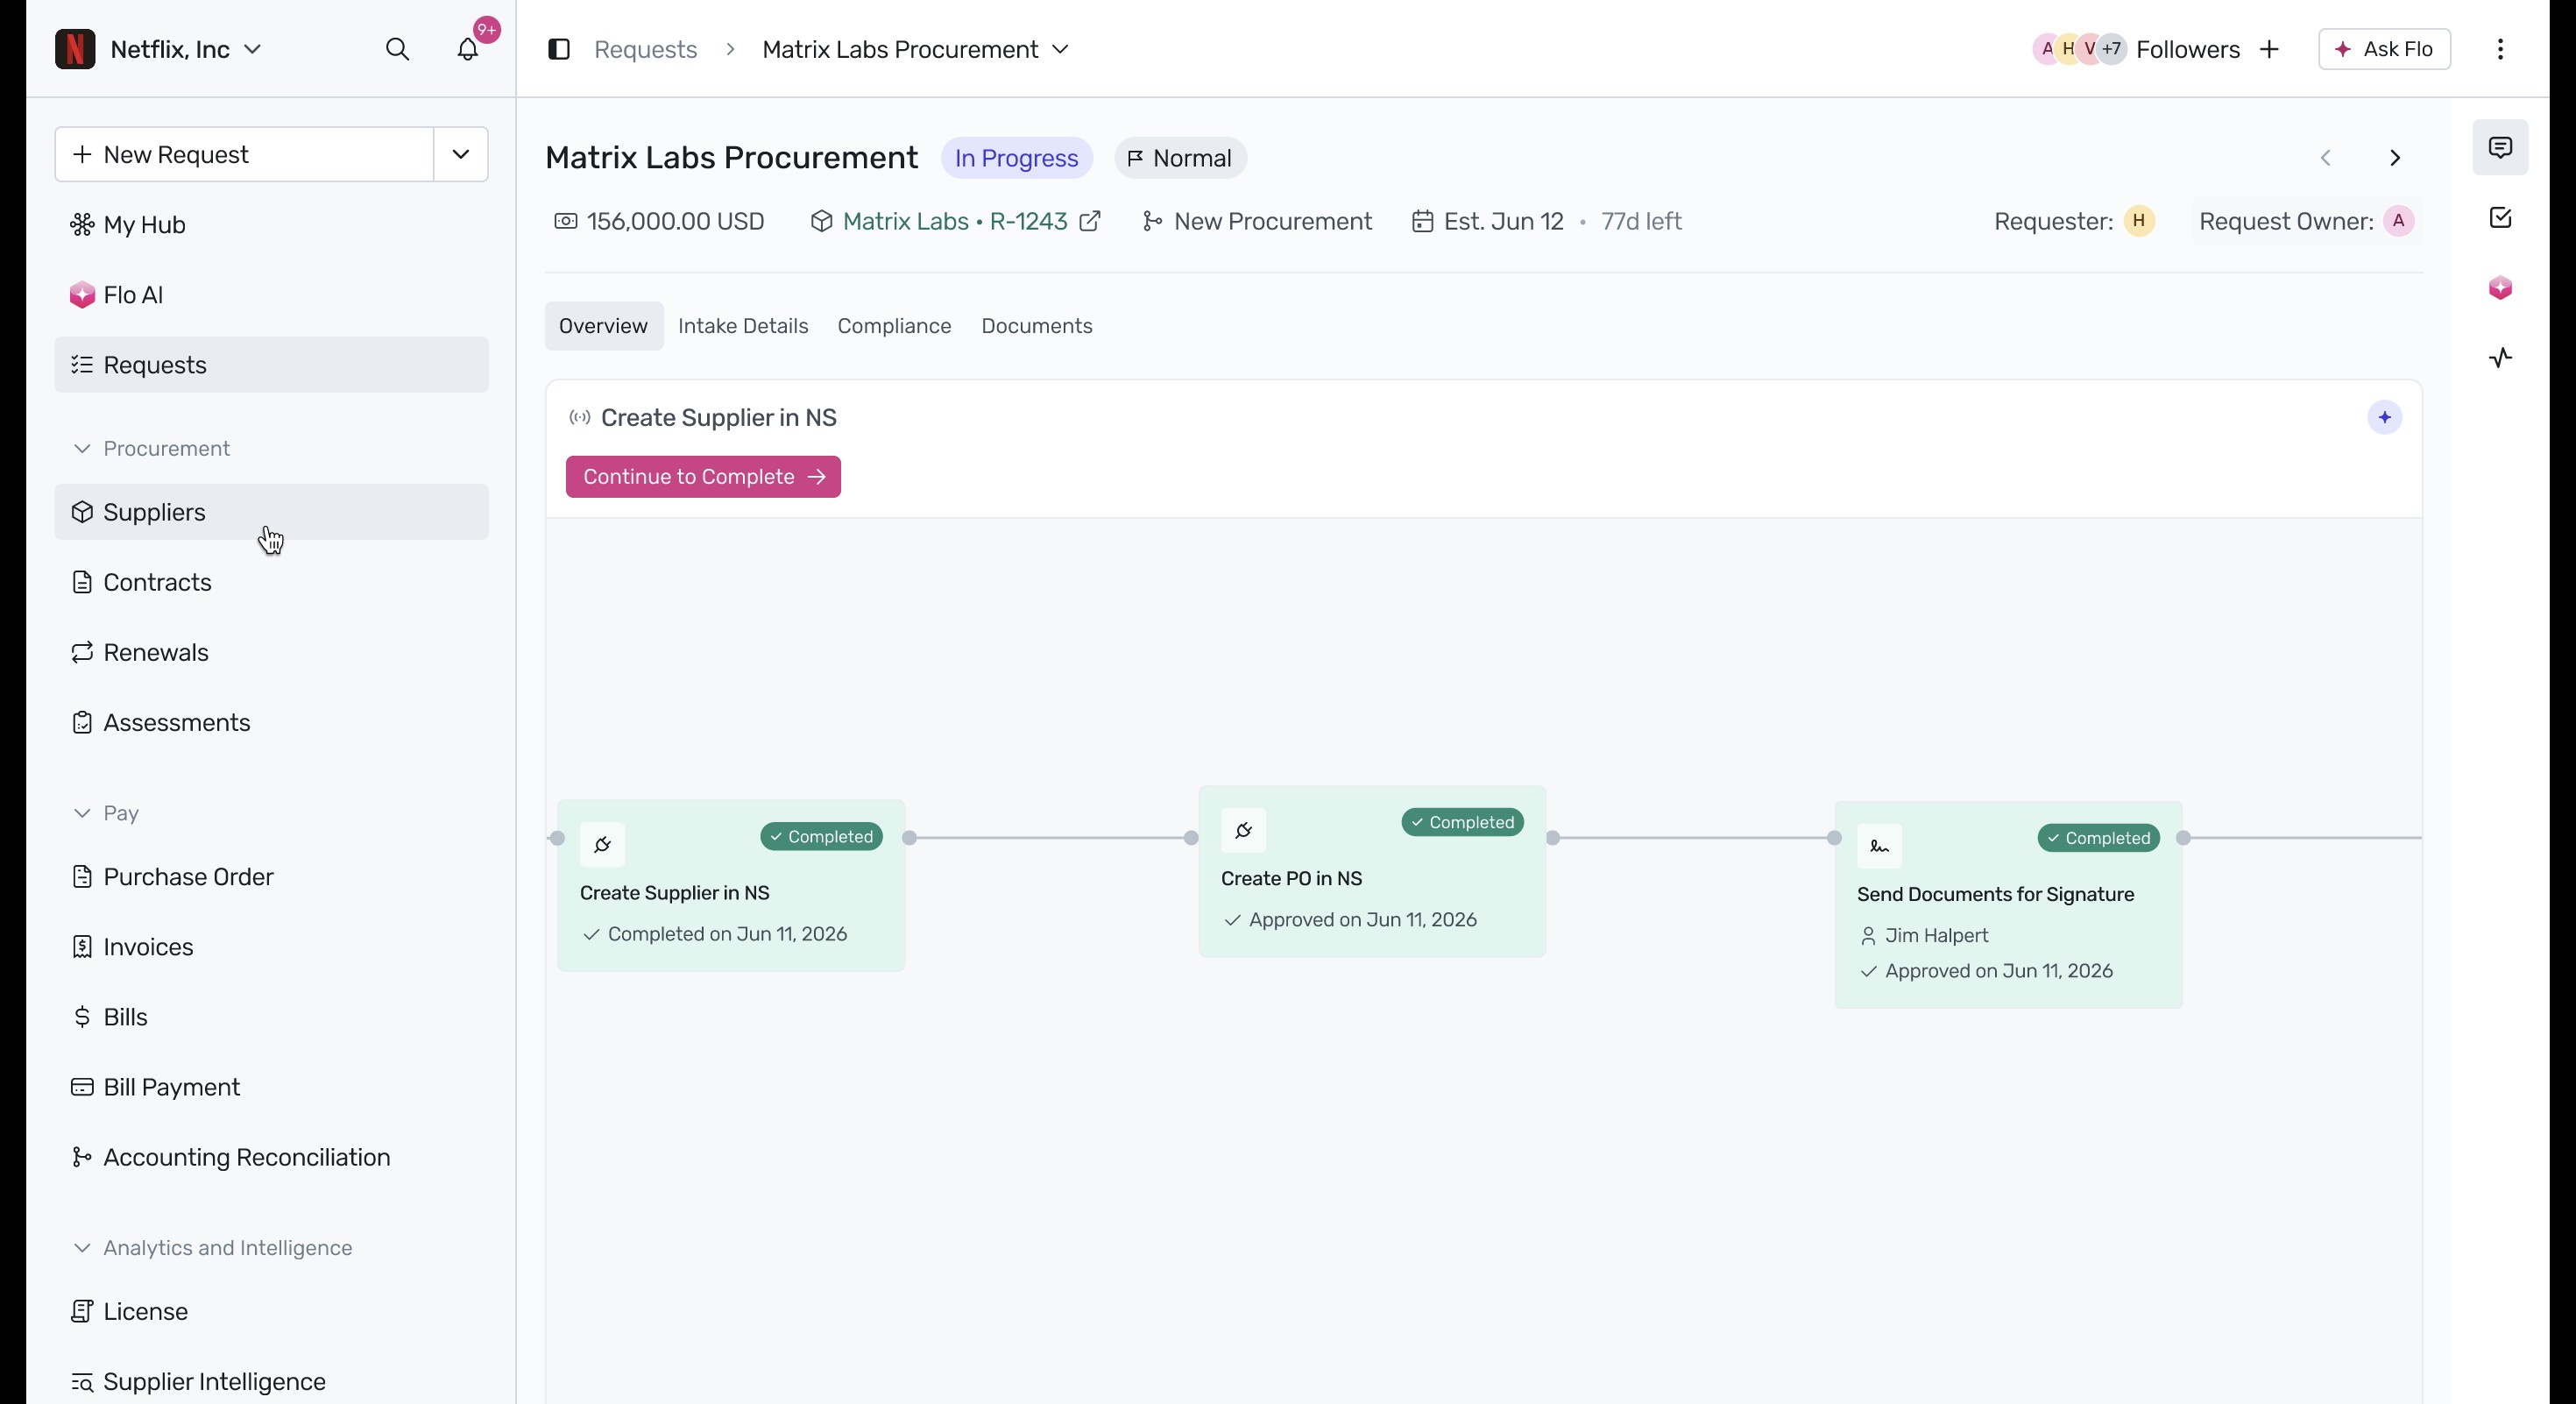
Next Steps
Now that you understand how to navigate the post-submission workflow, you can check out these related resources to optimize your procurement setup:
- To learn how to initiate new requests, see How to raise or create a new request.
- To manage your general workflow tasks, see How to manage workflow tasks and timeline.
- To configure NetSuite ERP syncs, see Netsuite ERP Integration.
Was this article helpful?
That’s Great!
Thank you for your feedback
Sorry! We couldn't be helpful
Thank you for your feedback
Feedback sent
We appreciate your effort and will try to fix the article