Managing and approving bills is a critical step in maintaining financial control and ensuring accurate SaaS spend tracking. Spendflo allows finance and procurement teams to seamlessly review, verify, and approve bills, as well as record payments directly within the platform. This streamlined process ensures that all invoices align with active purchase orders and are correctly accounted for in your financial records.
How to Review, Approve, and Pay a Bill
Follow these steps to review a pending bill, verify its purchase order match, approve it, and mark it as paid:
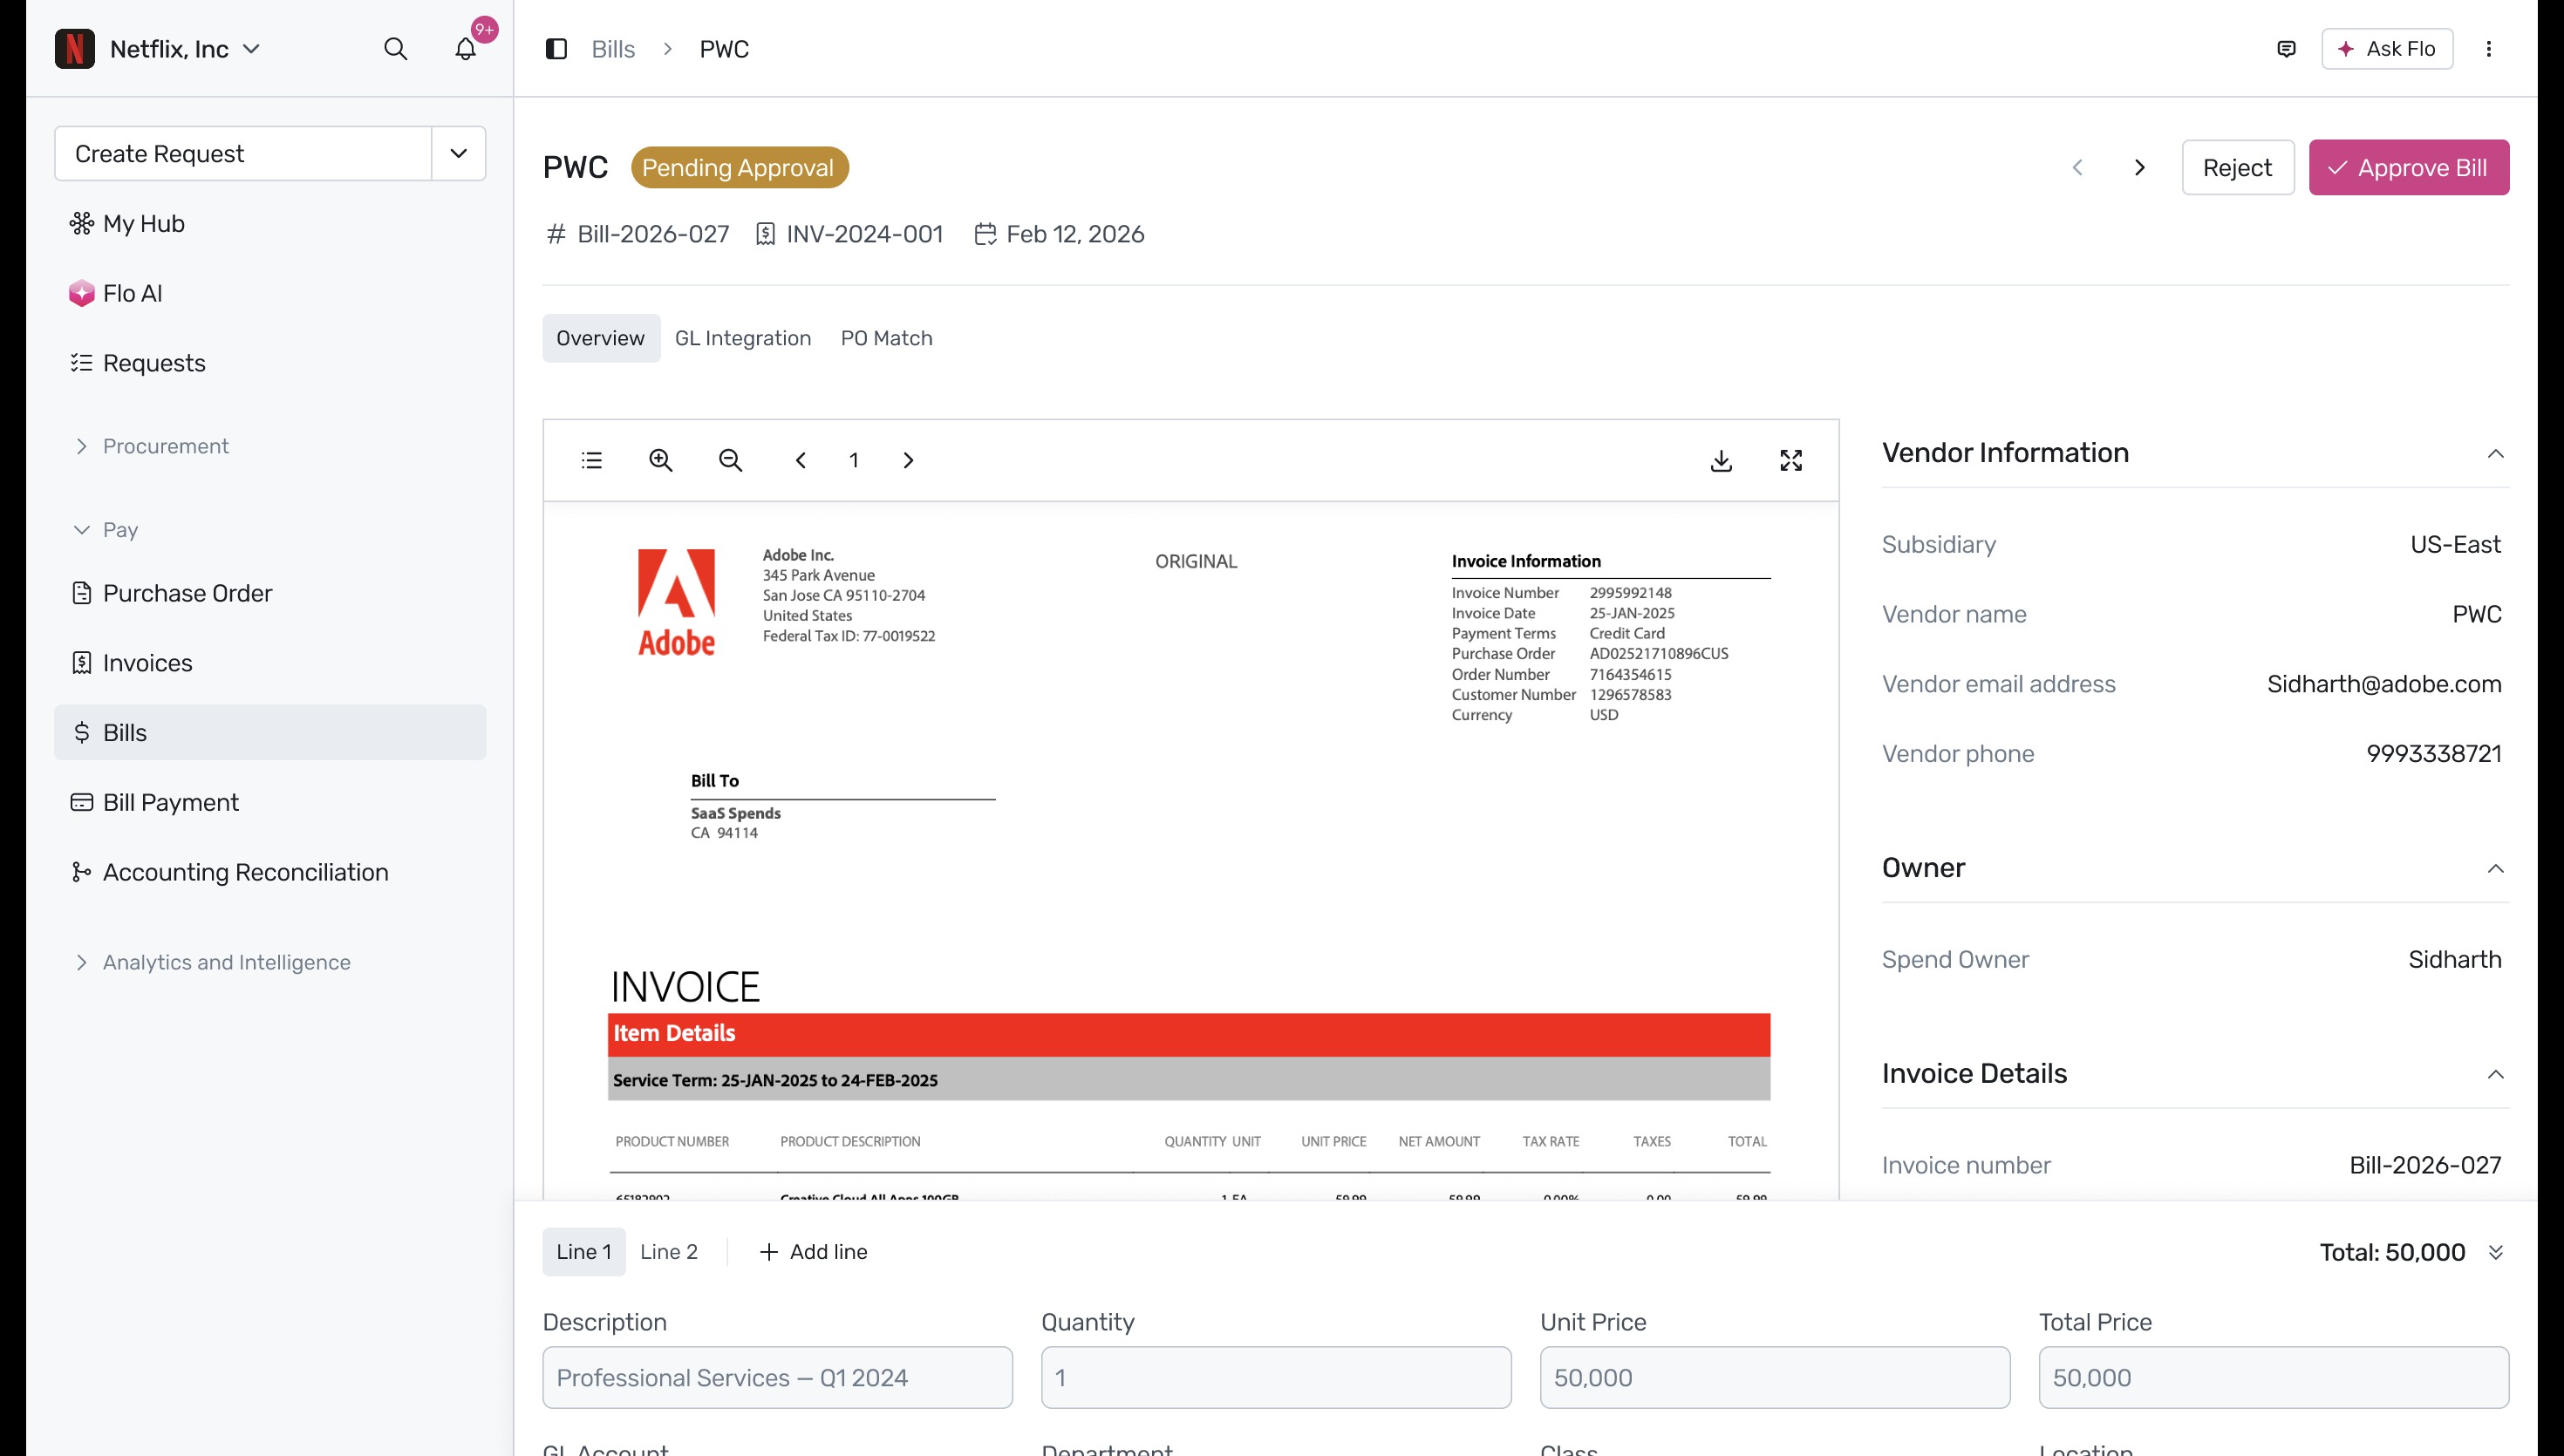
Review the bill overview: Navigate to the Bills section in the left navigation menu and select the bill that is currently pending approval. On the bill details page, review the uploaded invoice document, vendor information, spend owner details, and individual line items.
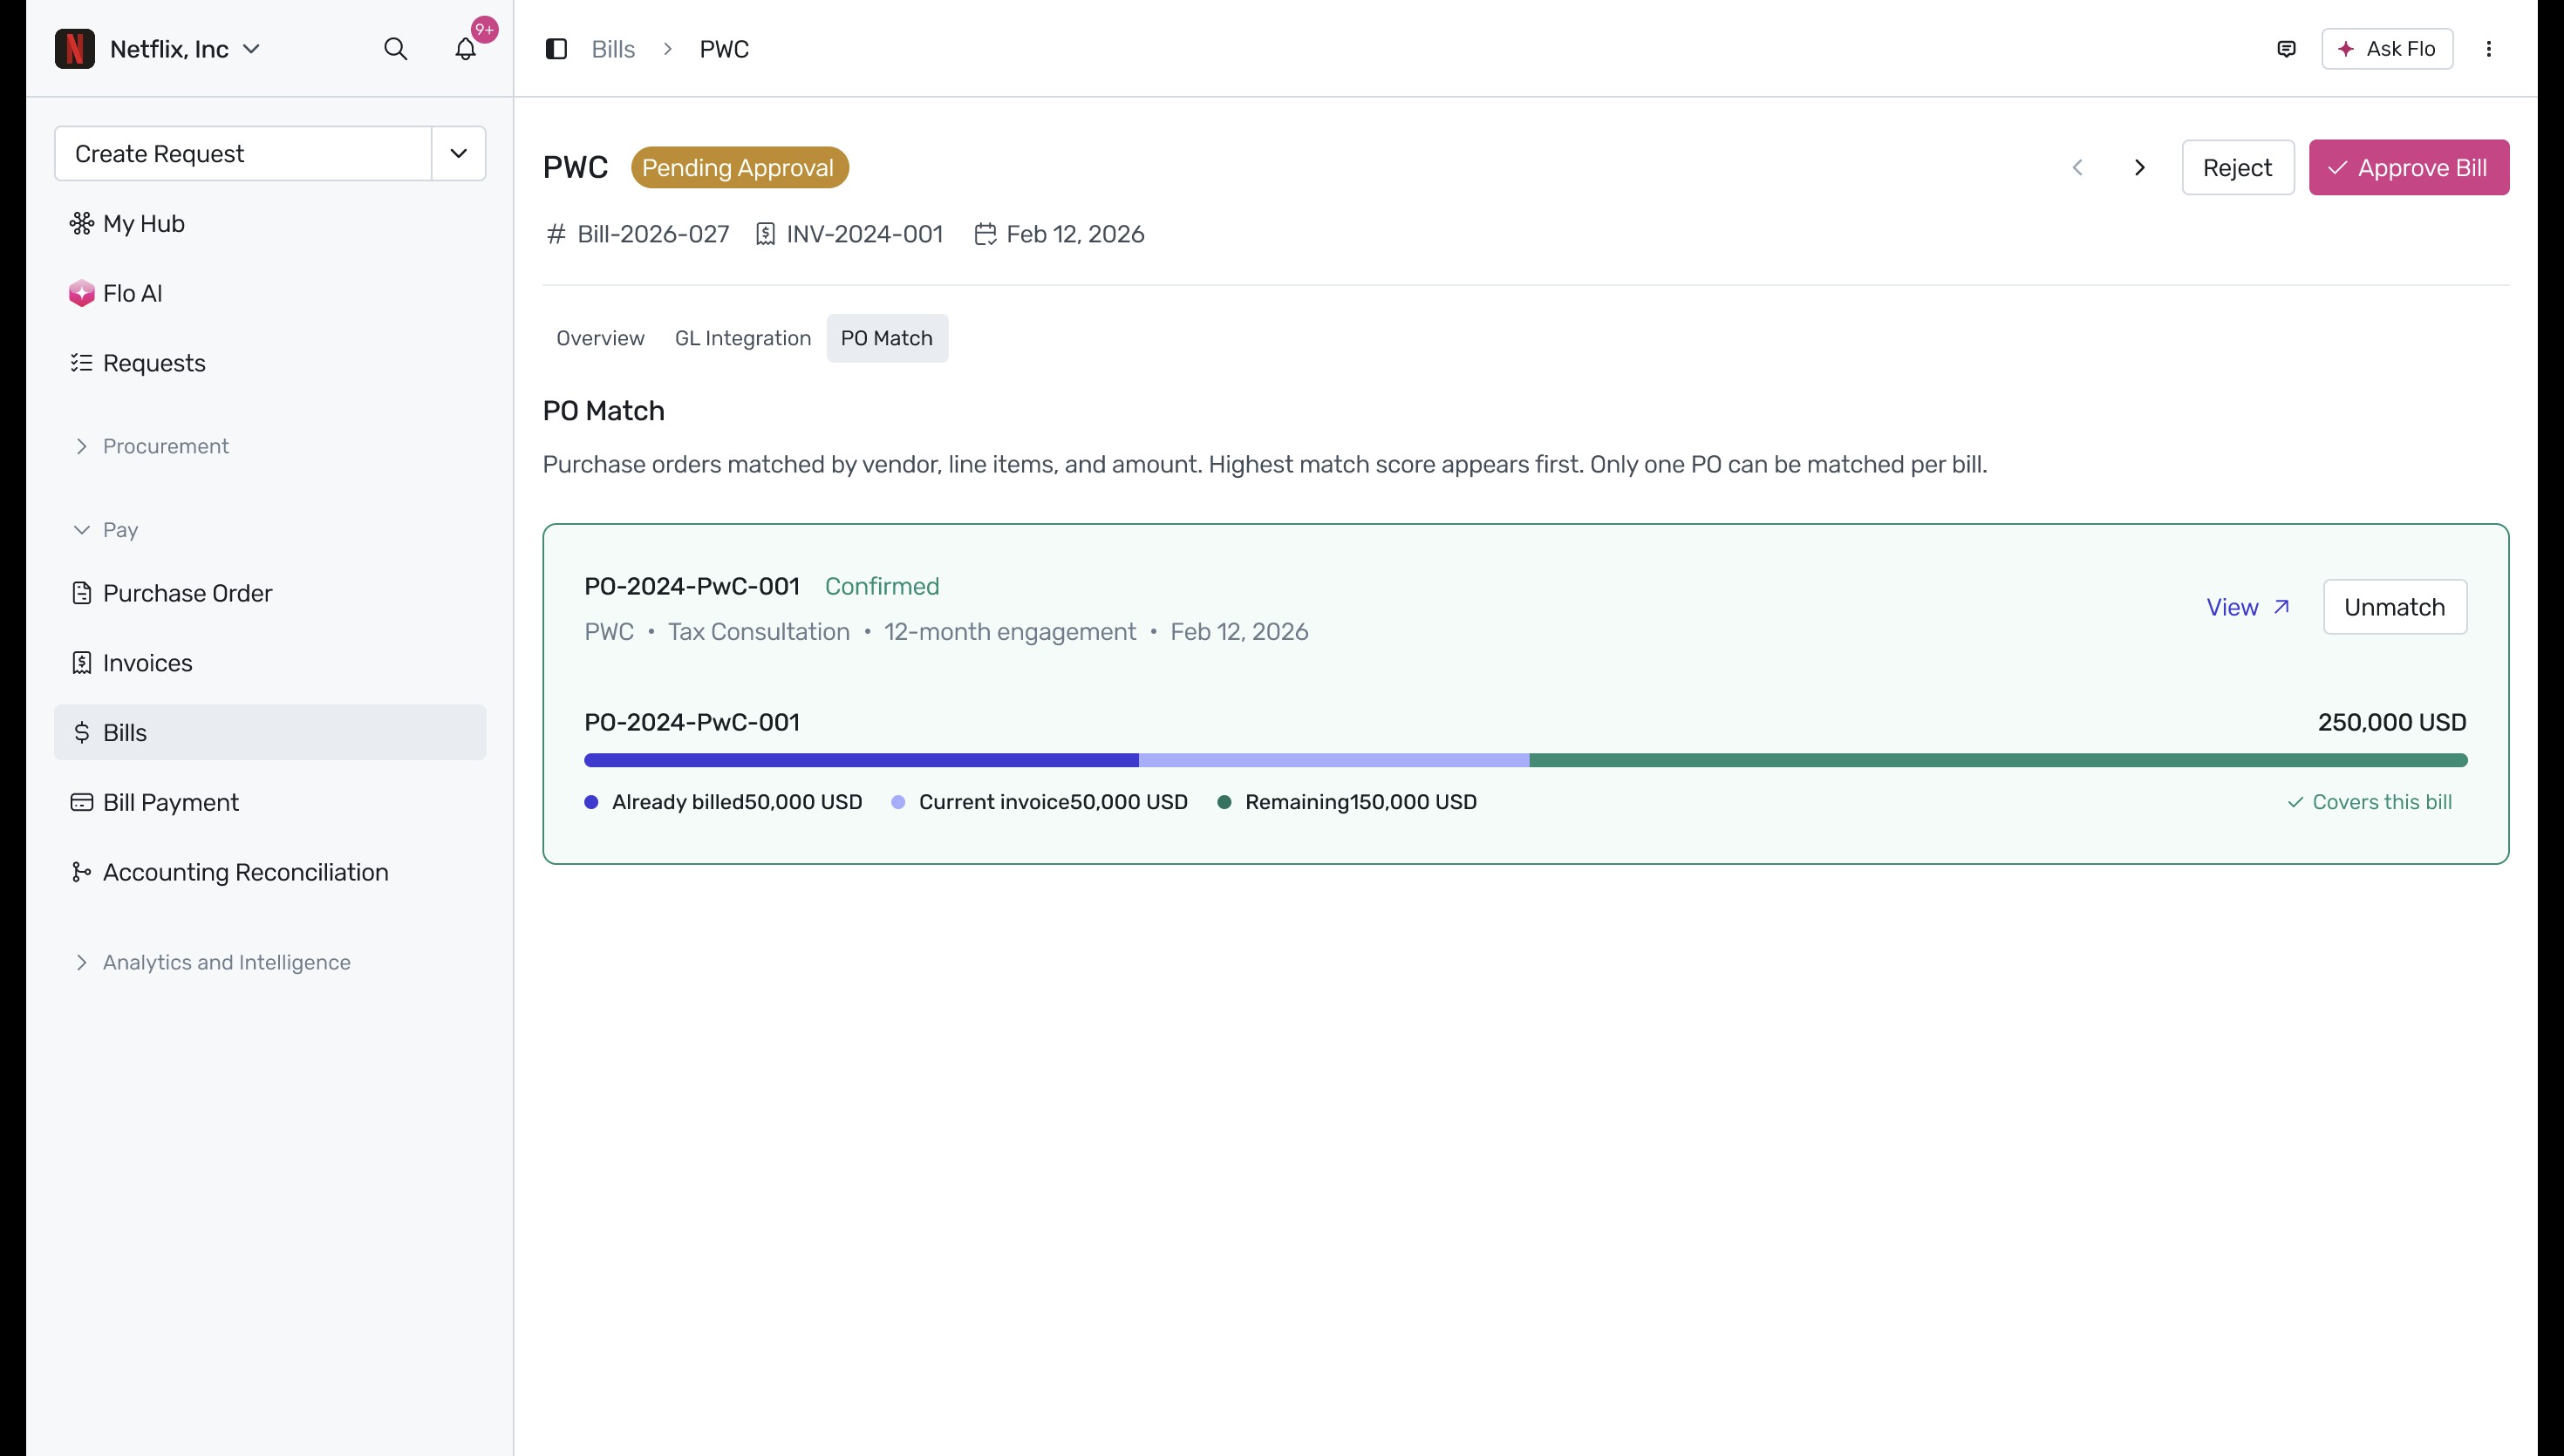
Verify the Purchase Order (PO) match: Click the PO Match tab to verify that the bill corresponds to an active purchase order. This tab displays the matched PO details, including the total PO amount, the amount already billed, the current invoice amount, and the remaining balance to ensure everything aligns correctly.
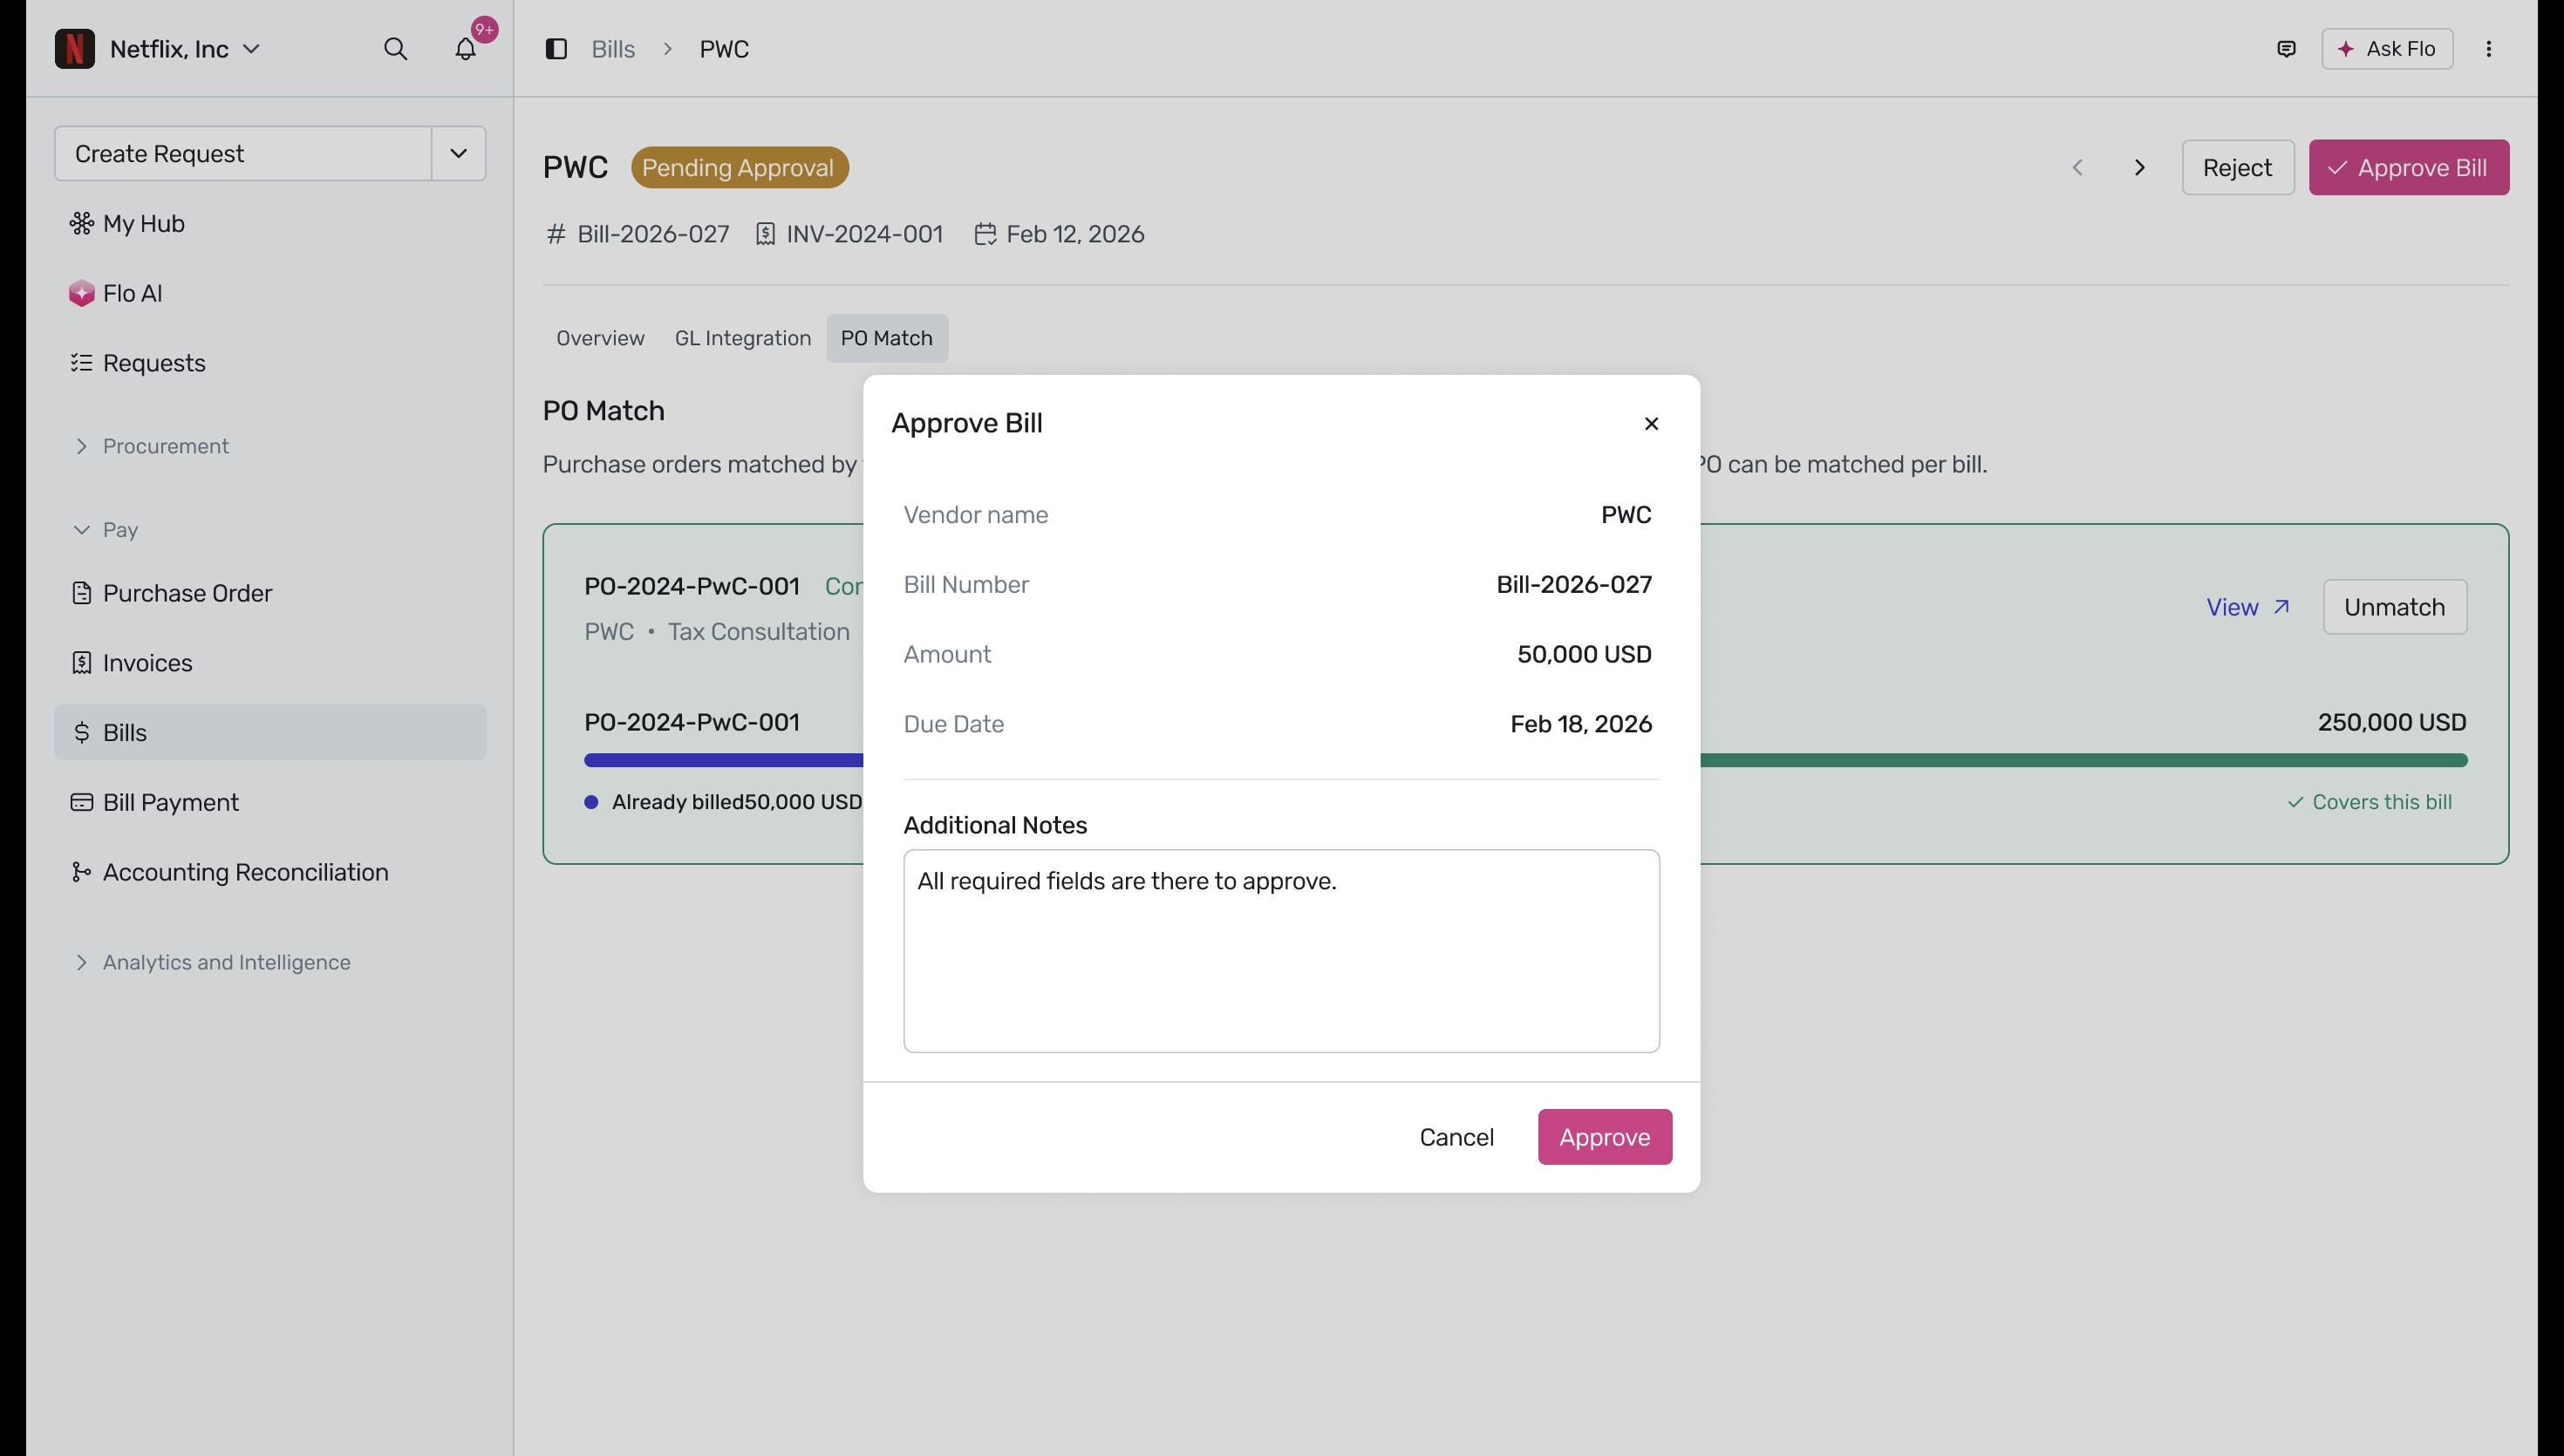
Approve the bill: Click the Approve Bill button in the top-right corner of the page. In the Approve Bill confirmation modal, review the vendor name, bill number, amount, and due date. Enter any additional notes for reference, and then click Approve.
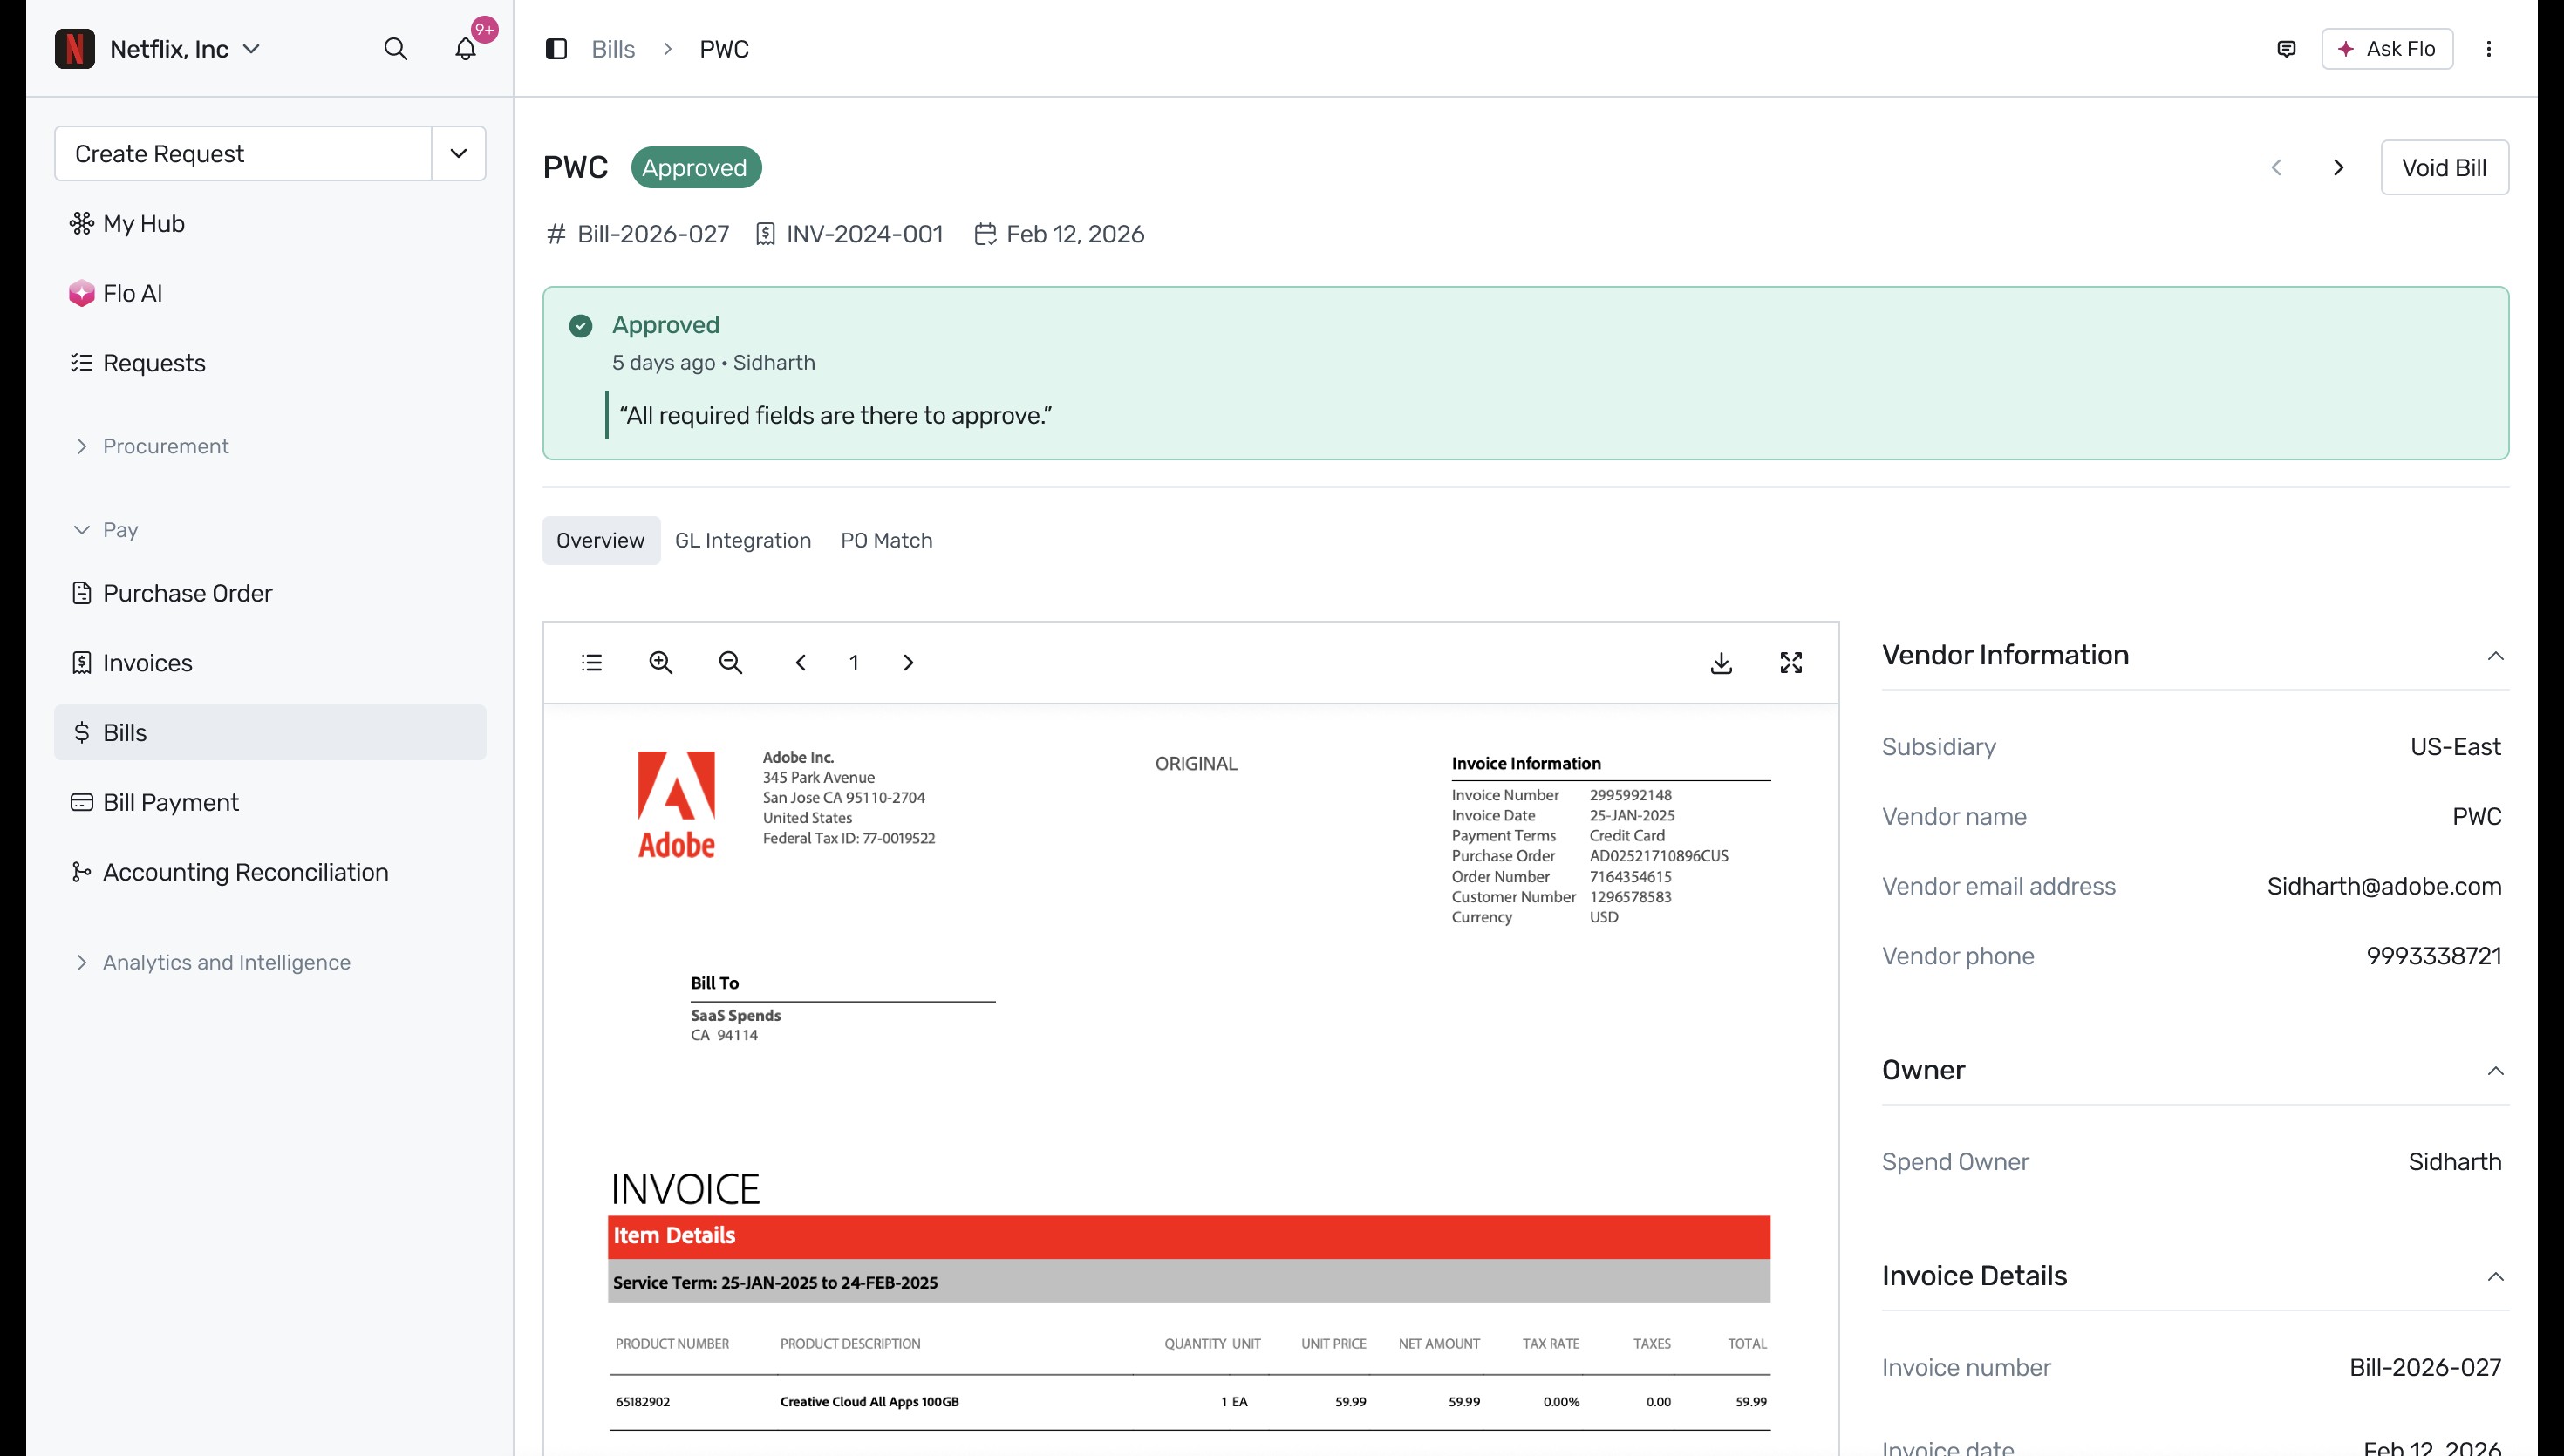
Verify the approved status: After confirming, the bill status updates to Approved, and a green confirmation banner displaying your approval notes appears at the top of the page.
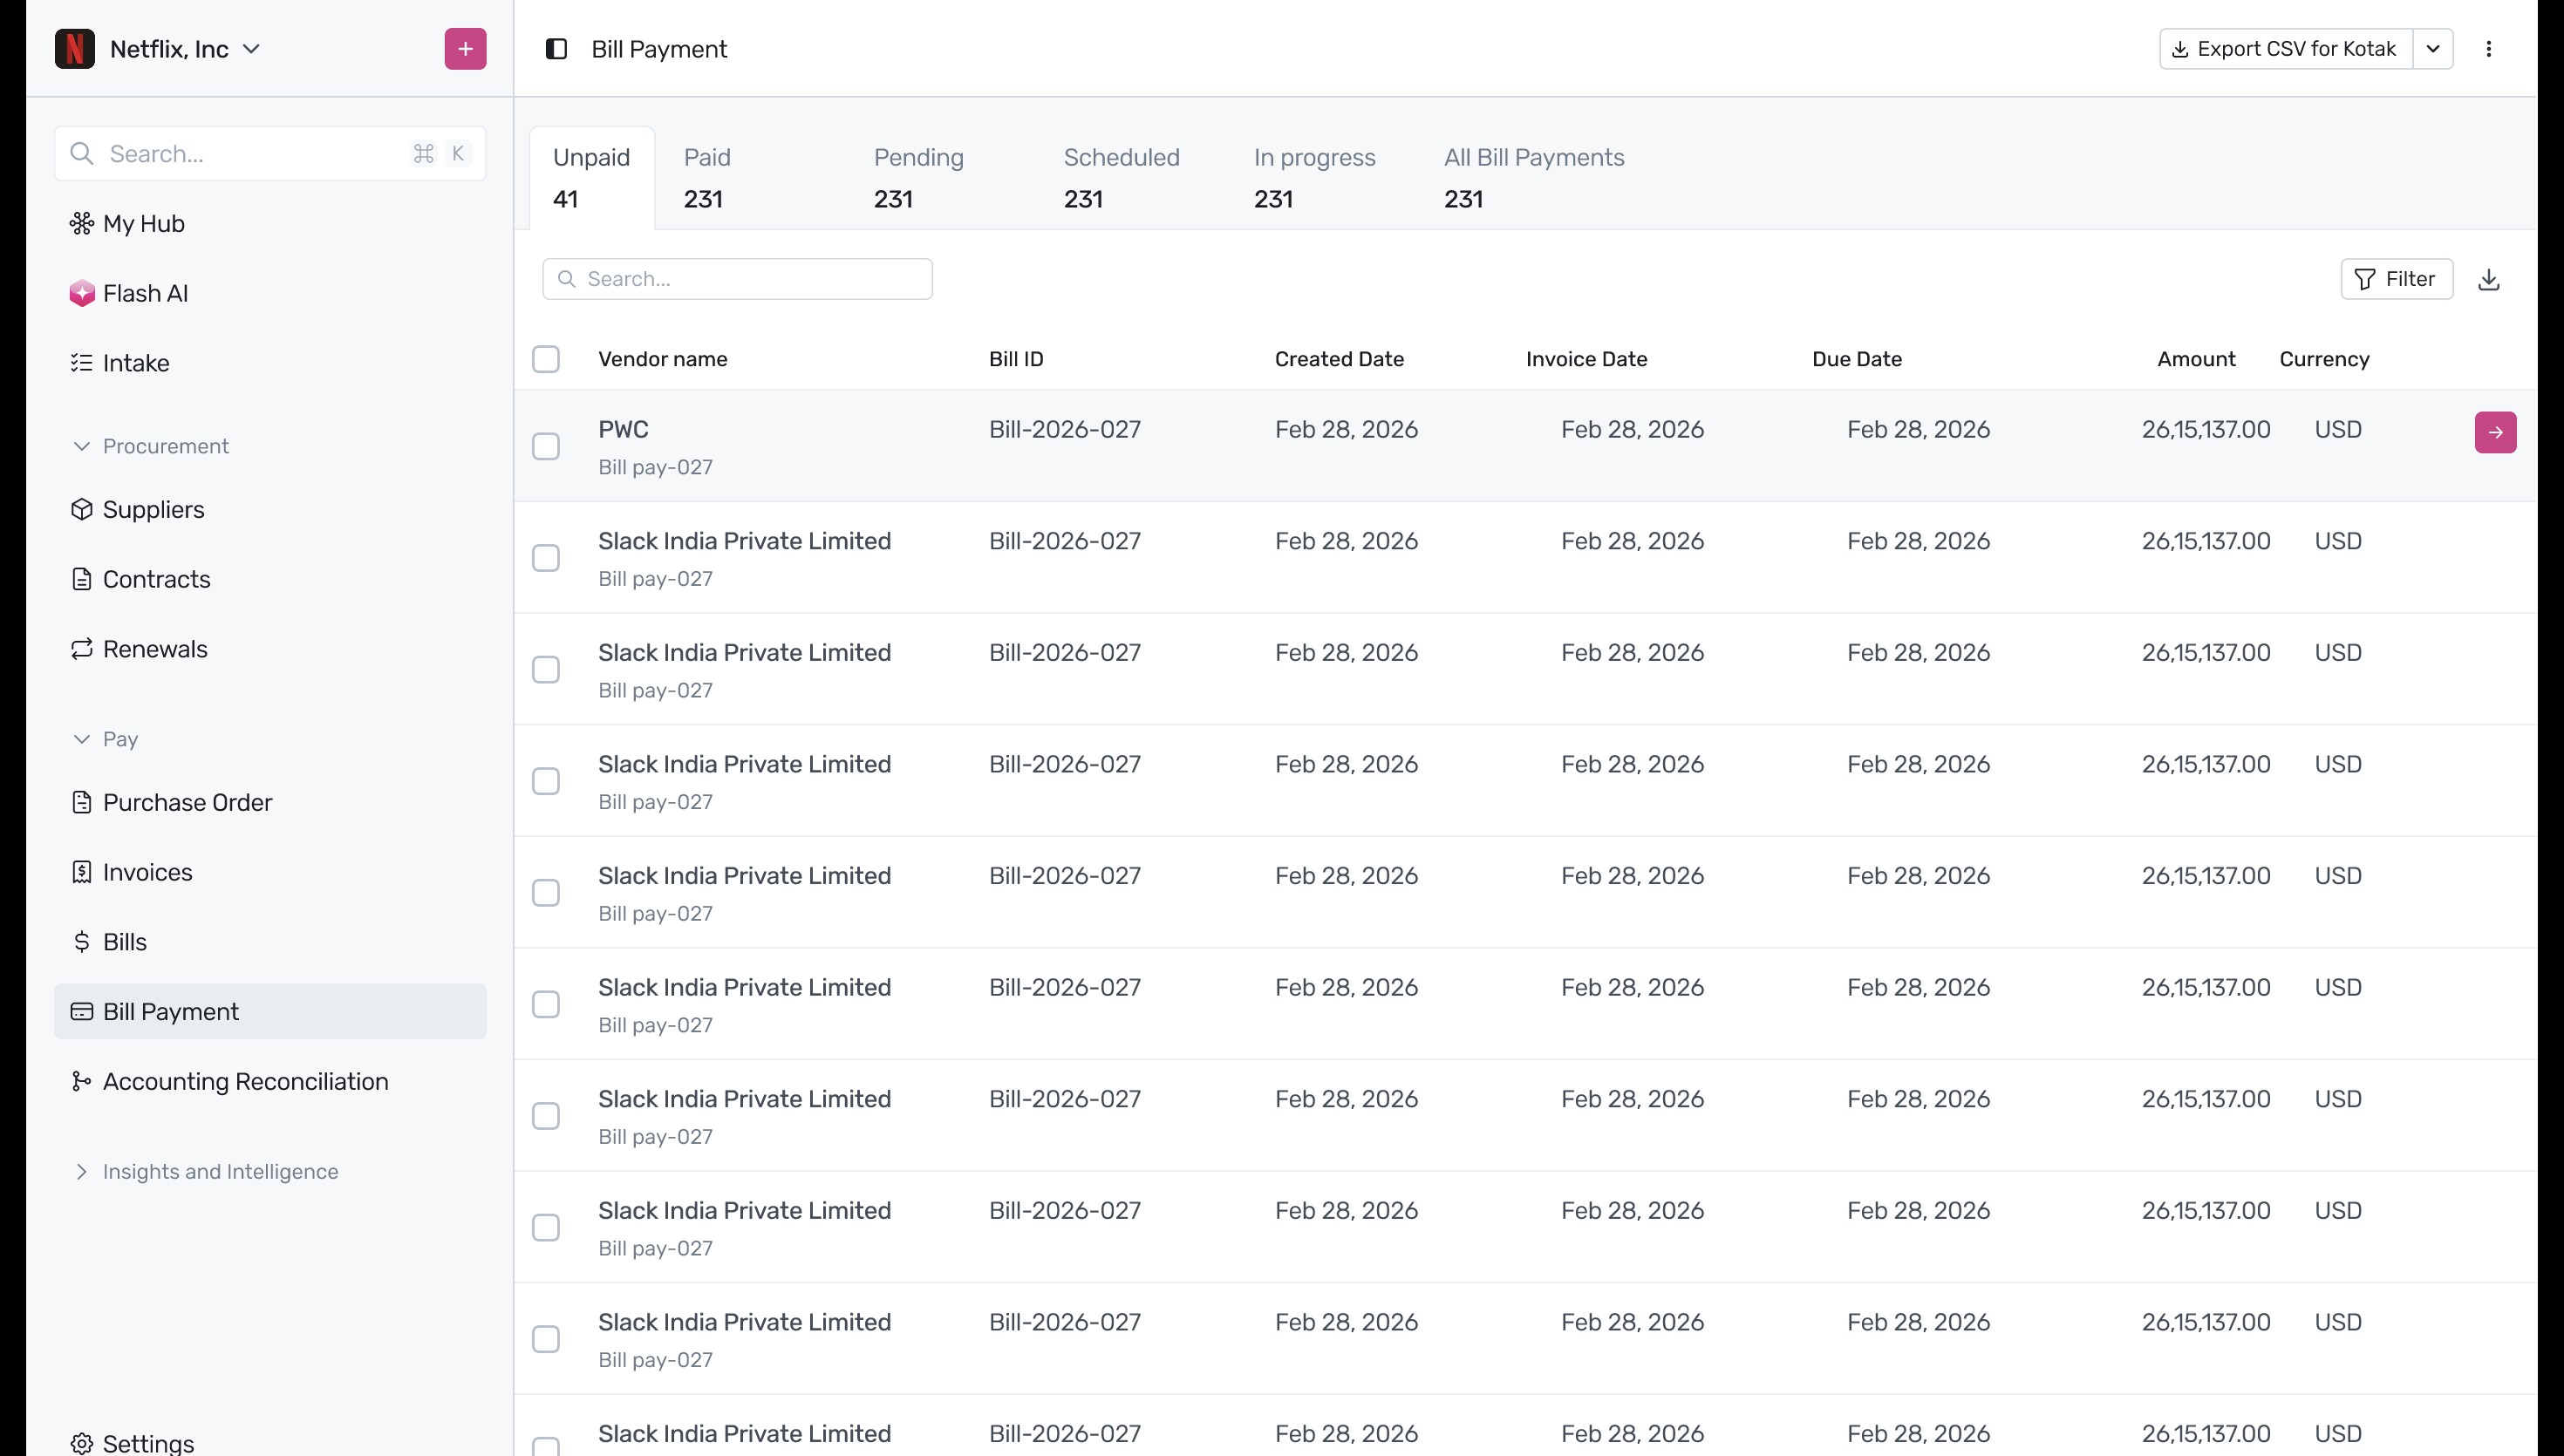
Access bill payments: To process the payment for the approved bill, click Bill Payment in the left navigation menu. Under the Unpaid tab, locate the approved bill and click the arrow icon on the far right of the row to open its payment details.
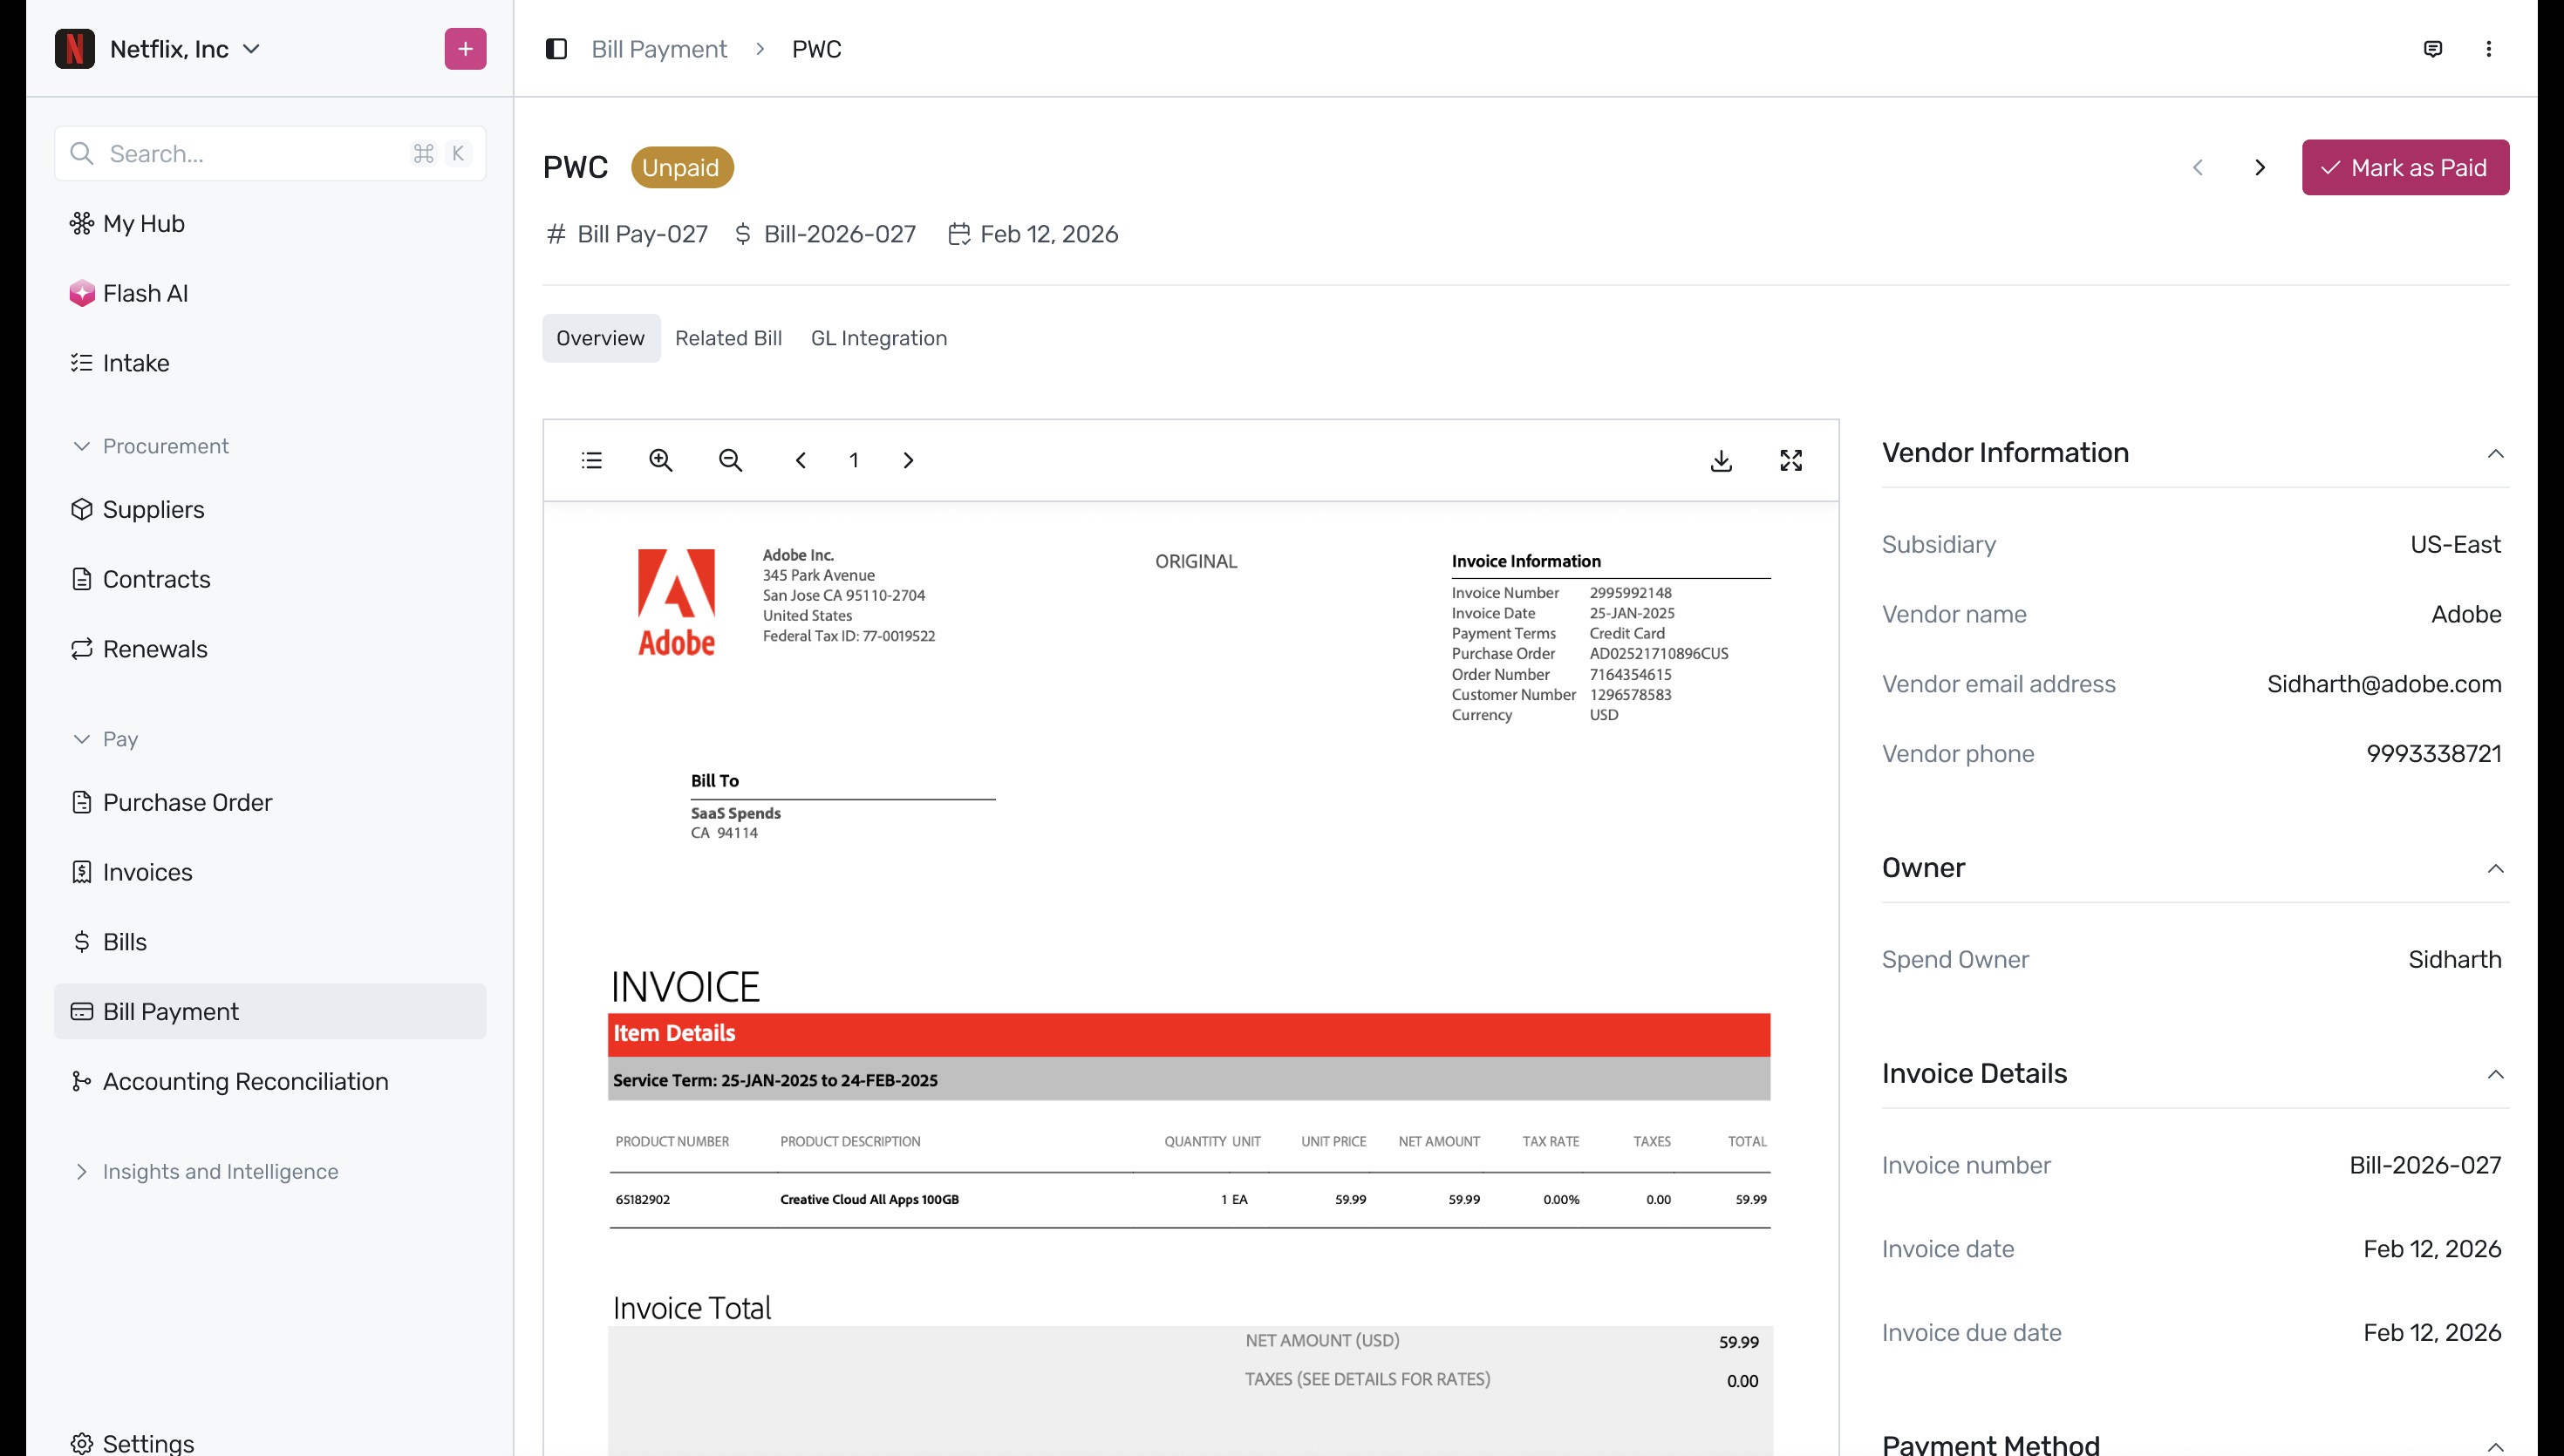
Mark the bill as paid: On the bill payment details page, review the invoice information and click the Mark as Paid button located in the top-right corner.
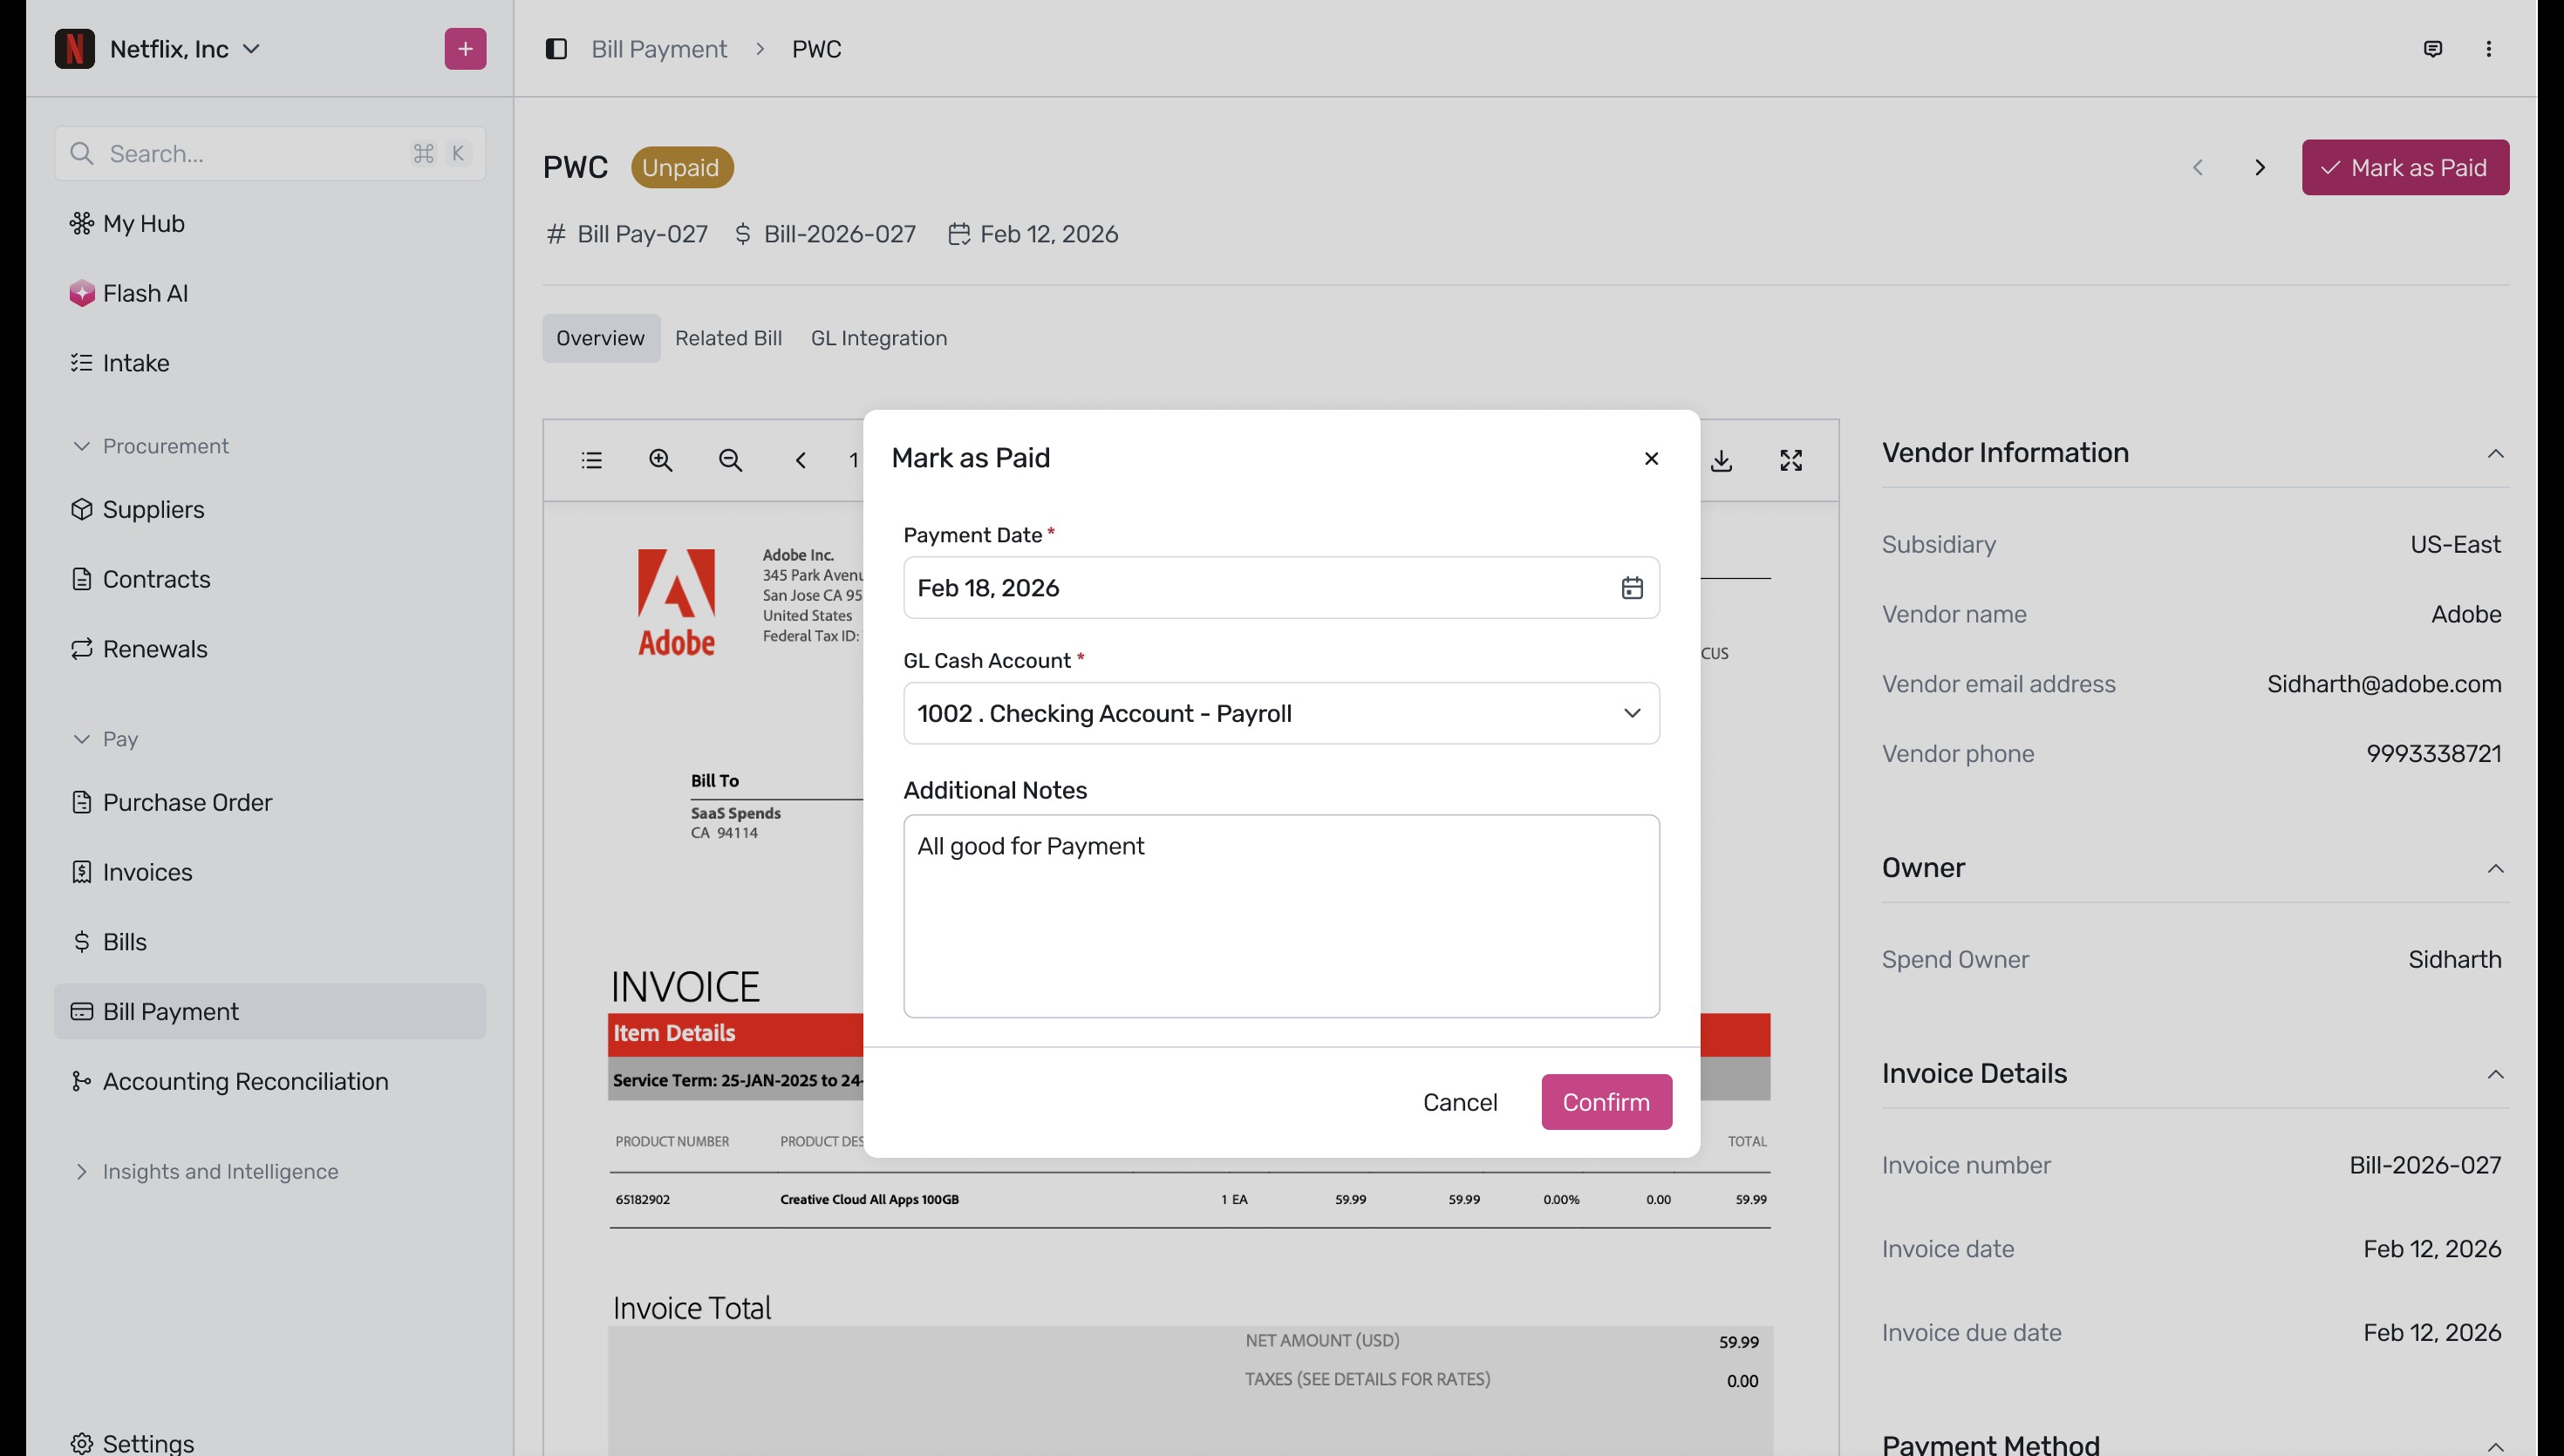
Confirm payment details: In the Mark as Paid modal, select the Payment Date, choose the appropriate GL Cash Account from the dropdown menu, add any additional notes for reference, and click Confirm.
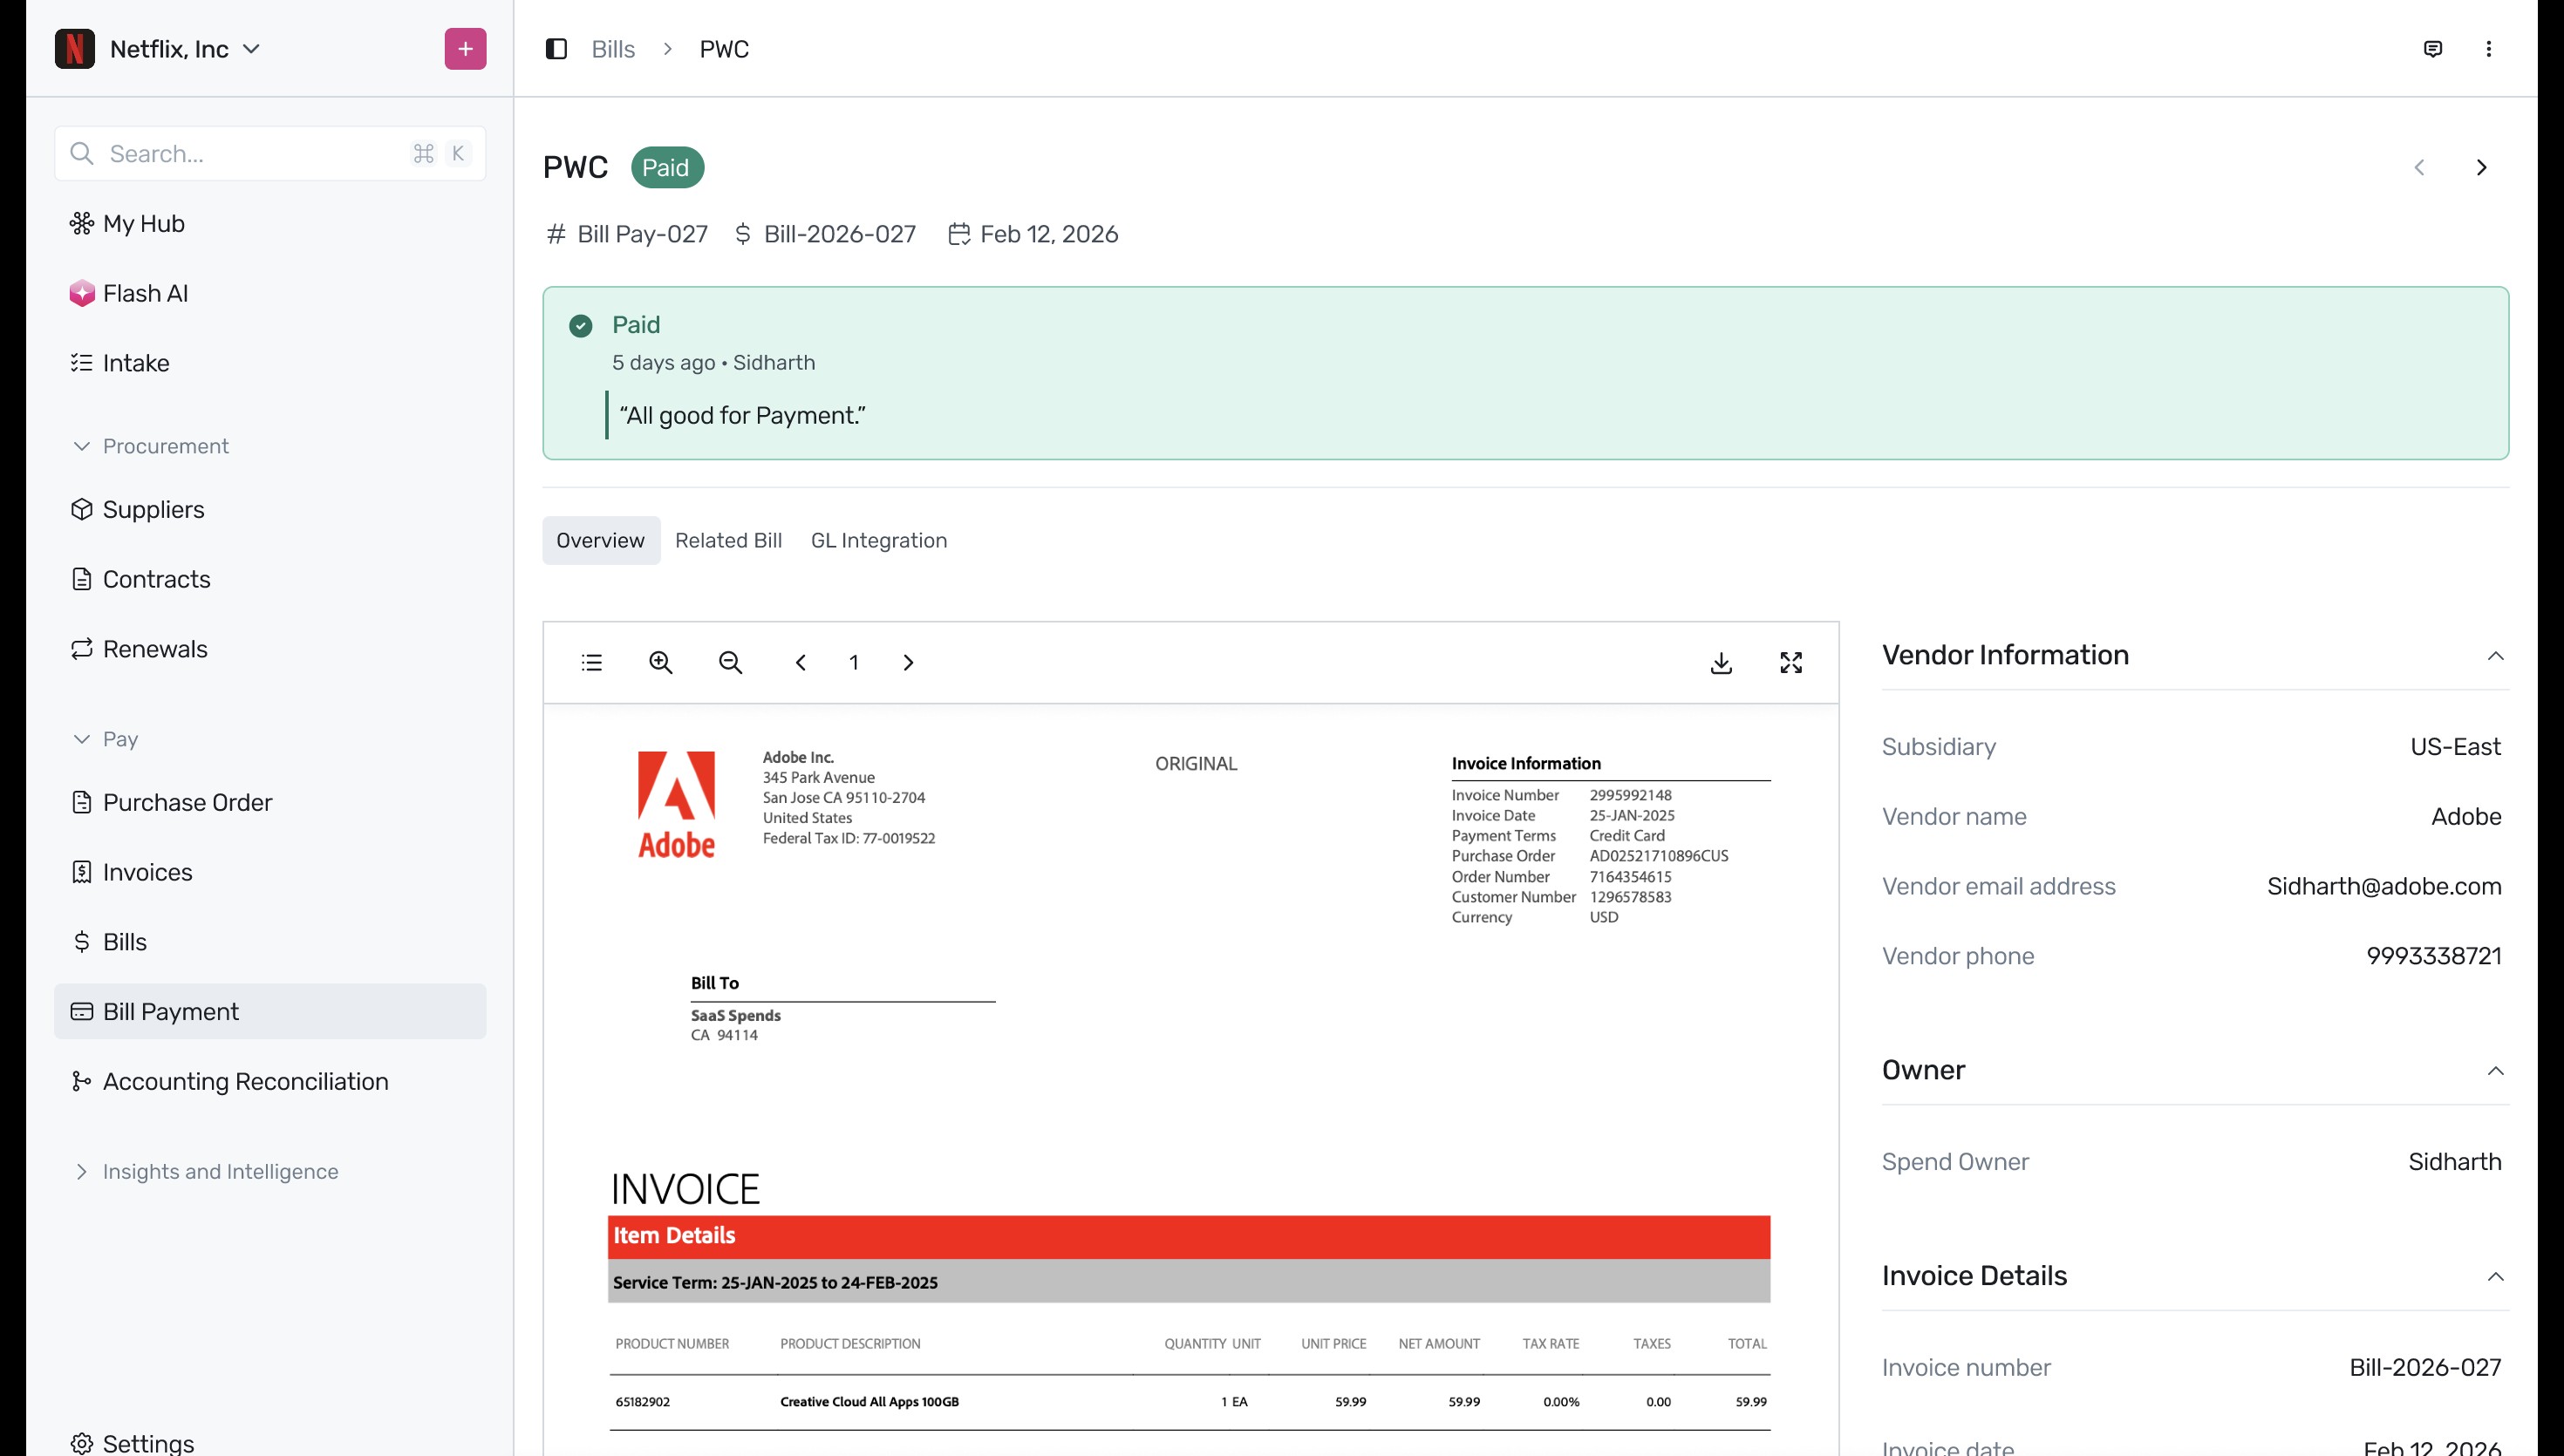
Verify the paid status: Once confirmed, the bill payment status updates to Paid, and a green banner displays the payment details and notes at the top of the page.
Next Steps
Now that you have approved and recorded a payment for your bill, you can explore other workflow and financial management features in Spendflo
Was this article helpful?
That’s Great!
Thank you for your feedback
Sorry! We couldn't be helpful
Thank you for your feedback
Feedback sent
We appreciate your effort and will try to fix the article